Have you ever gathered plump, juicy berries into your apron and whisked them to the kitchen to make syrup, wine, or jam?
I’m no Julie Andrews and I don’t (usually) twirl and sing in my kitchen, but gathering food and therapeutic herbs from my yard does make things feel a little more magical, and some singing may be involved.
With that in mind, I thought I’d share my process for planting elderberry cuttings so that you can have your very own berries to harvest.
Benefits Of Elderberry
Like the common backyard weed I use to make our “first aid” ointment, elderberry has a variety of benefits and uses.
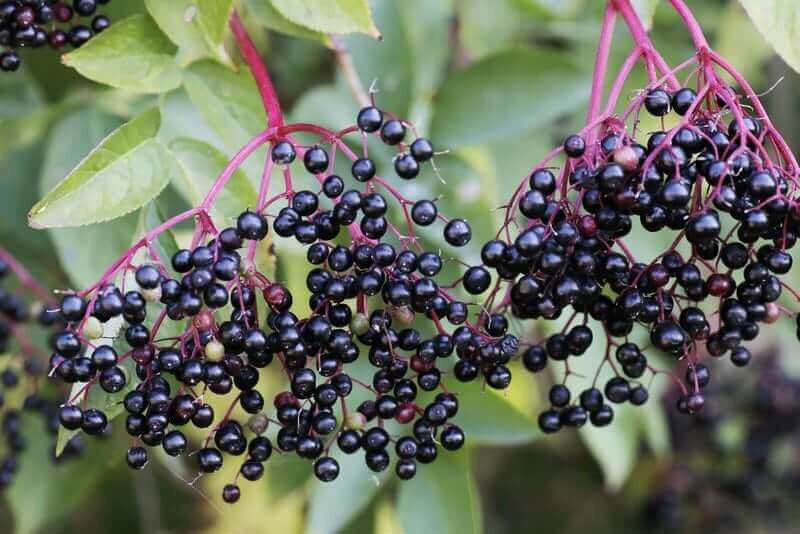
Elderberries have long been revered for their ability to support the immune system, and newer research suggests they can also help the body absorb vitamin C, too. (1)
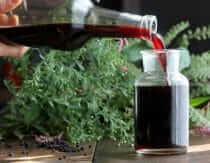
Elderberry syrup is a favorite traditional way to prepare it, and for just .000001% more effort the syrup can be transformed into elderberry and strawberry jam. The berries to make elderberry tea or fizzy soda, and the flowers can also be used to make homemade soda in the late summer.
I could go on and on, but the bottom like is that word is getting out about elderberry, and that is AWESOME!
Except when it’s not, because all of a sudden elderberry retailers everywhere are out-of-stock due to high demand. Yikes.
Fortunately, elderberry bushes are both beautiful and easy to grow. Several of you have asked for step-by-step instructions, so I put together this post for you.
I cover the most common questions I’ve heard about growing elderberries, plus step-by-step instructions for growing elderberries from cuttings.
First, let’s find out if elderberries grow where you live
Elderberry bushes are very hardy and do well in zones 3-8. You can type in your zip code here to find out what zone you’re in.
Wondering how long it will take to get berries?
This summer you’ll get elderflowers, which you can use to make syrup, tea or lemonade. (See step five for details.)
By next summer you’ll have juicy elderberries to use in homemade pies, jam, jelly, wine, syrup and soda – yum!
Growing Elderberry From Cuttings: Step-By-Step Instructions
Because I’m not an expert on anything garden-related, I enlisted the help of elderberry expert Rodger Lenhardt of Norm’s Farms to make sure this post is accurate and helpful. (Thanks Rodger!)
Step 1: Find Or Order Your Elderberry Bush
If you know of a friend or neighbor that has an elderberry bush, ask them if you can get a clipping. If not, chances are good that if you ask around someone will know where to get one. You might post on Facebook to see if anyone in your extended community has a bush they’d be willing to let you take a clipping from.
Tip: Use Two Varieties for Bigger Fruit
According to this article:
Cross pollination is not required to produce fruit, but flowers that are cross-pollinated will produce larger fruit–it is beneficial to have two cultivars of elderberry in close proximity.”
In other words, if you plant two different varieties within 60 feet of each other you increase the fruitfulness of both. Norm’s Farm sells two varieties:
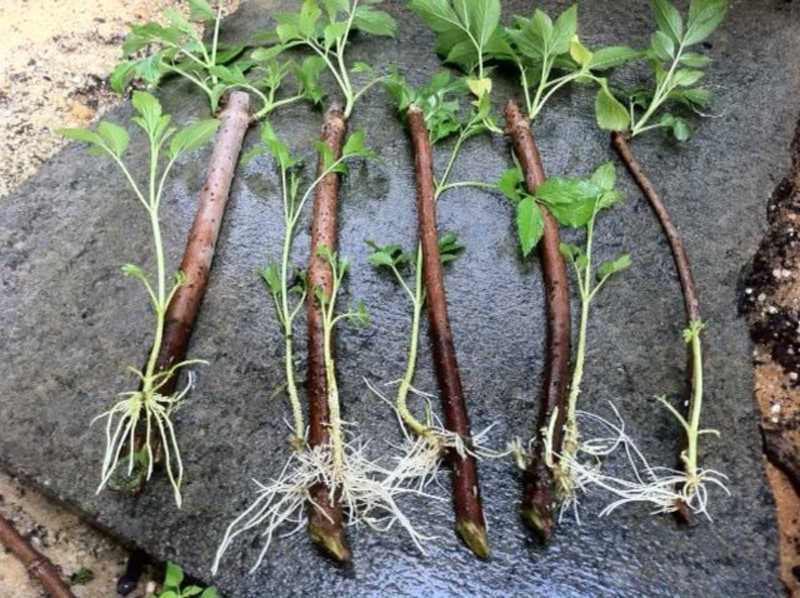
Step 2: Gather Your Elderberry Cuttings
While the bush is dormant – usually January through March – use pruning shears to cut a 8-9 inch section of elderberry cane, aka its hard, woody stem. You want the cut to be slanted to improve the cane’s ability to draw up moisture.
According to this article, it’s best to “focus on stems that are very green in spring, those that are sturdy but thinner than the older canes at the center of the clump . . . Choose ones that are about as big around as your little finger and located on the edges of the thicket.”
Step 3: Encourage Root Growth
And by encourage, I don’t mean grab your pom poms and cheer. (Though you can totally do that if you want to.)
There are two main ways to help your trimmings establish healthy, strong roots.
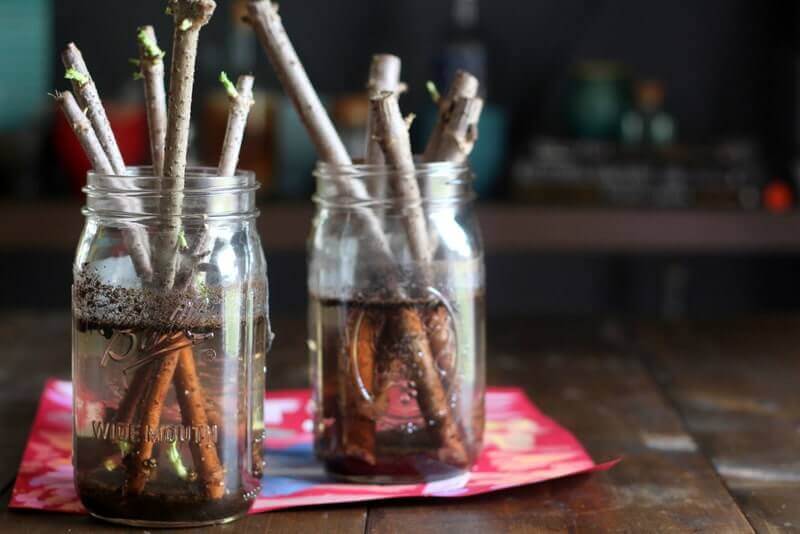
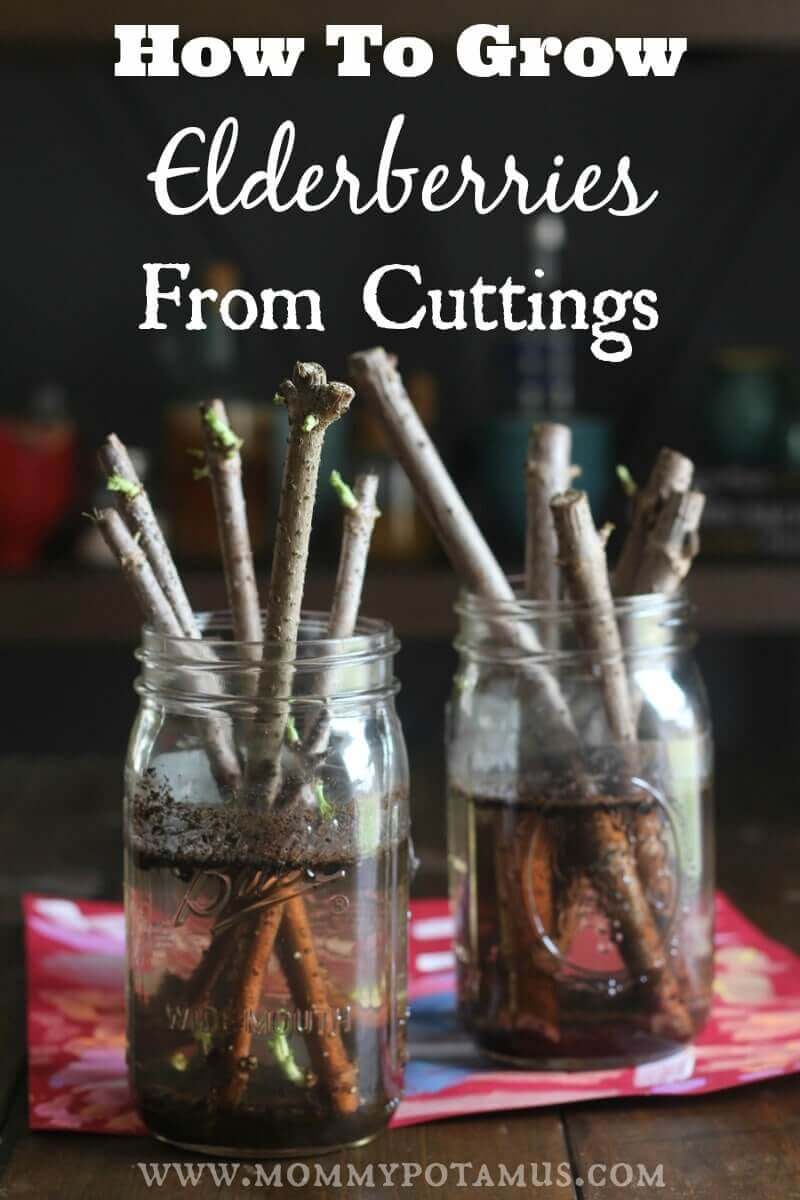
The Water Method
Place your trimmings (cut side down) in a mason jar and add water until they are halfway submerged. Place the jar in a sunny area for 6-8 weeks, changing the water often.
Spritz the trimmings with water occasionally – elderberry bushes love a humid environment.
Roots grown in water are more fragile than ones grown in soil, so wait until they look very sturdy before transferring.
When they’re ready and there is not risk of freezing temperatures, plant the elderberry bush into quality soil – the kind that you’d use in a vegetable garden – with good drainage.
The Soil Method
Place your trimmings (cut side down) in a mason jar and add water until they are halfway submerged.
Allow them to soak for 12-24 hours and then transfer them to pots filled with good, organic soil. (The kind you would use in a vegetable garden.)
Keep the pots moist so that the cuttings don’t dry out. They need a humid environment to encourage growth, so either:
- Place them in a greenhouse
- Place a plastic bag over the top to trap in moisture and create a greenhouse-like effect, then set the pot in a sunny area.
The trimmings will send out leaves and then grow roots – at about the 6-8 week mark, gently tug on the cutting to assess root development. If they seem like they need more time that’s okay – according to Rodger it can take six to twelve weeks to see significant root growth.
Once they’re well established and there is not risk of freezing temperatures, it’s time to plant the elderberry cane (roots intact) into the soil.
Step 4: Planting Your Elderberry Bush
First, choose your location. According to Norm’s Farms:
Fully rooted elderberries should be planted in the spring or fall for success. Regardless of the season, unless you are planting an ornamental like the Black Lace or Lemony Lace elderberry, you want to choose a site that will allow the plant to get as much as 12 feet tall and 8-10 feet across as well.
Regardless of the type of elderberry you are planting, the site should receive at least 6 hours of direct sunlight a day and remember; Elderberry likes water!
If you are considering planting the shrub in a location that will make it difficult or impossible to water every week, make sure that spot is near a creek or drainage ditch that drains areas above it so that the plant gets every opportunity for a good drink as often as Mother Nature will allow. Most thriving wild-growing elderberries can be found growing on creek banks and drainage ditches for this very reason.
Next, it’s time to plant:
All elderberries enjoy a good loamy soil. Loamy soils are those that drain well and contain the nutrients plants need to grow. The best way to create a loamy soil in your garden is to add organic matter to it every year.
Since you’ll be planting your elderberry in a hole and hopefully not moving it again, we recommend digging a hole two feet deep and two to three feet wide for your elderberry. Once all the soil is removed from the hole, mix enough high-quality organic compost into the soil so that the resulting mixture is about 50% organic compost and 50% soil removed from the ground.
Return enough soil to the hole so that the elderberry bush, when planted, will be even with the soil grade around it. Remove your elderberry bush from its pot and inspect the roots. Healthy roots should be white to cream colored, and some may even have a bit of a fuzzy appearance.
If the plant is root-bound, (all you can see is a tangle of roots growing in a spiral), gently rough up the outside of the root ball to encourage the roots to grow outwards instead of in the spiral.
Place the unpotted elderberry into the hole, again checking to make sure that the top of the elderberry’s roots will be either even with or just slightly below the surrounding grade. Do not plant your elderberry high as it will dry out too often.
Return enough of the mixed soil and organic matter to the hole to fill it and, using your fist or your feet, gently tamp the soil down all around the elderberry to make sure the roots are in contact with soil. Add about a gallon of water and allow the water to percolate out. When the water has drained thoroughly, top dress the elderberry with a 2-3 inch layer of bark mulch or rotting hay.
For information on caring for your elderberry bushes after they’re planted, check out this article.
Step 5: Make Elderflower Lemonade!
Seriously, this is a step. During your elderberry bushes’ first season you want to pinch off the flowers so that the elderberry can devote its energy to developing a strong root system. Use them to make syrup, tea or lemonade.
Next season you’ll be harvesting elderberries! What’s growing in your garden this year?
Sources
- Jones, E and Hughes, R.E. (1984) The influence of bioflavonoids on the absorption of vitamin C