So, the other day my husband stopped by Whole Foods after picking up produce, meat and cheese from our local farmers market. The cashier took one look at our reusable bags and, um, insisted on giving us new ones. Apparently, they don’t like the look of them after they’ve been repeatedly dragged along the ground by children who “help” unload the groceries.
Anyway, I’ve been looking for an easy-to-carry, washable alternative for the kids to use, and over the weekend I came across the perfect solution. My local thrift shop was selling cute t-shirts for 99 cents apiece that were practically begging to be upcycled into a farmer’s market tote. They’re 100% washable, and when they’re no longer useful as bags I can cut them into rags to clean with.
There was just one problem: I can’t sew. At all.
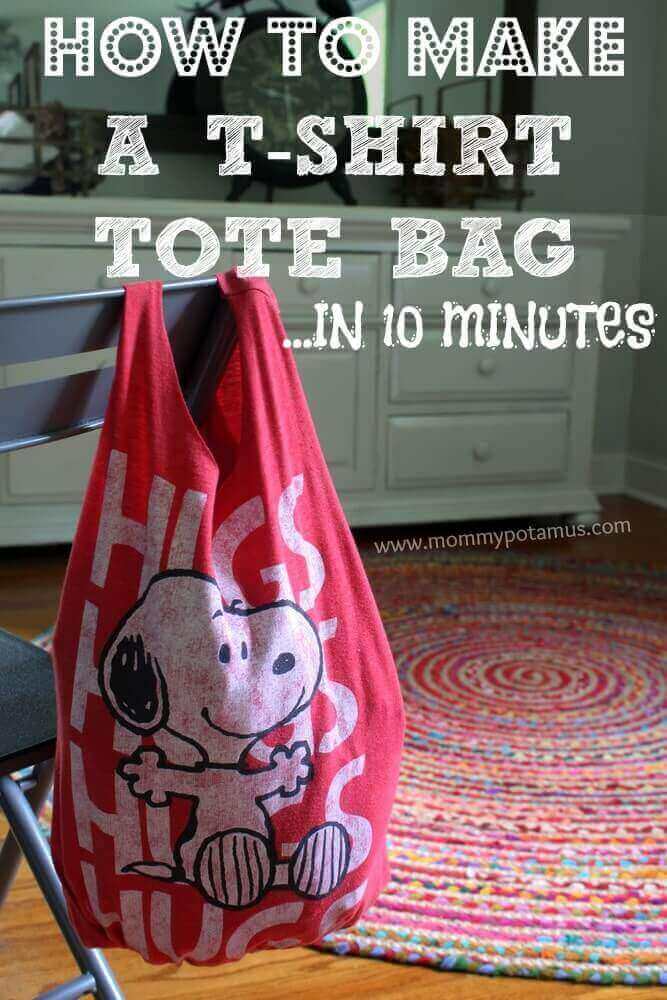
Fortunately, I came across some no-sew ideas that Katie and I adapted to fit our style (which, if you’re curious, generally favors the color red and anything Snoopy). The took no more than 10 minutes from start to finish, and I love how they turned out.
How To Make A No Sew T-Shirt Tote Bag
Supplies:
- Old t-shirt – The thicker the fabric, the sturdier the bag
- Sharp scissors, preferably fabric scissors
- Washable marker (optional)
Directions
Step 1: Cut the sleeves off
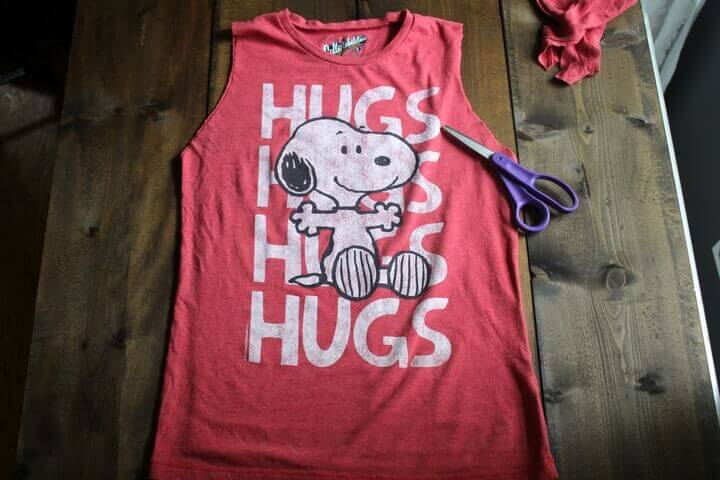
If you’d like to fold the t-shirt in half you can cut both sleeves at once so that they are identical. Or, if your material is too thick to cut them both at once, you can cut one, then fold it in half and use the cut side as a guide for the next sleeve.
Step 2: Cut the neckline area
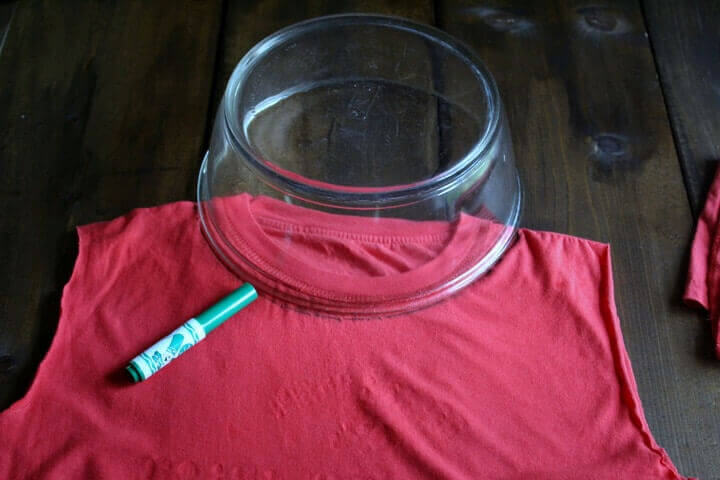
If you’d like, you can turn the shirt inside out and trace the outline of a bowl before cutting. I used both methods and personally, I like free-hand cutting better because I prefer a slightly oval shape to a perfectly round one. I ended up trimming this one a bit to make it more oval.
Step 3: Determine how deep you want the bag to be
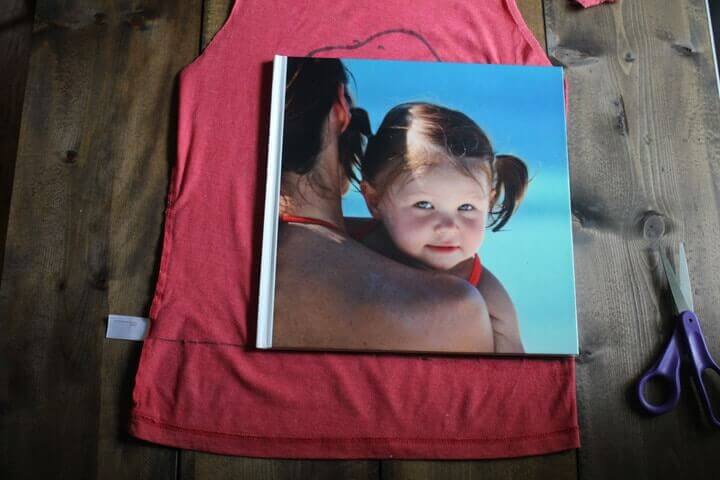
If you haven’t already turned your t-shirt inside out, do it now. Determine where you want the bottom of the bag to be and trace a line across. Keep in mind that depending on the fabric used, your tote is likely stretch and become longer when it’s filled with stuff.
Step 4: Cut fringe
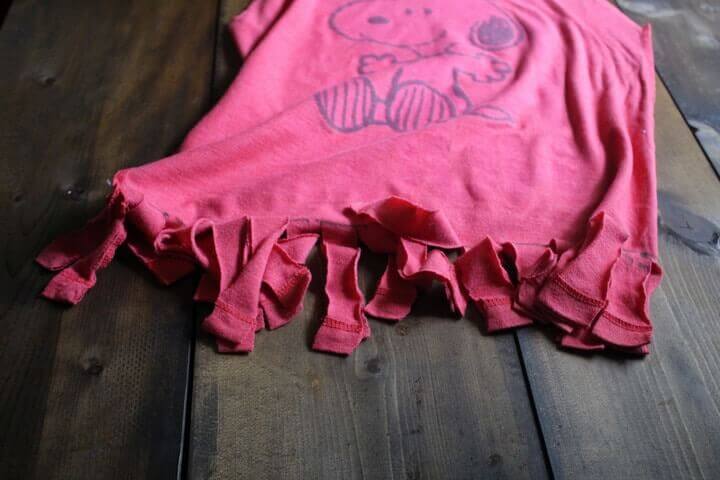
Now grab your scissors and cut slits from the bottom of the shirt up to the line marking the bottom of your bag. You’ll want to cut both the front and back layers together because they need to match up for the next step.
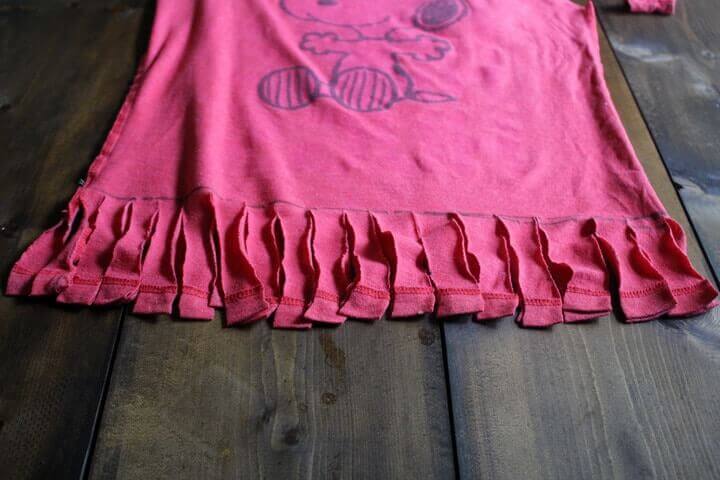
I cut my slits about 3/4 to 1 inch apart.
Step 5: Tie Fringe
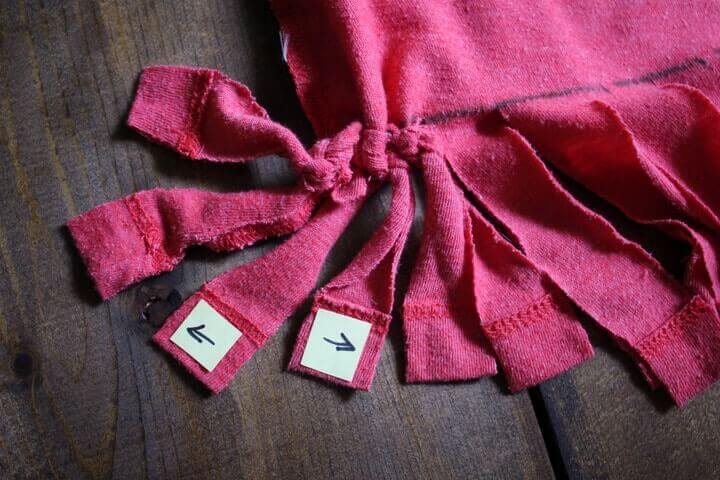
Okay, this is going to sound really complicated, but it’s NOT, promise. Take your first pair of fringe and tie it into a knot, then tie two more pairs. Now if you lift your bag you’ll see that although the pairs are pulling the bag together, there’s a hole between each pair. This next step will close those holes.
In the photo above you see three sets of fringe that have been tied in knots. What I do next is grab one strand from the middle set (the one with the arrow pointing left) and tie it in a knot with one of the strands on the left set. Then I take the other strand from the middle set (the one with the arrow pointing right) and tie it in a knot with one of the strands on the right set.
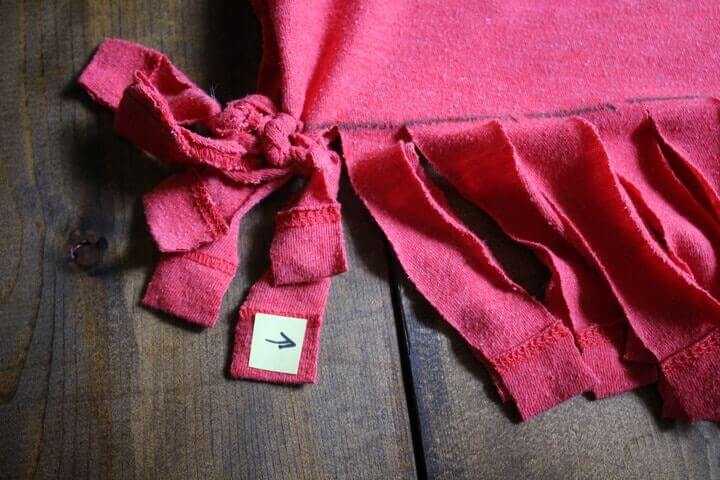
Then I take the remaining strand on the right set and tie it to the next set of strands, and so on and so forth until all the strands are tied. Now turn your t-shirt right side out again and voila, you’re done!
A Couple Of Fun Variations . . .
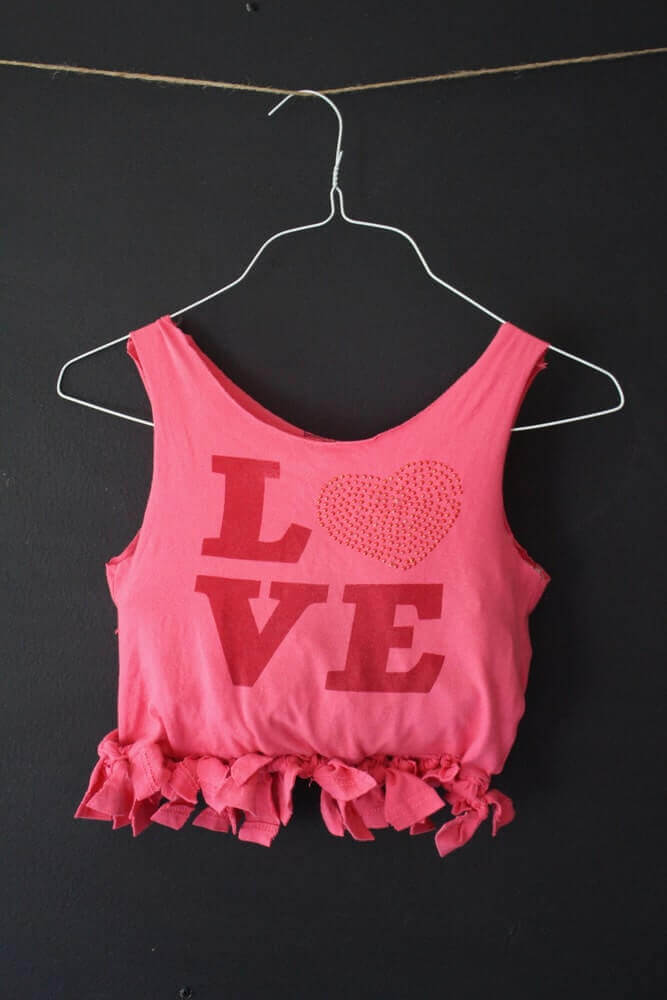
Turn the bag right side out when tying the fringe. This is one I made for Katiepotamus.
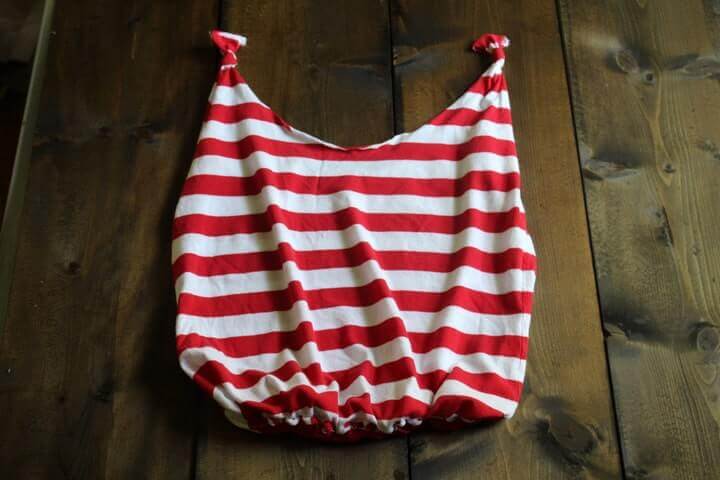
Tie the straps in knots, or tie bits of t-shirt scrap to the top as embellishments
Wondering what to do with your leftover scraps?
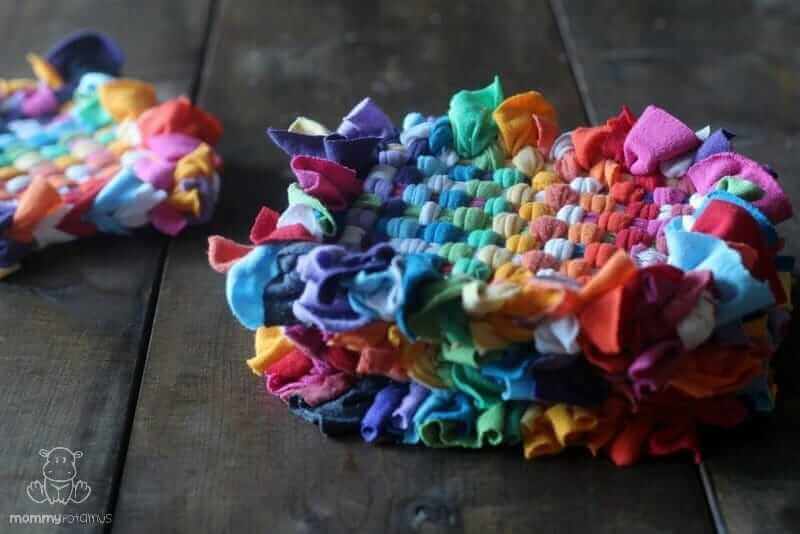
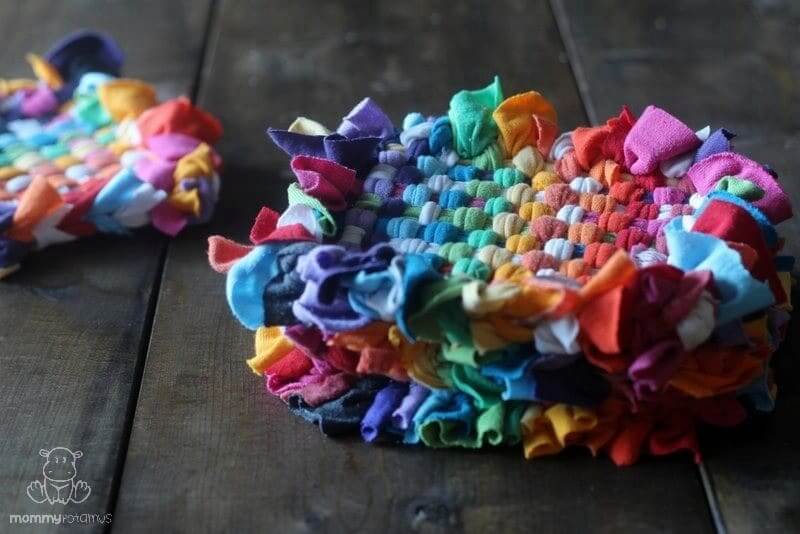
I usually use larger pieces as cleaning rags, or use them to make the recycled t-shirt potholders pictured below.
So cute!! Definitely going to try this… now for a trip to the thrift store 😉 Thanks for the simple tutorial!
Yea I agree
Hi,I’m Megan. I was hoping that you could try explaining the last step. It really is confusing and I would love to have the same bag!
I make lots of these and don’t do the cross knotting shown here. I simply knot each pair. Because my fringes are only about 1/2″ each, the space between them is very small. Unless I’m carrying a bag of shelled peas, nothing’s going to fall out!
Thank you! That makes it much easier!
I was gonna say I think I seen a better way too. Her instructions for the end part was confusing. So thanks for your input to cut them smaller
I know the goal is not to sew but how about just running a line of sewing across the bottom on the wrong side and not have to do all those knots?
I agree because it would make the bag less lumpy on the bottom. I would see it several times across to make it stronger.
From Elaine: I would just sew a close double seam at the bottom then cut the fringe, it’s cute. But I do sew. Great tote bag idea, though!
I use it as a project for my girl scouts and my afterschool so them being able to do the whole thing without needing to sew makes this awesome.
Oh, I love that Demi!
For sure that’s what I will do. Maybe double stitch for extra strength
You can turn inside & put iron on in the bottom
I’m looking forward to trying this. Thanks for the no-sew idea!
She tied three pairs first, she tied one piece from the first pair with one piece from the middle pair.
Then she tied the other piece of the middle to one of piece of the pair which is on the opposite side (the third one)
Thank-you for that clarification! I too was a little confused.
It is the next step that is confusing to me. Sounds like she takes on strand from the 3rd set and ties it together with both of the next set of strands. Or, does she tie the next set of strands together, then ties the one strand from the 3rd set to one of those strands and then repeats that? (so you tie each pair first before tying one of its strands to the neighboring strand)
The best way to figure it out is to get a t-shirt and scissors and try it yourself. Every fabric handles a little differently too.
What I did was after you tie each pair on the fringe, tie make pairs again then tie them up, this may seal up the holes, it might not but it worked for me. 🙂
I have done with an other way too…no fringe !! I kept the piece I cut at the bottom which formed the hem of the t/shirt. Turn your back inside out and gather the bottom in your hand. Tie firmly ( twice ) with the cut piece you have put aside and make sure the knot is really secured. Turn your bag on the right side again , and….voila !!!
I turned my bag in side out and sewed two rows of zig zag stitches. No fringe.
You could do both
I do that too and it is so much quicker and easier!
Your instructions were perfect. The diagram made it clear. Thank you.
Sure, but this is NO SEW. And that requires sewing.
I used a long strip of the cut off pieces to create a length of cloth. I then made small chevron cuts across the bottom of shirt turned inside out, about 1/2 inch apart. Or use 1” apart depending on if you want gaps or not. Then use the length or strip of material to whip stitch the bottom closed. You make a large knot in each end to secure it. Turn inside out again to use it. No fringe.
Here u thought I invented this dang thing lol but I see it online now. Great minds…
-Donna H
Here I thought I invented this…it should say. (Autocorrect ugh)
It’s ok – I’m sure people have the same ideas for stuff lol the thrift shop I work at loved it and they are creating them to use now that plastic bags are banned next month 🙂
I don’t know what you mean by ‘whip stitching’. Would you explain how you do it?
Thank you.
Hi I’m Cindy…..also did I miss something…what about the sleeve holes. I didn’t see anything about that..
I want to tryy. So brilliant!!
Does anybody think this would be sturdy enough for a school bag? And if not what could I do to reinforce it a bit?
Just make sure it is a thick cotton shirt, not thin material and also…depending on how much you carry…the shirt may need to be an XL to an XXL….
Use two t-shirts, one inside the other.
I was thinking about doing the same. I’m not a big on sewing, but I think I would like the inner one seen across bottom with putter one fringed. I have a TON of Æ shirts, roots, Hilfiger…Ones that we no longer wear. What an awesome idea!
Sooo I just made one! I didnt do the cross ties, my strips were small enough I think (And i dont plan on carrying anything that small in it) BUT anyways I used one of my ol mans old Tshirts and it had a little pocket on the front so that gave me an extra little pocket on the front of my tote bag! It came out awesome and I love it! Gonna use it tomorrow as my purse! Lol thank you so much for the tutorial!!!
Genius! Then you can flip it for other design! Love it!!!
‘To reinforce t shirt material u can make the inside sturdier by turning bag inside out then get a roll of duct (silverygrey )tape.then cut strips and lay horizontally starting from bottom.flip over and repeat .insert a book,tray or piece of wood for ease and as a guide to strech to desired size.Good luck!
Try the double t-shirt – really strong. ? Then you don’t need to use “plastic” duct tape ?♀️ & recycle two t-shirts ??
Mine can carry up to 11 library books. I’m sure it would be perfect
I was just thinking that I could take one of my son’s favorite shirts that he has outgrown and make a library bag so he can continue to use his favorite shirt.
You could make 2 t-shirts up,keep 1 the right way and one inside out , put the inside out 1 inside the other, line up handles , so that if you then turn bag inside out it wont have a wrong side (makes it reversable and strong enough for most school stuff) hope this is helpful, just one thing make sure the t-shirts are same style. If ones got one of those small pockets it could be useful on the inside. I have re written this about three times to make it as easy as possible to understand. Good luck.
What a great idea about using a shirt with a pocket! Thank you! 🙂
Also makes great trick or treat bags
What a great idea,
I’m sorry … This would work so much better sewn. ?
Buy for *Total” npn-sewers, it’s easy to do.
Bah humbug!
Sewn was best, even by hand with small stitches. Great for boys T-shirts for car toys organizer or to hang bath toys up on a hook to dry. So many uses for boys to use.
Totally agree! Also if you didn’t want the stretch then use a fusable interfacing to stablize it. There are lots of people out there that would be happy to show you how to sew. Check churchs, sewing or quilting shops, ect… The main thing is get the word out you want to learn because someone will know someone that can teach you. Then get the word out that you want an old simple machine to learn on. Someone will find you one for about $50.00 or if your really lucky free. Start learning on old clothes you know longer want and remember no one is good at any new skill they try. It takes years of learning to get really good but have fun along the way and be happy with where you are. Craftsy has some really good classes at all levels in lots of hobby interest. They even have some free classes. I love taking there classes. My grandaughter and me take several of there classes. We have lots of fun learning. In fact we just swiched up to craftsy unlimited so we pay a mothly fee and can watch everything we want too. Just a thought?
I can sew, but I don’t have access to enough machines for an entire VBS group, so this will make a great craft and they can keep their materials in it for the week! thanks so much!
The whole point of this is that you don’t have to sew. It’s a great DIY gift and something you can do with the kids for gifts. If you want to sew a bag, then look for sites with instructions for sewing bags.
Love this sooOOO much, THANK YOU Mommypotomus! 🙂
I have one question. If you have a hot glue gun (like I do) could you use that method instead of the knots? Amazing idea!
Depends what you are using it for. I use mine for a pet sling so I would not use hot glue. I tied mine like the tutorial.
If you are using it for something lightweight, and wouldn’t care if something fell through then I would try it.
Fusible web works better
Glue gun glue could freeze or melt. Easily comes undone when washed ….
I strongly disagree with these comments; the low melting temp for hot glue is ~250 degrees, way hotter than a tote bag will ever see. Hot glue is plastic, so it “might” get brittle at cold temps, but it doesn’t freeze. Finally, I use hot glue on all my clothing patches (since the adhesive that comes on the store bought ones is pretty poor) and I have NEVER had a patch come off in the wash. YMMV, but I can’t imagine how!
i failed so bad at this though 🙁
Don’t give up. I plan to make several more.
that stich witchery its like glue for fixing hems would also be good
Stitch Witchery is also known as Interfacing (Pellon is a common brand name). When ironed to both inside “walls,” it would provide the stability and anti-stretch that others were seeking.
I made the cutest puppy sling out of my t shirt. She really, really, likes it. I tied it at the bottom like you did. I put a puppy pad in the bottom because she is only six weeks old.
These make perfect reusable cloth grocery bags! Plastic grocery bags are detrimental to our beautiful planet! They have even been outlawed in some countries.
Yes where I live u get charged 5 cents per plastic bag. Which isn’t that much but it’s bad for the environment (the bags obvi lol) I sewed my own but had to do it by hand bc my sewing machine broke. It took FOREVER so I def dig this tying way! Plus it seems like it would be stronger than my sewn one.
That is such a good idea I’m so going to the store now I never would have thought of that as you have a huge bag of stuff I was going to donate and now I’m going to go back and look at it again to see if there’s anything I can use you’re so smart great minds think alike
Hello. I haven’t read all the comments but a no sew idea you may like is: if the shirt has a hem at the bottom. Cut a hole in it. Now thread a piece of cheap string through the hem. Pull the string tight as you can gathering the material together. Tie a knot, then tie a couple of loops around the shirt just above the gathered bit and knot again. Turn inside out, the knot is inside.
I’ve been reading through these comments, and found yours, with the same idea as I had. Through something through the cut-open waist hem. You could also leave the tie on the outside and then the bag can be opened from the bottom if you want, and retied.
Very creative idea! Adorable. 🙂
Thank U for sharing
I’m more interested in that beautiful RUG behind the bag —— was it made from T-Shirts also?
I’ve had this in my “craft folder” forever. I finally made one, and I love it. I wish I could post a picture!
Super cute! Love the fact that you used the front of the shirt as a bit of personalization. I foresee a few of these in my future. Great job!
Very cool! Great project for kids.
Thanks! I have been looking for a no sew version of this idea. Woot! I know what we will be using at the library next week.
Excellent! I too do not sew. I have made fleece no sew blankets so this up my alley! Thanks for the share!
I can’t sew to save my life despite a family of professional seamstresses. Can’t wait to try this. On a side note. My Hubby came back from the butcher today giddy as a school boy. He had a bag of beef kidney suet with the kidneys still attached. I laughed. This from a former coca cola addict. I thought of you.
Haha! My husband picked up part of a cow share recently and called to ask me if I wanted him to get some cow tongue as well. I was like, “Sorry, no.” I’m just not there yet 🙂
Tongue is delicious! Moist and very tender.
Scrub it under running water, put in the big slow cooker, cover with water. Add salt, garlic, an onion, some bay leaves, peppercorns, juniper berries if you have them, do on high for 2 hours, then on low for 5. Remove from heat, let cool a little, peel the outer skin off, your pets will love the skin.
Slice, great on sandwiches or served with a raisin, mustard or horseradish sauce.
Love tongue!! I make it like a stew, slow cooking… divine!!
When I was a kid at a family gathering, there was a tongue on a plate with some parsley, the parsley didn’t help me from convulsive dry heaves. It was the most disgusting thing I had ever seen on a plate before.
That it was on a plate, was an indication of intent for eating. Then someone said it was time to slice it, when I saw the knife sliding through the immense tongue, I knew I had to leave the table at once. This caused quite a stir which made me move faster faster than I thought possible.
Years ago when our children were young, I listened to a friend who told me how good tongue could be. Hesitantly, I purchased one and cooked it for dinner one night. It was delicious, just as she said, but my husband and I absolutely couldn’t bring ourselves to eat it again…..kept thinking about what it was and just couldn’t do it. Since our children loved it, I made sandwiches for their school lunch the rest of the week. They couldn’t say enough good things about about their roast sandwiches. Years later I told the story at a family gathering and our daughter got so mad at me for “tricking” them.
I agree – haven’t used any in yrs. but use to love using tongue when we were young and low on money. My dad had cows and we got beef
from him!
Wow would love to try this recipe as for the bags… I have already chosen my ts
I used to love tongue as a kid, but not tried it recently – I might go and get some next time I shop now, thanx XX
Never tryed it
I could SO NOT do tongue either Heather! I have a hard enough time eating hamburger without wondering which poor guy lost his “moo!”
P.S. Love this idea & your tutorial is so easy to follow! Thanks for sharing!!
I love this. I have many t-shirts that are so cool but can’t wear any more or have too many of so I have to thin out to make room in my draws:-)
That what I do one of my dresser is old clothes so I can like make 30 of them
Love it! I need to make some grocery bags. Most of mine are wearing out, too. I much prefer my fabric ones that I can throw in the wash, over the reusable ones you get for a dollar or two. I’d sew the bottom with a machine, but for those who don’t have one, this is awesome!
Quick question…did you make the round rug? If so, is it made from t-shirts? I’ve seen some similar, and I just love it!
I’m insanely curious about the rug as well & would shout Woo Hoo if it was made from T-shirts & there was a tutorial!!! Love that rug!!
I’ve seen several tutorials of how to make the rag rugs….theyre great can do it with old sheets and even jeans…just about anything will work even plastic bags will work
My daughter (13) saw this post this afternoon and has spent the rest of the day going through her old t-shirts (and mine!) and making these bags. We now have several really cute shopping bags!
Adorable idea! I think these will be stocking stuffers for my 14 grandkids this year.
Love this! My husband is always bringing me home event t-shirts that I’ll never wear (aside from pajamas) but wouldn’t mind using them as a shopping bag. I can totally see using concert or festival t-shirts for this! Thanks!
Great stuff! If only I would remember to take the bags out of my car instead of filling my purse!
Thank you! My girls just got finished making this. So cute and very simple!
Yay! I love thrift store shopping.
What a great idea! It’s sooo cute. Thank you so much for sharing!!! ^.^
Such a cute idea! I love the rug in the background too! 😉 Would you mind sharing where that came from?
Ha, I’ve gotten tons of questions about that rug since I posted photos of it as part of my son’s birth story. I bought it online, but unfortunately it’s no longer in stock 🙁
LOVE your projects……you are like my new best friend. THANKS!!!!!
Where did you buy the your beautiful round braided wool rug in the last picture? Please tell me!
{b.t.w thank you sooo much for your blog, such a blessing to so many mamas}
nevermind, sigh, just saw the other comment about the rug…
BEST idea, ever!!! Thank you! ❤
I am so happy to stumble across this tutorial! I have a million tshirts I can’t let go of but that I surely do not wear. And we looove bags in this house! I’m turning them into tote bags immediately! Thank you, thank you, thank you 🙂
This is so cool! I have been wanting to do something like this for a while but didn’t know how to go a bout it. Thanks for the awesome tutorial!
This is wonderful….. I always felt that some of the grocery bags that are sold as cloth bags do not last as long as they should and they are not too good in the wash…
Our Girl’s Empowerment Program has recently opened a Thrift Store here on Guam and we have so many t-shirts we are selling them for 4 for $1….. I’d love to have the girls make these bag as a fundraiser for our arts & crafts programs.
This is adorable! Love them so much! And so simple. Thanks for sharing! <3 <3
Love this! So easy you could even do it with your kids. Thanks for sharing 🙂
Its a great idea! I made it with my three kids and they love it! They decided to decorate it with ribbons made with the sleeve remains. Also, we put beads with hot silicone.
Anything new sew is right up my alley. Love this idea!
Great way for bags for grocery store. Here where I shop at Krogers I get 5 cents back for each bag we bring in to carry out our grocerys. Win win. Give as gifts that way to friends without it being expensive but thoughtful. Get read for any gift giving time.
I just made this and it is darling. The,t-shirt was an extra large and took me a lot longer than 10 minutes, but it turned out and my husband didnt believe I made it without sewing! Thank you.
I love this idea! I think I’ll make a bunch of these but just sew a super quick stitch across the bottom instead of tying. It would seriously only take 4 minutes so it’s perfect!
I need to try that, looks so cool and easy!
Target has red snoopy shirts in the big boys clearance section for 3.88.l
Very interesting. Going to make for my grandchildren.
This is a great idea for putting books or anything else you want to use it for. Love it
OK…maybe it’s just too early in the day for my little brain…
On the red and white striped bag you show, where’s the fringe? In the Snoopy shirt example the fringe hangs down. In the striped shirt example it’s not there.
Help! I prefer no fringe but I cannot sew either!
Pam, when the fringe is not visible it’s because it’s inside the bag. When I made the Snoopy bag I turned it inside out, tied the fringe, and then turned it right side out again.
Omg! That’s such a simple answer I literally smacked my head as soon as I read it. Duh!!! Lol!
Thanks so much!
I love this idea. I’ve seen other variations of it but none quite like this. I want to try it with some t-shirts we have that the kids have outgrown. I know they’ll love the idea especially my daughter. BTW someone posted your idea with a link to your blog on FACEBOOK so your idea is make the internet rounds. 🙂
Love the idea of tying the fringes. So glad no sewing is needed because I can’t really sew! I have a couple of old tees waiting for me to turn them into tote bags! Thanks. 🙂
I love this idea, I think it’s great.. but PLEASE, PLEASE, PLEASE do NOT go out and buy shirts from thrift stores (or bargain stores) specifically for the purpose of cutting them up to make bags. PLEASE use ones you already have at home.
Some people have to rely on thrift stores for their every day wear because they cannot afford to buy brand-new clothes and every shirt that someone buys from a thrift store (same goes for the cheap shirts from Target) to make a bag means a shirt that someone who actually needs a shirt to wear rather than a cute shopping bag goes without.
Upcycling is great, but not at the expense of people who need access to inexpensive clothing.
We’re such a wasteful society that I highly doubt someone would end up going without because people buy a few t-shirts at a thrift store.
In our thrift stores, they put many, many t-shirt in boxes for rags!
Or they could just make sure to bring there next clothing donation to the thrift store to benefit others! Thrift stores DO NEED lots of types of customers, not just the people who “have to” shop there because they can’t afford anything else.
Seriously, I get your thinking, however, there are literally THOUSANDS of t-shirts at each of a dozen or so thrift stores in my one town! Buying a couple of them won’t dry up the supply, and as EVERY single day more are added……. Not really an issue.
So easy and really neat. Will be doing this with my grandchildren. Great project for just about any group to do.
if you cut the shirt while it’s wet, then throw it in the dryer, the cut parts will roll under for a more “finished” look!
Will it have the same effect if you make the whole bag first then wash it/dry it?
Oh boy…headed there RIGHT NOW to create my new bag!!! Excellent ideas! Thanks
Love the idea of t shirt bags!!! For those of us who hang our laundry outside, it would make a great clothes pin holder also using a small t shirt. I was happy to come across your blog, thanks
What size tshirt did you use? Do you have any idea what size tshirt makes what size bag? Thanks!
Hi Kari, it really depends on how deep you cut the strands at the bottom. That’s how you determine how tall the bag will be. Whatever the width of the shirt is will be the width of the bag.
Really liked the rug
I’m wondering about the top when you’ve cut off the sleeves/collar… without hemming the fabric there does it curl/get messy/unravel at all? It seems a lot easier than the sewing versions, but that’s the difference I’m most curious about. Thanks for a no-sew option!!
Hi Christine, yes mine did curl a little bit but they did not get messy/unravel. I like the tiny amount of curl 🙂
The sleeves can be cut right at the seam, so the seam remains on the bag. The other side rolls slightly, but doesn’t unravel. I’ve made many of these. I sew them, though and “square” off the bottom.
I LOVE THIS IDEA. I collect tote bags, but sometimes they are kind of heavy. These will be great, I love that they are washable and they take up almost no room to store, when not in use. Thanks for sharing this idea!!!
This idea is really cute and fun!! I love taking my re-usable bags to the store and it is even more rewarding when some of the stores give back a bag credit for bringing in our own bags. I can’t wait to make one to use and find a cute top at the thrift store to up-cycle it as a bag. This post reminds me of how I made my No Sew DIY T-Shirt Infinity Scarf out of a top. Thank you for sharing this idea. It’s brilliant!
Thanks for this project! I had 2 old teeshirts from The Common Ground Country Fair in Maine and loved the graphics but the fit and material weren’t good for wearing. I didn’t want to throw them out so now they are shopping bags!
Yay! I’m so glad you were able to repurpose them.
Great idea, but: there are so many sleeveless t-shirts, would these not work better and allow less cutting? And why would we want to cut the neckline off when they are usually already seamed? We could just fringe the bottoms and tie or us with sewing machines just turn the tees wrong side out and stitch, and we are ready to go when the tee is turned right side out?
You certainly could use a sleeveless shirt! The reason I cut the neckline is that it creates a larger opening, making it easier to fit groceries in 🙂
Doesn’t the fabric stretch hugely when you are carrying groceries in your bags (since knit fabrics do tend to stretch a lot)?
It depends on how tightly woven the cotton is – some t-shirts stretch more than others.
No need to limit this idea to grocery bags. They make a great gym bag, as they will hold everything, change of clothes to gym shoes. At the end of the day, throw all the stinky into the wash, including the bag!! Also great for Famer’s Market days. They will get dirty, throw them in the wash! Take one along on your picnics, just toss all the dirty containers in the bag! The possibilities are endless!! I have ben using them for years. Enjoy!!
What a great idea. Thank you for sharing!
Love the idea – I don’t sew, and this is also a teachable craft for Girl Scouts of all ages, thank you for sharing!
Love this simplicity. I didn’t want to invest in or use hampers to carry my fresh laundered clothes when I do my laundry or a storage bag for comforters now I can create a sac bag just for this purpose. And find a big enough stretchy tshirt 😉
Thankful
Tikvah
Thanks for directions. I would like to print the directions for No Sew Tshirt Bags, but don’t want all the extra ads, etc. Would you please email to me. Thank you.
I love this! I do not sew and think this is great for all of us non-sewers! Thanks for sharing! BTW-great directions!
Seems like this could be even sturdier if you used tank tops to start with as the opening and handles would be done for you and finished off on the edges as well.
So timely to have spotted this on FB this morning! My great nephew turns 1 this weekend and I collected a dozen board books thru thrifting to celebrate his first year! But, the presentation plan was, unfortunately, missing from my brain!OF COURSE – A BABY BOOK BAG!!! THANKS FOR SHARING :*)
I love that idea! I would be so happy to get that as a gift for my son 🙂
love your idea! I did similar for a project for kids. Had many fabric paints and because one of the celebrations was a 60th birthday party, theme being When I am old I shall wear purple, everybody was treated to a purple t-shirt and red ball cap. For the kids the next day I had the shirts ready for the to decorate with their own art. Then, I cut them out with the help of 2 aunts when they were dry and sewed the bottoms up. The kids loved their personalized bags and my goodness we had some budding artists in the group. Too cute!
This is a cute idea. I will pin this so our kids can try it when they are learning to tie knots. I will try a ‘sew’ version because it will be faster. So, we will try out your idea two ways. I love the knotted strap variation. Very cute. Thanks for the inspiration!
I just made one. I’m not very crafty, but this was easy enough. Thanks for the idea!
Could also use the bottom hem for a draw string closing, using an old shoe string.
I saw this on Pinterest last night and I just had to try it out. I have so many tops that don’t fit anymore, I love the idea of up-cycling them into something useful like this! The bottom of mine didn’t turn out as good as yours did but there weren’t any holes when I got done with it so I was happy with it. I’m not crafty at all but this came out so adorable. I can’t wait to try it on my favorite shrunken sweater next! Thank you so much for the easy tutorial.
So glad you found it helpful, Whitney!
These are wonderful! Such a cute idea for adorable shirts you don’t want to wear anymore (or at all; I love the graphics, but hate wearing tee shirts). I’m going to run this by my husband, and if he likes it we’ll soon have something like ten new bags – he doesn’t get rid of shirts he stops wearing, because there’s an emotional investment. #wink This is way better than a tee shirt quilt, that’s fun but doesn’t fit in with your decor in the least.
Cute ideas. Thank you.
I just made this and I really enjoyed it! Very easy and fun, thank you!
I just tried this for the first time, and even though I read the instructions several times before I started, I still managed to mess it up. I drew the line where I wanted the bottom to be, and then cut it right then instead of cutting the fringe up to that point! AAARGH. So now I have a really short bag with really open sides. Lesson learned!!!
Idk how to fringe knot
That is the best idea ever! I made my own and it looks fantastic ( I must say)!
OMG i just made one it worked out so well i will definately be making mote of these
Great project! We’ve actually featured your t-shirt totes in our blogpost ‘Free {and almost free} Earth Day Crafts for Kids That You’ll Actually Want to Keep. You can read it here:
http://ecogoodz.com/blog/free-and-almost-free-earth-day-crafts-for-kids-that-youll-actually-want-to-keep/
We applaud your thriftiness, ingenuity and commitment to sustainability!
-Ecogoodz, a used clothing wholesaler
I had a shirt that has been sitting in my bottom drawer for 6 years now. It said “Best Mom Ever~Mother’s Day 2009. Needless to say, it’s a bit outdated and too small. But I couldn’t dare throw away something my kids got me for Mother’s Day! It has now been brought back to life as the coolest bag ever! Thanks so much for helping us ‘no-sew folks’ repurpose some treasures!
Thanks !
It’s a beautiful idea !
Such a good idea!! I am participating at our local Relay for Life Cancer Event and I will be making several of these totes from old Relay t-shirts that we have accumulated from past events. I know it will be a hit! Thanks so much!
That is such a fantastic idea!! I tried it and my daughter loves her new bag thank you so much!!
thanks i will totally try it. It looks super simple me and my friend will definally try these.THANX
Hi, I love this idea! I’ve just done one. So easy. Is it ok to trim the fringes when you are finished or do you think they will fray and make it no good?
Thanks.
They may fray. It depends on the t-shirt 🙂
Oh, wow! This is so easy, good looking, fun and I love the thought of reusing an old, loved shirt that doesn’t fit anymore or isn’t good enough for wearing one more day…
Will try this with my daughter tomorrow. Guess, she’ll love it, too. 😀
Thanks for sharing this great idea with us!
Best rgds from Germany,
Alex (with Paulena, 9 years old)
hi! great idea but im a bit confused so after you finish tieing the first 3 knots and you close the opening in-between them, do you go and tie the next 3 and repeat the process or do you continue as if you were closing the holes in between? and also how do you finish it off
Thanks x
I have the same question. i’m confused at this point.
Tie all the pairs then cross tie them all. So 3rd pair ties to 2nd and 4th. 🙂
Hi, Thanks for the idea… loved it 🙂 and used the bag too.
I absolutely love this idea, in one night I made three and now I can’t stop. It’s so quick and easy a wonderful go anywhere bag. Thanks Mommypotamus
This did not work at all
Like will make some. Got lots of t-shirt.
My sewing machine recently broke, but i travel alot (I’m a teenager) so I’ve been looking for different travel bags and this is perfect. Great idea, thanks!
supercool ! my green communities will do this DIY project with several kids on orphanage! smart decision to reduce plastic trash in FUN WAY!!
I love this! cant wait to try it.
I purchased many $5 Disney t-shirts from the clearance rack at Target right after a trip to Disney World. I was shocked at how cheap the shirts were compared to the park prices, so went a little overboard. I am glad to have a new purpose for the designs that I still love, even though I don’t want to wear the shirt anymore. Thanks for the tutorial!
such a great idea! so glad you shared. I’m excited to try this. Also, nice tutorial
Love it! Thank you very much for this fantastic idea!
i just finished my 4th bag. Wow! I am making a few more and changing them up just a bit. Thank you so much for sharing this. I truly appreciate it. You are so clever
I just finished making a t-shirt bag. Thank you for the pattern. ..was easy to understand and complete.
Love the concept… Def worth a try.
Thank you for sharing.
Back in 1989 I went to my first concert…Metallica. If you knew me now, you wouldn’t believe that. Just turned my concert t-shirt into a bag! It will be fun and easy…and a conversation starter for sure! Thanks for the idea!
Love the bag but I REALLY like the round rug in the background!
Did you make that also? Share?
Cute ideas. Thank you.
great step by step instructions. The only thing I did different was to cut the sleeves on the outside of the stitching this made the handles stronger and stayed in shape a little better.
I have a 4X tank top I bought for $1 thinking a child could wear it for a night shirt. I collect items for Operation Christmas Child shoeboxes year round and thought I’d make the shirt into a tote for a child to carry their box home. A lot of people have bought fabric/reuseable bags for their boxes, I did too. But thought I could try making one of these from the VERY LARGE shirt. It is plain, solid color. Maybe I’ll embellish it with an iron on design first. I do not sew either so this is a good idea for me. I look forward to checking it out.
What a beautiful project ! I will defininety try it at home.
Thank you
Sheers from France
This can also be used like a backpack. Just slip your arms through the arm holes! So handy and easy to do. 🙂
Great idea! And also it’s a good recycling example for my girls. We just made few bags and they are really proud of themselves. I just showed once and they did the rest. Molly even made a small bag from one of her baby t-shirts as a gift to her best friend. Thank you for sharing this inspiration!
I am a total sewer, but no-sew projects like this are nice as well. Super excited to try this!
Great and super easy ideer. Thanks! 😀
I had a t-shirt with an awesome stamp on it that I really didn’t want to throw away but don’t fit into anymore that was on top of my chair waiting for something to be done to it and this was perfect. Done in 10 minutes and looks awesome, I’ll be using it very often now!
Thanks Heather for this fun and easy project. Seen it on Pinterest last night and couldn’t stop thinking about it today. So I created a bag and it came out fairly good for my first time. I’m not really good at crafting but your ideas and instructions were easy and clear enough so I gave it a shot. Now I can’t want to make more. I have plenty of shirts I don’t wear anymore and this is perfect to reuse those old shirts!! Thanks again Heather!!
-Yvette L.
Super cute AND you can make several and put them all in one of the bags… great for taking up zero car space and easy to take into the market!!??
Qué creativa idea!
You can use the cut off sleeves for pockets. It would require sewing.
I love this idea. This may be a dumb and obvious question but on the 2 other variations of the bag there is no fringe so how were they done?
you just have to turn it inside out when you tie it so when you flip it right side out there is no fringe…at least that’s what I think you do
If you turn it inside out before you tie the knots, the fringe will be on the inside and not be visible.
You turn it inside out and tie the knots on the inside
THEY WERE TURNED INSIDE OUT SO WHEN COMPLETED, THE FRINGE WAS ON THE INSIDE.
Your tutorial saved Christmas!! I bought a t-shirt that was too small without time to order the correct size. I wanted to turn it into a cute tote bag but don’t have a sewing machine and wouldn’t know how to use one if I did. A Google search led me to a few tutorials, and yours was the best. Easy to follow and didn’t need anything except the shirt and a pair of scissor. The bag turned out great. Thank you!!!
SO happy to hear that! Merry Christmas!
I love this and will try this with my wives club!
Did you tie all the fringe sets in knots first before tying them to the adjoining sets?
It is easier if you do. It is easier to keep track of In my opinion.
could i cut the neck in a bit more to make the straps of the bag longer?
You can, but the bag stretches quite a bit as soon as there are things inside. After you use
your first one, you will see how much you want to cut your neck and armholes. (A trip through the washer and dryer will tighten it up again, but I don’t take off very much any more. I sew the bottoms of my shirts, but the knot method is handy for non-sewers.)
Lovely idea??
I’ll surely make one
Thanx for sharing
I am a Speech-Language Pathologist and I have been looking for bags to place manipulatives along with their companion book in. THANK YOU, THANK YOU, THANK YOU!!!!!! My busy school life just got a little less stressful.
Awesome idea! My teens accuse me of being a hoarder. I hate throwing away great stuff esp clothes that have hardly been worn. Thanks for sharing. I will be re-purposing some “old” tees. Any ideas for barely worn jeans?
I think I saw how they were making purses out of jeans. I saw it on Pintrest. Good luck to you.
I love this creativities. …. And i would to see more ….???
I am making one of these out of last years shirt for ending Alzheimer’s. We are getting ready to have a big walk and fundraiser locally. I thought it would be fun to share with others and I know they will want to know how to make one. Would you give me permission to print these directions, make copies, and give them to anyone who is interested. Thanks in advance.
This is a genius way to make a personalized tote bag! I have a lot of shirts that I don’t want to throw away that could easily be turned into something useful like this! I also love that it doesn’t require any sewing. I’ll give this a try for sure.
I saved this pin a while ago but decided to finally try it today with an old souvenir t-shirt I couldn’t part with but that was past its prime. It turned out great. What an awesome way to recycle and give new life and purpose to fun t-shirts! I appreciate your idea for tying the second set of knots to make the bottom more secure. Terrific idea!
Lots of people asked about making rugs. I made my first T-shirt rug when my Uncle died leaving stacks of event T-shirts behind. T-shirts are nice and soft so they are fun to work with and they make a great crocheted rug.
I found your blog on facebook, so now I guess if I want to post my “how to” for rugs I’ll have to join your ranks.
Oh my goodness I literally just made it. It turned out great!
What an amazing idea! I love it.I will make it for my little baby.
What is a reasonable sale price for this product? This would be a fun summer project for my teenager to earn money.
I was thinking the same thing. I’m going for 5 to 10 dollars a bag depending on the size. 1/2 price tshirts at Goodwill.
Really like your creativity. I always prefer different type of clothing in my life which attracts people to me and my style. I like fashionable clothes in which I feel comfortable.
You could also use an old tank top and eliminate the first step.
Hey,
I had a question, would I be able to share this?
Thank you!
We use the sleeve arm bands as hair lackies. Just cut again on the “shirt” side of the hem and use that section (about 1.5cm) as a hair tie.
I lovvvve this idea.. I thought i was the “mother of all ideas:) ” and my cowees were laughing at our other cowee for swinging around a “t-shirt bag.” omg I thought this was the coolest.. I had just gave a gazillion t-shirts to goodwill… but FEAR NOT… I have a gazillion more… .. you have the cutest t’s
I really enjoyed making mine, but it came apart after I washed it…what did I do wrong?
I did the tshirt bag thing and THANK YOU. I have a ton of tshirts I do not want to get rid of but I finally found something that makes other uses out of them. thank you super easy project.
This is such a fun idea. We did this at the farmers market I manage at the kids craft table. Everyone loved it. Thank you!
What a cute no sew idea! I am always searching for what to do with old t-shirts – we have so many!
Ahh, so that’s how we can use old T-shirts to good use! And it doesn’t really even seem it would take that long. Going to get on this ASAP! Thanks for the share
Wow! I can now do it. I would like to make a shirt and finally I have learned. Thanks for sharing this.
I made my first one today and I so recommend this bag! I was worried about the strength, but tested it with 3 large textbooks and it held up great! I wasn’t sure how tight to knot the bottom and did the first few a bit too lose (though it still held the books well), so make sure you knot tightly. In terms of how to knot, while it might seem confusing, it really is as easy as mommypotamus says:
Knot the first three sets of strands, then make a knot between the left strand of your second knot with the right strand of the first knot (the one on the end of the bag). Knot the other side of the second strand of knots (the right side) with the left side of your next set of knotted strands (the third set you tied together). Tie your next set of strands together in a knot (set 4) and tie the left side to the right side of knot three, make a new knot with the fifth set of strands and tie the right side of it to set four– keep going all the way along the bottom of the bag. It should only take you about 5 minutes. All you’re doing is connecting (by knotting) each strand of the tied knots with the strand directly beside it.
Thank you mommypotamus! A perfect gift for stocking suffers and quick and easy enough for the kids to do– and awesome to get them thinking about repurposing items that we normally discard. 🙂
So glad you found the tutorial helpful, Becca!
Awesome! I can now do it, so that’s how we can use old T-shirts to good use! Thank for the share
Very cute… But wouldn’t a (French) braid work to close the bottom? No holes, and pretty! I think I’ll go that route!
Did this work? I am so curious if the French braid would hold!
Transforming old shirts and making them a simple tote take note that it will not be sewed needs an art print that are in with the trends nowadays.
The knots are for those who like the look or don’t have a sewing machine, or to be simple enough for kids to make their own.
Hi. This isn’t the first time I’ve come across your site :).
An. Idea of hat to do with the cut off sleeves, use them as sweat bands. Ive don’t this for years since its a lot cheaper than purchasing one. I find the size of the (short) sleeve corresponds with the size of my head so there is nothing extra to do except trim the edges, and maybe wrap it around a head band if you like, although they can be used as is.
This is a fantastic idea! I’m impressed. I have so many t-shirts I was going to get rid of that I no longer fit into and instead of tossing them, I can now have stylish little totes to take on a day trip, to the store, wherever. Kudos to you for coming up with this idea. 🙂 I can even turn my “Totes Gay” shirt to a totes tote LOL. How fun. THANK YOU
Have “saved” some of my fave Ts thanks to you, have also shared your link with my “just-not-ready-to-let-go-of-it” compadres. Thank you!!!!
Love this idea, but alas, my favorite old Tshirt has worn too thin to be used, but maybe if I double it up with another one inside. Thanks for sharing!
Hi Kim, Thanks for your post it’s really helpful.
It is very useful!
i’m in school we aren’t allowed fabric scissors!!!!!!!!!!!! IDIOTS
I’m freaking out about my consumption of single use plastics and have vowed to do much better then what I’m currently doing /using! I have a couple (not great) reusable shopping bags! Because I can’t afford the nice PLASTIC coated ones this is a great solution especially because I have a ton of awesome large Tee-shirts I can’t/won’t wear and can’t part with! Thank you!
Thanks! I needed an easy idea to make bags to hold my troop girls books and uniforms in!
Great ideas! Thank you!
Can’t wait to cut up some old favorite tee shirts for tote bags! Woohoo
I simply hate wrapping gifts with paper or gift bags. I’m going to use this as what I will put the gift in. Perhaps only use a t-shirt that isn’t too old or faded.
You will have a stronger and less stretchy handle if you cut the sleeve off just outside the seam-line leaving the sleeve stitching with just a bit of sleeve fabric attached to the bag to reinforce the handle. I usually use a drawstring at the bottom to close the bag (works as long as nothing smaller than a lemon goes into the bag), but your knot and fringe method is cute. I’ll have to try that soon!
This is a well-written blog post that’s both informative and entertaining. I really enjoyed reading it and learning something new.
You can also cut the sleeve hemmed part into a headband. The hemming is strong and works really well. If you leave some sleeve attached you might be able to sew a hem, but I’ve not done that and it works just fine.
This looks so fun! I have a few T-shirts that I can’t stand to throw away and this is the perfect alternative!