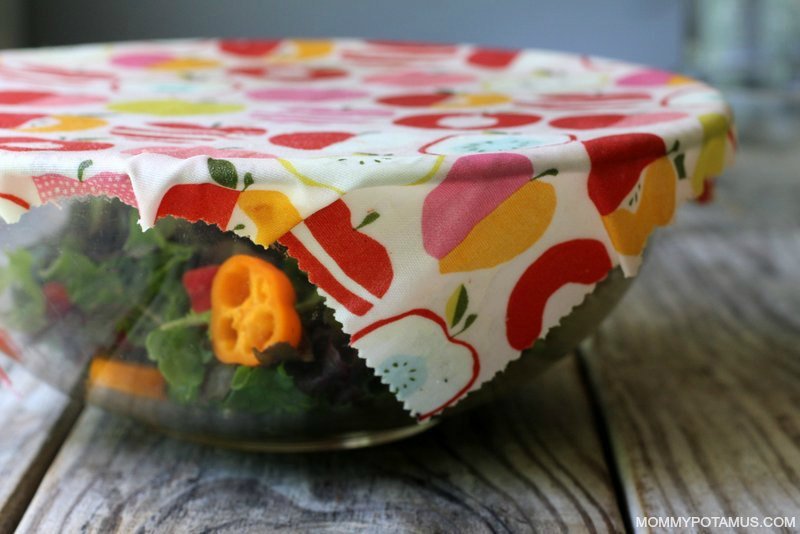
DIY Reusable Food Wrap (How To Make Beeswax Wraps)
Here's how to make reusable beeswax wraps that are an eco-friendly alternative to cling wrap. Using the warmth of your hands to make them pliable, you can wrap them around fruits, veggies, bread, and containers like bowls and casserole dishes. They can also be made into reusable sandwich bags.
Calories
Equipment
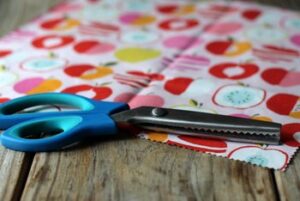
- scissors (pinking shears will prevent fraying)
- paintbrush (can only be used for this purpose)
- cheese grater
- baking sheet (I use this stainless steel one)
- thread, needle, string and buttons (optional- you'll only need these if you plan to make snack or sandwich bags)
- ruler or tape measure (optional)
- oven
- makeshift clothesline - binder clips make fantastic "clothes pins" if you don't have any on handmakeshift clothesline - binder clips make fantastic "clothes pins" if you don't have any on hand
Ingredients
How much beeswax, jojoba oil, and pine resin you need depends on the size and number of sheets you want to make. See the notes section below for my recommendations.
- organic beeswax pellets (See below for info on how much you'll needsee below for info on how much you'll need)
- powdered food grade pine rosin (Also called pine resin. This is what gives the wrap its "cling" factor - see below for info on how much you'll need)
- organic jojoba oil (See below for info on how much you'll need)
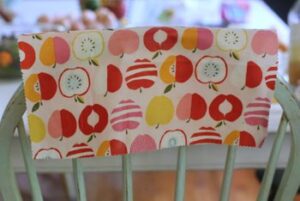
- 100% cotton fabric100% cotton fabric (Needs to be very thin, like a sheet. Organic cotton muslin will work, as will this cloth with pretty bee-inspired patterns)
Instructions
- Preheat your oven to 225F.
- Cut your fabric into the sizes you prefer. I wanted to have a small, medium, and large assortment, so I cut mine into 8x8, 11x11, and 14x14 inch squares.
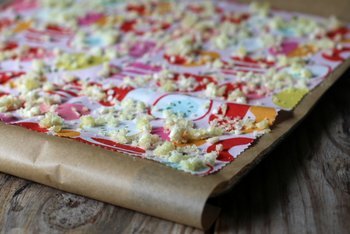
- Lay a piece of parchment paper over the baking sheet, then place your fabric on top. Sprinkle your beeswax/resin/jojoba oil mixture evenly over the top.

- Place the baking sheet in the oven and bake until the mixture is fully melted. This should take between 5-10 minutes, but can take longer.
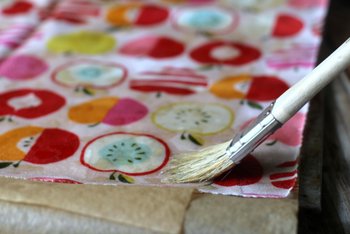
- Using the paintbrush, spread the beeswax mixture evenly over the fabric. In order to take this photo I took the sheet out of the oven, but usually I just pull the sheet slightly out of the oven, brush, and then pop it back in to let the mixture even out for another minute or so. Fyi, the mixture will adhere to the paintbrush just like it does with the cloth. I bought an inexpensive brush that I keep just for this purpose.

- When the mixture is evenly melted, remove the baking sheet from the oven and lift the sheet with tongs. I wave mine in the air to allow it to cool enough to touch (it doesn't take long it all) then hang it somewhere so that it can "set." This can be your laundry area if you have clothes pins in there. I just waved mine around until they were mostly cool, then hung them over the back of a chair to cure. You can also use a laundry drying rack if you have one, but you may want to place some parchment paper over the rungs before you place the beeswax wraps on them.
- Keep in mind that the wraps will feel very tacky at first. They mellow out fairly quickly. The end result will have grip but not be super sticky. Keep in mind that the wraps will feel very tacky at first. They mellow out fairly quickly. The end result will have grip but not be super sticky.


Notes
Deciding How Much Beeswax, Resin & Jojoba Oil To Use
How you need depends on the size and number of sheets you want to make. I wanted a small, medium, and large assortment, so I cut mine into 8x8, 11x11, and 14x14 inch squares.
Here's what I used for each size.
8x8 Sheet:
- 2 teaspoons grated, packed beeswax or beeswax pellets
- 2 teaspoons powdered pine rosin
- 1/2 teaspoon jojoba oil
- 1 tablespoon plus 1 teaspoon grated, packed beeswax or beeswax pellets
- 1 tablespoon plus 1 teaspoon powdered pine rosin
- 1 teaspoon jojoba oil
- 1 tablespoon plus 2.5 teaspoons grated, packed beeswax or beeswax pellets
- 1 tablespoon plus 2.5 teaspoons powdered pine rosin
- 2.5 teaspoons jojoba oil