
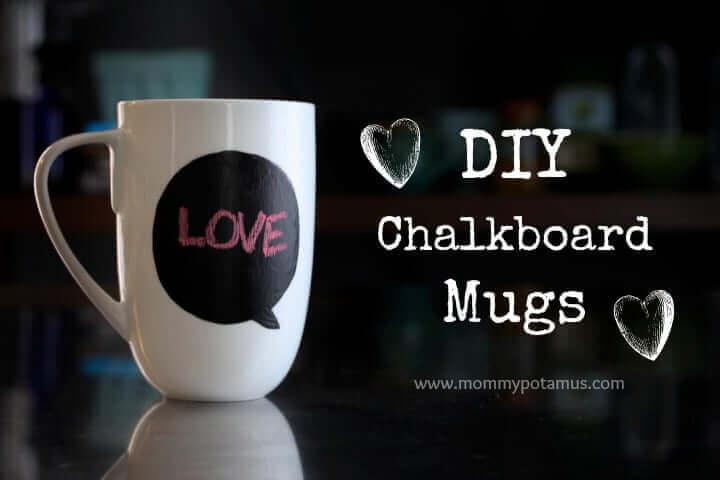
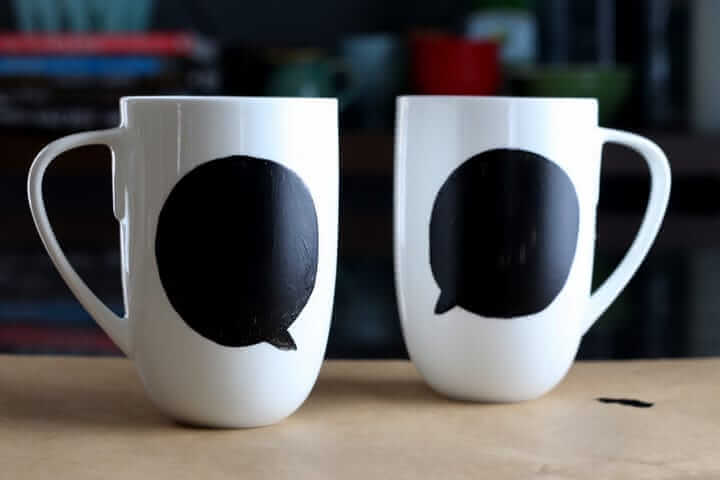
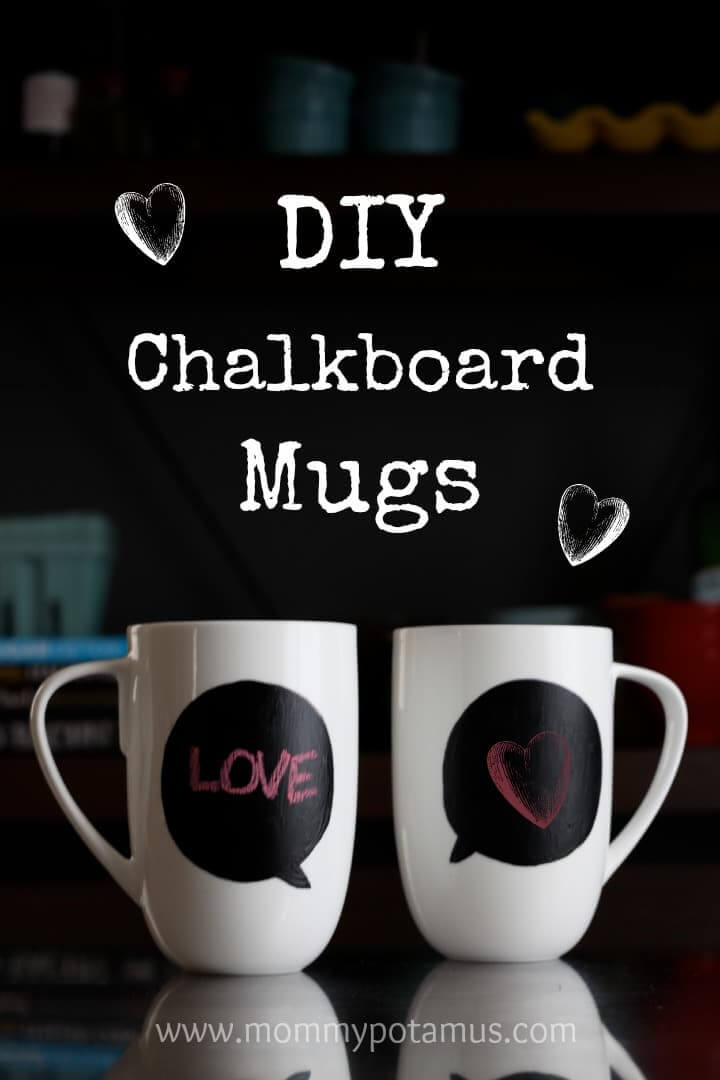
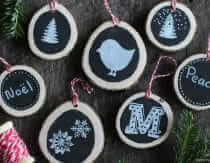
This cozy chalkboard mug is perfect for the odd game of tic-tac-toe, an inspiring word for the day, or a whimsical doodle. Whatever your style, they’re a cheerful way to get your morning going. And of course they also work well for keeping track of drinks at parties.
Once the paint dries it is microwave and dishwasher safe, so no special care is needed. I use my microwave as storage, but you get the idea.
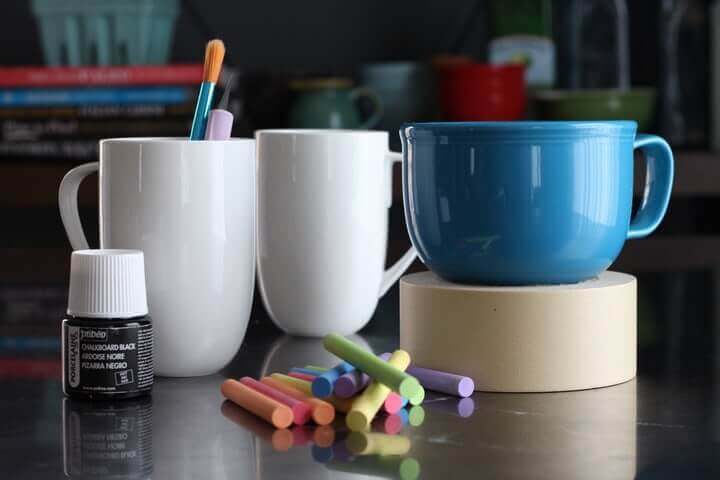
Equipment
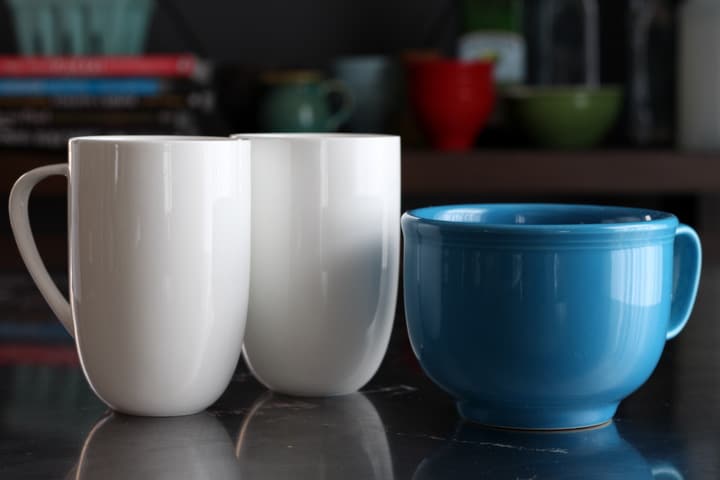
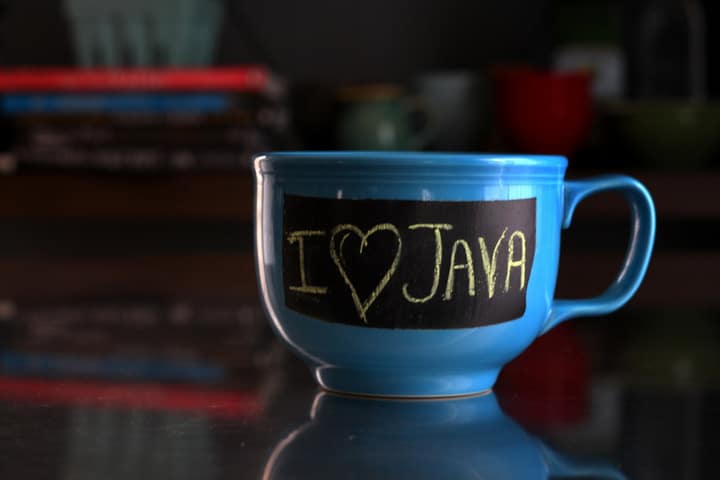
- Mug – I prefer to buy from companies that are lead and cadmium free. The blue mug is from Fiestaware, and the white mugs are Denby. The Denby’s are bone china so they are pricey, but you can sometimes find them on sale.
- Pebeo Porcelaine 150 chalkboard paint (where to find it)
- Paint brushes (I used the one of the large ones from this set plus the small one for detail work)
- Painters tape or masking tape (where to buy painters tape, where to buy masking tape
- Scissors or X-Acto knife, optional (where to buy and X-Acto knife)
- Sharpie marker (where to buy Sharpie markers)
- Chalk for decorating (here’s a combo package of white and colored chalk)
- newspaper or other paper to protect your table/surface while painting
How To Make A Chalkboard Mug
Step 1: Prep your mug
Wash them thoroughly with soap or wipe them down with rubbing alcohol to make sure the paint will adhere well to the surface.
Step 2: Customize your shape
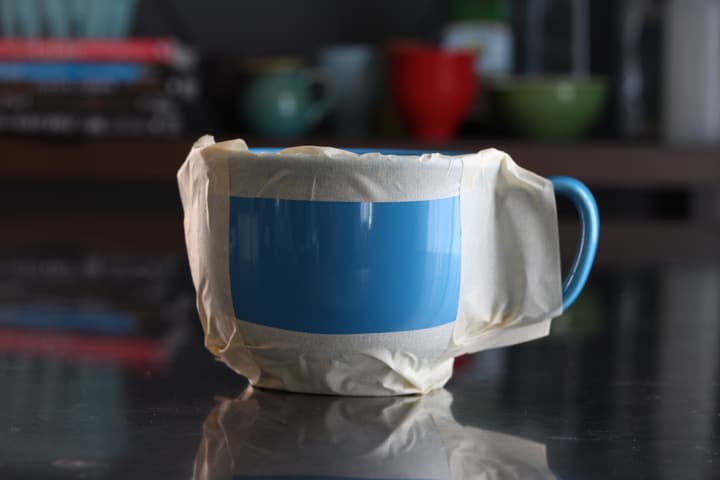
If you’re going for a basic square or rectangle, just apply painters tape or masking tape in the proportions you desire.
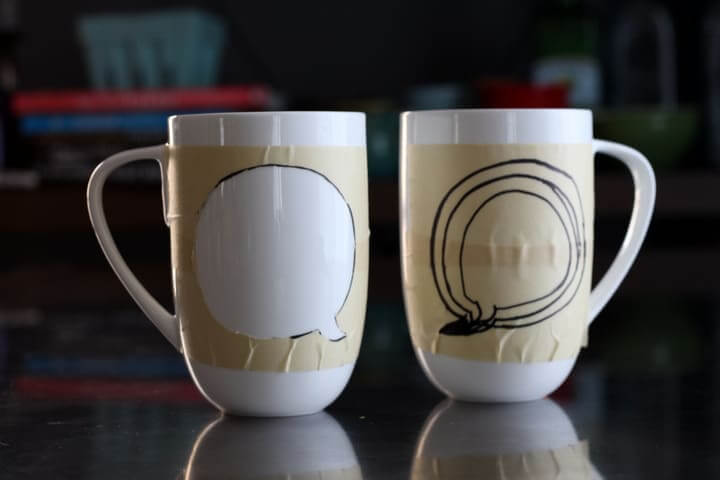
For a more customized shape, apply tape and then draw an outline using an X-Acto knife. Gently trim away the inside of the shape you’ve created – I was a little worried that this might scratch the mugs, but I found that if I worked slowly and gently it didn’t.
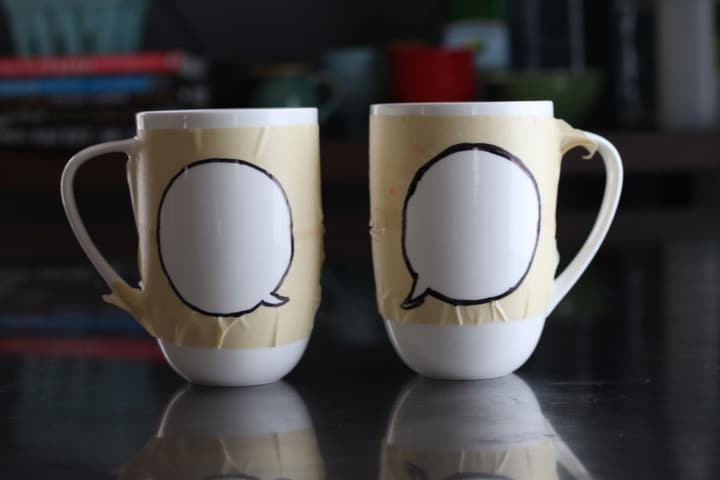
Next, trace the inside with a Sharpie and then peel away the tape.
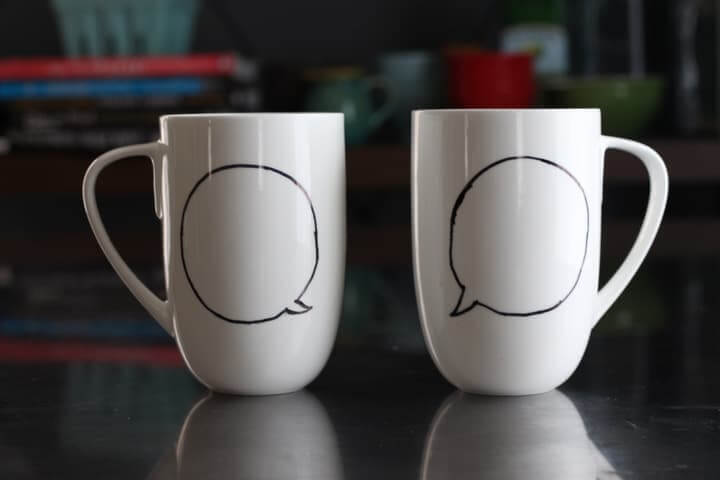
[Note: The first time I tried this I didn’t peel away the tape before I painted. Unfortunately it bled a lot behind the tape and I had to start over. It’s best to remove it so you can see what you’re doing.]
If you prefer to skip the tape and draw your shape in the mug using a stencil that would work, too, but I had trouble drawing the right size unless I was actually drawing it on the mug.
Step 4: Apply Paint
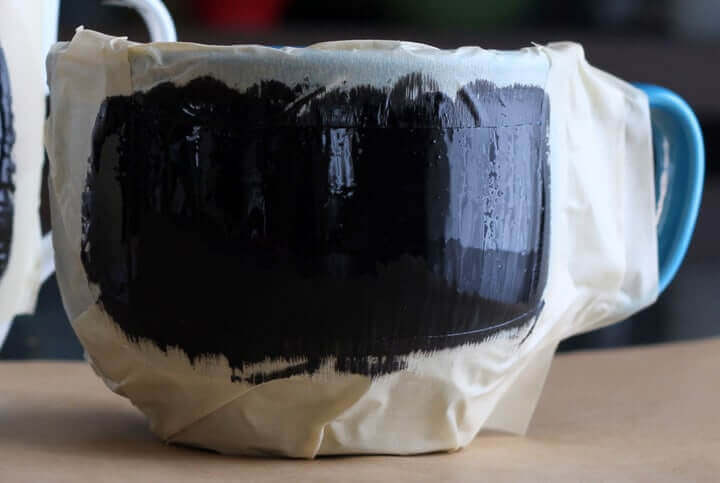
Using a paintbrush apply several thin, even coats. If you make a mistake, DON’T WORRY! Just wipe the area you want to re-do with a damp paper towel and the paint will come right off. Allow to dry to the touch and then remove tape and clean up any edges where the paint bled beyond the stenciled area.
Step 5: Dry & Bake
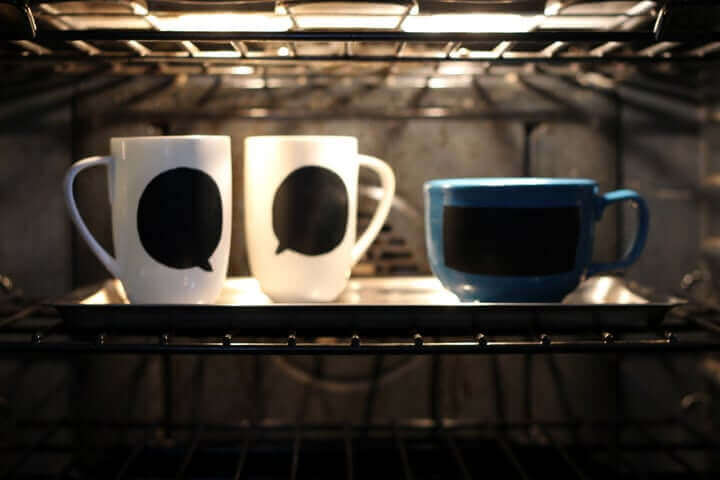
Allow the chalkboard mug to dry for a minimum of 24 hours, then remove any tape that remains and place the mug in a cold oven. Set the oven to 300F (150C). When the temperature of the oven reaches 300F, turn on your timer for 35 minutes. Remove when the timer goes off and allow to cool. Decorate and enjoy!


Looks like fun!
These would make cute inexpensive gifts! Thanks for the tutorial!
I love these! Great idea and so simple to make.
Mommypotamus, do you think this can be done on MASON JARS, or any type of glass jar/container?
Yes, it can 🙂
Hi, does the paint wash off after a while? I want to make them as gifts for relatives but don’t want to make them and then it washes off.
No, it doesn’t wash off if you bake them after applying it 🙂
Quick question, on step 3 it looks like you removed the tape after outlining the shape with the sharpie. Step 4 looks like you put the tape back on to coat with chalkboard paint? Can you clarify for me please? Thanks for sharing.
Hi Kimberly! Here’s a note from the tutorial that may clarify things for you: “[Note: The first time I tried this I didn’t peel away the tape before I painted. Unfortunately it bled a lot behind the tape and I had to start over. It’s best to remove it so you can see what you’re doing.]”
In other words, I originally painted with the tape on, but found after doing a few that it was better to remove the tape and paint free-hand.
Love your mugs the first one on to CAN you drikout of thesep
How would you put someone’s name on them would ya half too before applying the chalkpaint also I this paint OK to put in oven
I bought the chalkboard paint in a can at walmartI did not buy the spray please email me thanks
Hi, So cute. I want to make 30 of these. How many containers of the paint would you recommend I need to buy.