
nest·ing (noun) – An instinct or urge in pregnant mammals and birds to prepare a home for the soon-to-be newborn(s). ¹ The moment in which a woman who is 38+ weeks pregnant decides to release ten years of creative frustration with the color beige.
The logical thing would have been to clean my baseboards, freeze some extra meals, and put fresh linens on the bed, but did I do that? Um, no.
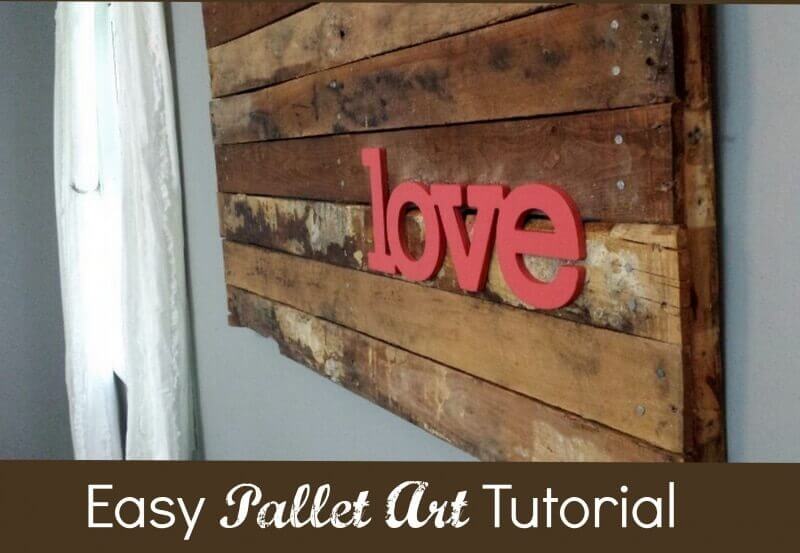
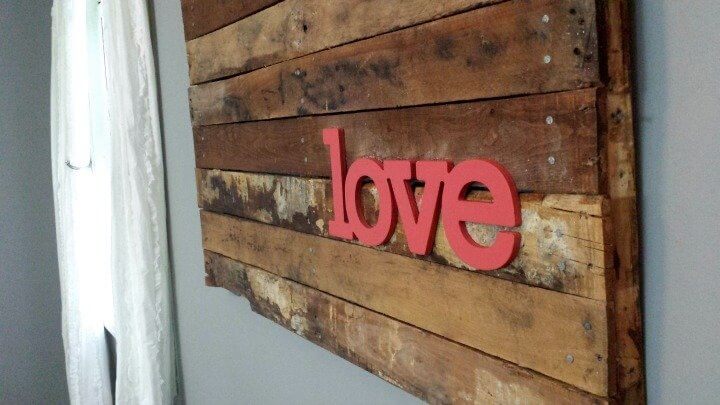
At 38 weeks pregnant I decided to create a 30 pound piece of diy pallet art for my living room. Because, you know, the baby will immediately notice if there is not something between the two windows that look out onto our barn.
Okay, maybe not, but I would! You see, when Daniel and I got married nearly ten years ago I was so afraid of making a “mistake” while decorating our new home that I painted everything beige.
Everything.
As you will see in the upcoming video of our babies birth, things are a **little different** in our new home. I love this new addition so much and it was SO EASY I wanted to share it with you!
Oh, and I am washing the linens now.
 Step 1: Locate Pallets
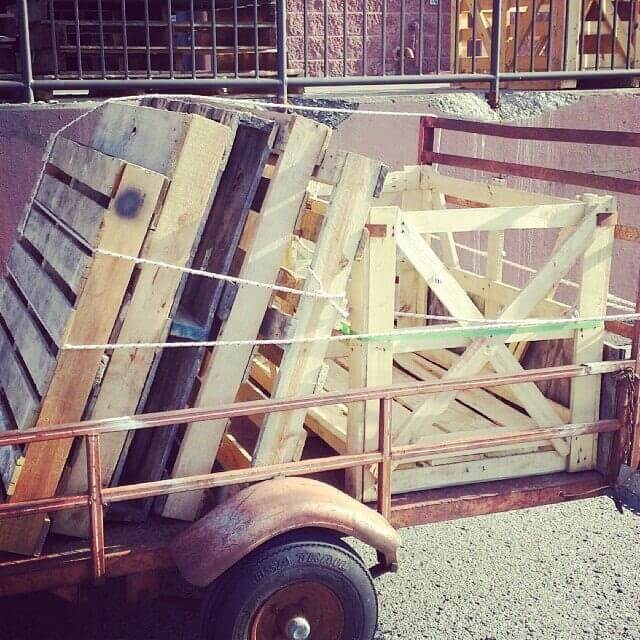
Discarded pallets are pretty easy to find if you know where to look. Daniel asked the guy at the tile store what they did with theirs – he said “We wait for people like you to come by or break them down for the dumpster.”
The photo on the right is our haul from the tile store. We’re repurposing that crate into a drink stand for outdoor BBQ’s next year – YAY!
Here are six simple tips for locating quality pallets.
Note: Some have asked whether it’s a good idea to use pallets for indoor projects, because some are treated with chemicals such as fungicides. While this is true, many are now treated with heat rather than chemicals – you can identify them because they will have “HT” branded on the side.
Personally, I am not all that concerned with it when the DIY pallet art is going to hang on the wall because after they’re put together they don’t really come into physical contact with anyone.
Most have been stored outside and therefore have “aired out” more than most pieces of new furniture, which are usually treated in one way or another with equally toxic chemicals. However, if you are concerned you have a few options:
- Look for pallets that have a brand reading “HT” on the side. This means they were treated with heat rather than chemicals to eliminate pests.
- Create your own pallets using new, untreated wood. (Note: Much of the lumber sold at hardware stores is also treated, so you’ll need to ask!)
Step 2: Gather Supplies
Because I already had a bunch of zero VOC paint from my kitchen table chairs – which, yes, are all painted a different color – all I needed to buy were some wooden letters from Hobby Lobby. (Also needed for this project that I had on hand: wood glue, nails and a hammer)
Supplies:
- pallet
- wood letters/phrases (I got mine from Hobby Lobby, but I also adore these, these and these)
- paint (I prefer low/no VOC. If you are super sensitive to chemicals you can use milk-based paint)
- wood stain, various colors (For projects like this I prefer water-based stains – they contain fewer VOCs)
- paintbrushes – various sizes based on the size of your slats/how many colors you want to use
- hammer
- nails (see Step 2 for details on selecting the right size)
- crowbar
- sandpaper (optional)
- saw (optional)
Step 3: Prepare Your Pallet
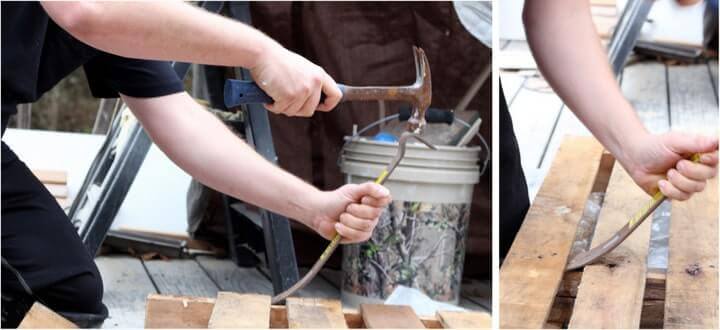
Gently remove slats from the front and back of the pallet by tapping your crowbar with a hammer.
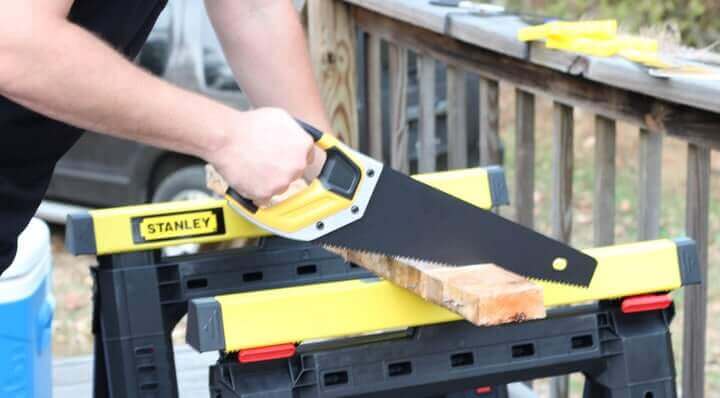
Place the support planks (the pieces of wood in the middle that attach the front and back slats) flat on the ground and arrange the slats on one side. If you have enough slats you may be able to cover the entire length of the support planks. If you don’t have enough slats or prefer not to use them all, saw off excess length from the support planks.
Nail the slats into position on one side, making sure to measure first to determine that they are not so long that they will go through the support planks. (Also make sure they aren’t too short!) It should look like this when you’re done.
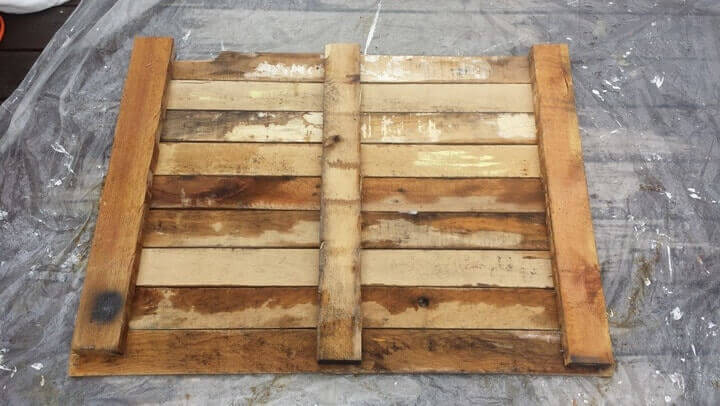
If desired, lightly sand the surface to prepare it for stain/paint.
Step 3: Paint Or Stain Your Pallet
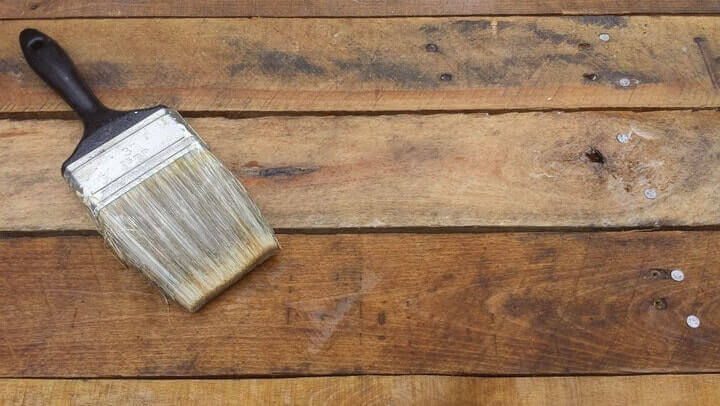
Make sure you allow for the drying time your paint/stain calls for before moving on to the next step.
Step 4: Prepare Artwork For Hanging
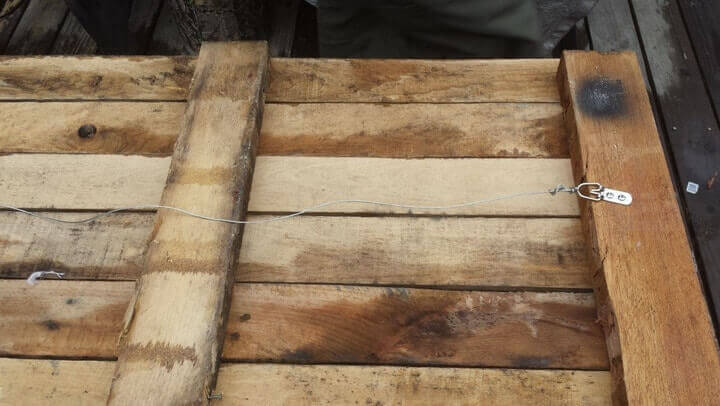
Daddypotamus used a kit he bought from Home Depot
Step 5: Add Letters Or Symbols
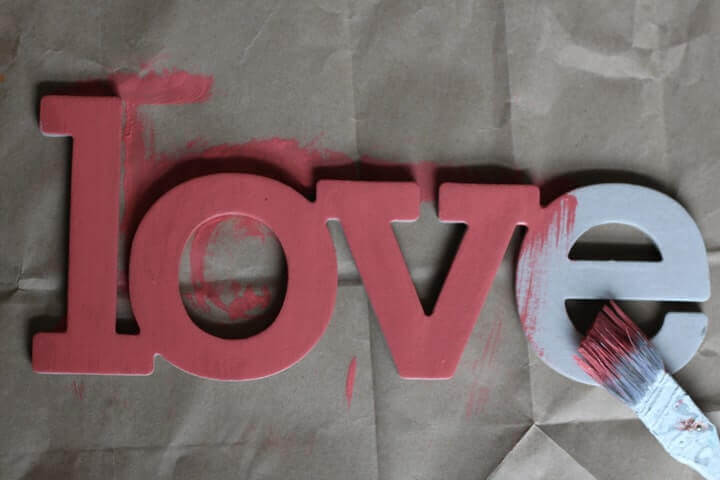
There are soooo many ways to do this: stencils, free-hand, puffy paint (which is a surprisingly awesome technique), or pre-made wood/cardboard lettering. Your DIY pallet art can be whatever you want it to be! I painted a cardboard cutout I found at Hobby Lobby, then superglued it on.
Step 6: Hang It Up!
And be so, so proud of yourself.
More DIY Art Projects
How To Turn Your Favorite Photo Into A Watercolor Canvas – My art skills are indistinguishable from my five-year-olds, but I figured out an EASY way to turn a photo into watercolor art for my wall. It’s an app that does it for you.
Canvas Butterfly Footprint Art – This butterfly footprint art doesn’t require sewing skills, decoupage, or, um, talent. Make some for your home and a few to give away to the grandparents!


I think it’s interesting to find this on your blog. You may know this already but shipping pallets are filthy and some of them are coated with toxic chemicals to preserve the wood. I worked in shipping for years and we would not even handle them without gloves. Sometimes they would come in and have rat feces and urine on them. So for me pallet are is a big no thank you…lol.
Thanks for your comment, Amy! I actually meant to address this in the post and then forgot – will go update now 🙂
Heather! This is so awesome! I love that you added “love”…it’s a great touch. I hope you are enjoying nesting in your new home!!
Thank you, Allison! I am enjoying nesting just a little too much, I think. I’ve started waaaay too many projects.
I love how you call them daddypotamus and babypotamus – so cute. 🙂 I wish my “daddypotamus” was as handy as yours – If I sent him to buy a picture hanging kit, god knows what he’d leave Home Depot with.
I’ve done several of these wall-hangings (and a few pieces of furniture) from old barn-boards we reclaimed from some outbuildings we’re tearing down on our property. Since they’re so heavy, we experimented with a few different methods of hanging them on the wall, and decided that making a french cleat (make sure the piece affixed to the wall is actually screwed into the wall studs!) is the best and safest way to go. Maybe the little kit that Daddypotamus bought from Home Depot will suffice, but hanging something that weighs 30 pounds from that would make me nervous – especially with young children in the house! I have a massive (6′ by 8′) barn-board American flag that I made for the 4th of July this year hanging on the wall in our guest bedroom on a french cleat – and that thing weighs close to 80 pounds! 🙂
Thanks for your input, Kayla! We actually did attach this to hooks that are screwed into wall studs, which I forgot to mention 🙂
Love it! I’m glad I’m not the only one to take on seemingly “unnecessary” (but OH SO NECESSARY!) nesting projects. 😉 I’ve been decorating up a storm too. We must be due within days of each other…I’m 38+ weeks too! 🙂
I love this idea SO MUCH! I’m going to start asking local store owners if they have any spare pallets lying around. There are so many things you can do with them! And the fact that you can get them FOR FREE is the best part. YAY!
I love these ideas. we have a few pallets after having paving bricks delivered and wanted to use a couple as decorative screens, painting them with outdoor paint and adding phrases or just words that will complement the “entertainment” area of our patio extension. Thanks for sharing 🙂
Thank you for sharing, and also for the extra info about chemicals and hanging and such. My handy hubby is currently not available to help me, and I was feeling insecure about taking on such a heavy project. I don’t want to mess it up and risk him disapproving of me playing with DIY projects of this kind again. 🙂
I think I may be a few years late on this post but this is a great idea 🙂 I think I’d want to add a different touch to it and paint on the actual wood itself. Have you done something like that? I’m just wondering how I would be get all the pallets in one colour before painting something on it
“Love” your pallet art project and follow your pinterest profile to get more updated on your work. You are the super mommypotamus, whom I can make my idol. Thanks for sharing you works with easy steps describing perfectly…