
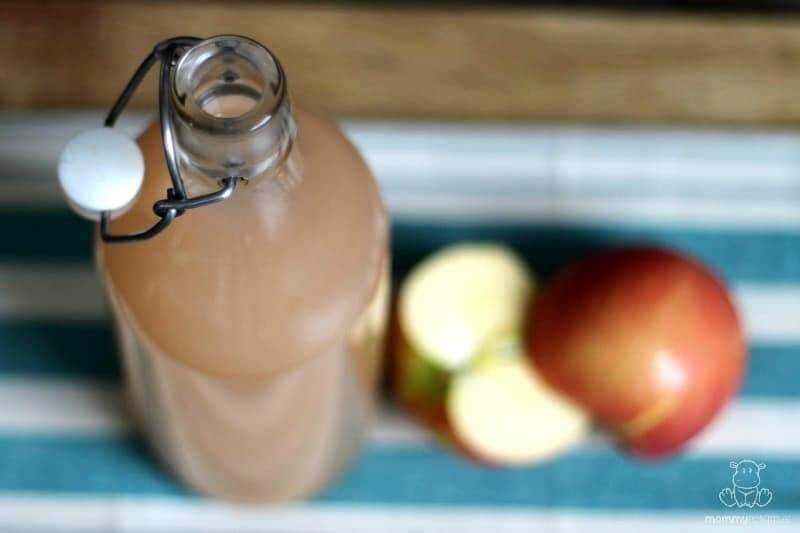
Note from Mommypotamus: What do scented jelly jars and a tutorial on how to make apple cider vinegar have in common? They’re both the subjects of half-written posts sitting in my drafts folder, of course! The jelly jars, which sprouted alien mold and sent colonies to mars, will never see the light of day.
Lucky for you, though, Carly of Modern Hippie Housewife has an amazing tutorial for making apple cider vinegar that she’s sharing with us today. I can’t wait to make up a batch for fire cider, hair detangler, and homemade cough syrup!
I didn’t know it at the time . .
But I was actually aware of fermentation before I knew exactly what it was. When I was a kid, I remember my Nana telling us stories about making sauerkraut and pickles in large crocks – “Like that one,” she’d say, as she pointed to an old crock that, at the time, my mom had filled with dried flowers.
Its been a few years now since I started my own fermentation journey. One rainy afternoon, I decided to give homemade sauerkraut a try. It seemed like the appropriate, stereotypical place to start.
Initially, I was a little intimidated. As I read through the steps in my mom’s fermentation book, I felt like I was missing something. Could it really be so simple? Just shred cabbage, add salt, pound with a potato masher, and wait?
Sure enough, it really was that simple. And then I was hooked…
Since then, my little curiosity has evolved in to a full-fledged obsession, and I’ve fermented everything from condiments to wine. Fermenting food and beverages truly is one of the most practical, beneficial and rewarding skills that I’ve learned on my journey toward self-sufficiency.
Last September, I decided to give apple cider vinegar a try. It was an obvious choice since friends of ours had an over-abundance of apples and I had already fermented apple sauce. We also use a TON of ACV in our household – I’m sure more then the average.
But before I go any further, let’s talk a little bit about the basics of fermentation. Perhaps you’re reading this and thinking, “Who is this crazy, fermentation lady, and what the heck is fermented food?” Ok, let me very briefly explain – a little fermentation 101 will also make the process easier and help with any trouble-shooting along the way.
What is fermentation?
Fermentation takes place in the absence of oxygen (an anaerobic environment), and in the presence of beneficial microorganisms (yeasts, molds and bacteria) which obtain their energy through fermentation. During the fermentation process, these microorganisms break down sugars and starches into alcohols and acids – lactic acid and acetic acid (a.k.a vinegar!) What you’re left with is a food that has been transformed into a more nutritious version of itself, which can be stored for much longer without spoiling.
In sum, by fermenting food, you’re giving it nutritional superpowers, and a longer life. Superfood, if you will.
Fermented food goes far beyond sauerkraut–you can actually ferment almost every food group! Fermenting grains gives you sourdough bread and beer, fermenting meat gives you salami, fermenting dairy gives you yogurt and cheese, fermenting veggies gives you pickles, and fermenting fruit gives you cider and vinegar! The possibilities are really endless.
You can read my full article on Fermentation 101: The Very Basics on Fermenting Food HERE.
The Transformation from Apples to Apple Cider Vinegar
There are three types of fermentation: lactic acid fermentation, ethyl alcohol fermentation, and acetic acid fermentation. To make apple cider vinegar, we’ll be utilizing acetic acid fermentation.
Acetic fermentation takes place when alcohol is exposed to air and is converted to acetic acid, which, like I mentioned before, is another word for vinegar! Yes, your apple cider vinegar was once good ol’ apple cider.
You’ve probably noticed that if you leave a bottle of wine out, uncovered, for too long, it starts to smell and taste a bit vinegar-y…well, now you know why!

How to Make Apple Cider Vinegar
Learning how to make apple cider vinegar is a pretty forgiving and simple process. No real skill is required, and all you need is apples, some raw cane sugar, water and patience.
I don’t use exact ratios for this recipe because the amounts vary depending on the size of your jar and the amount of apples or apple scraps you use.
You’ll need:
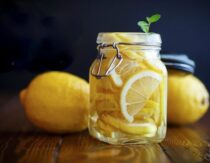
- A large, glass jar (half gallon mason jars work well)
- Cheese cloth + an elastic band to secure over the jar
- A glass weight (used to hold the apples below the surface of the water)
- Organic apples
- Filtered water
- Raw cane sugar (about 2-3 tbsp. for each half-gallon jar )
Step 1 – Prep
Prep your area – The only real thing that you’ll want to be cautious about is that the apples, utensils, jar and surface area that you’re working on is very clean – you don’t want to introduce any bad bacteria into the fermenting process, as it will spoil your ACV. Clean everything in warm, soapy water and leave to air-dry.
Prep your apples – Clean your apples in a sink full of cold water and wipe them down with a cloth to remove any residue or dirt. Make sure to cut off any yucky bits, bruises and blemishes before-hand – if you wouldn’t eat it, don’t use it for your ACV.
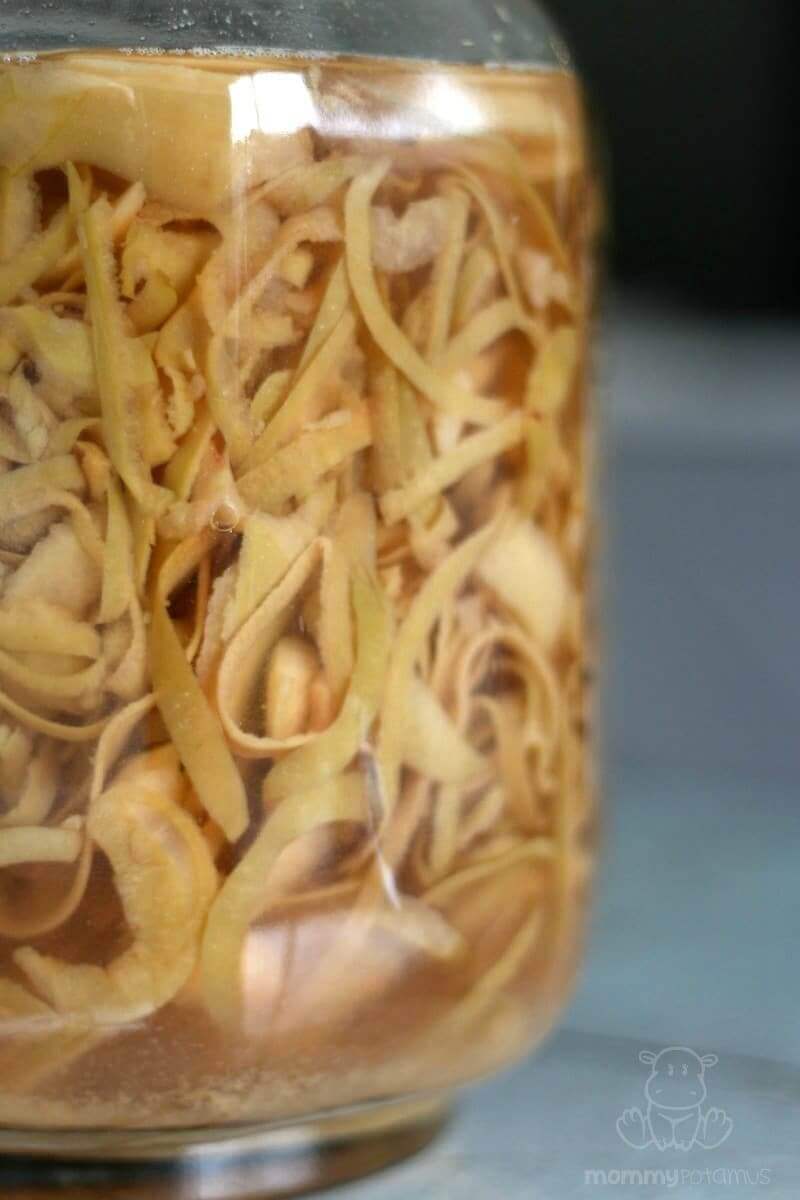
For this batch of ACV I used only the peels, and some of the core pieces, which I had left over from making apple sauce – very little apple made it to the compost!
If you’re using the whole apple, dice it in to small, half-inch pieces.
Step 2 – Assemble
Fill you jar 3/4 full of clean, diced apples.
Cover the apples with water and sprinkle with the sugar. The sugar will act as food for the beneficial bacteria which will help move the fermentation process along. (I’ve also made it without sugar, and instead used a 1/2 cup of ACV as a “starter” which worked well, too!)
Submerge the apples below the surface of the water. You’ll need to use a weight to prevent the apples from floating to the surface. I use special, glass fermentation weights, but you may have to get creative. Many people use a clean zip-lock bag filled with water, or a plastic lid, perhaps left-over from a yogurt or sour cream container, cut to size and then held down with a sterilized rock. Again, you may have to get creative. If there are pieces of apples left exposed to the surface air, they may mold which will spoil your ACV.
Cover the jar with a doubled-up piece of cheese cloth, and secure it with an elastic band to prevent fruit flies and critters from getting in.
Step 3 – Wait
Store your soon-to-be ACV in a room-temperature environment, away from direct sunlight (like in your pantry, or tucked away in an undisturbed corner of your kitchen) and leave it to ferment for 4 weeks. If the room is cooler then “room temperature” (about 70°F) then your ACV will take longer to ferment.
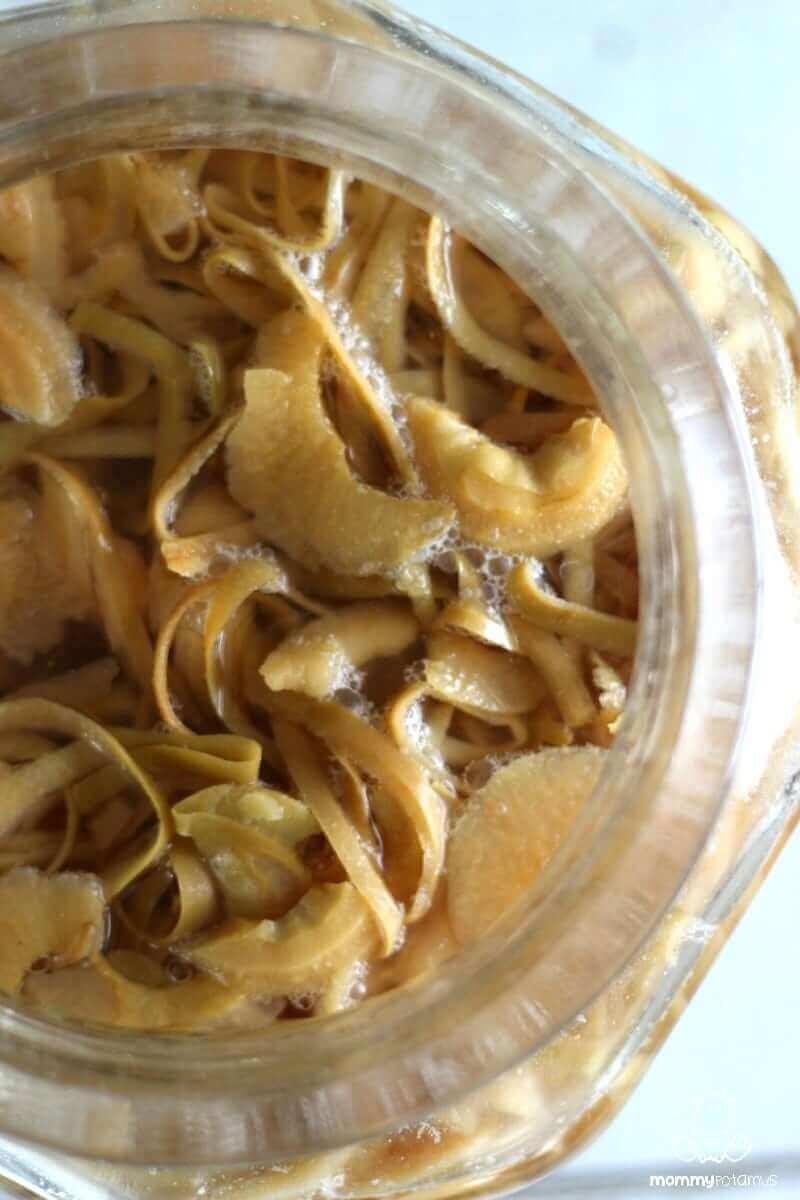
In about 3 days you should see little bubbles forming – this means it’s working! The beneficial bacteria are breaking down the sugars into CO2!
Check on the ACV every few days to ensure that the apples are still submerged. It should smell sweet in the beginning, and then eventually start to smell more and more sour.
Step 4 – Strain & Store
Something similar to a kombucha “mother” may form on the top, which is great – you can use it as a starter culture for your next batch of ACV, if you like. Simply store it in a small jar with some ACV, like you would your kombucha mother.
After about 4 weeks, it should be ready to strain. Use a cheese cloth to squeeze out, and break down, as much of the apple as you can.
Pour the liquid back into the jar, cover again with the cheese cloth, and leave it to ferment for another 2-3 weeks, stirring every few days.
Once it has developed the taste that you desire, you can now bottle it, seal it with a lid and start to use it.
About Carly Daley
Carly is passionate about the environment, sustainable living, and cooking healthy (yet delicious!) meals for her family. She’s a proud “modern hippie housewife” and mama of two!
Her hobbies include traveling, fermenting food and beverages, cooking from-scratch, gardening, dancing, DIY-ing almost everything, and relaxing after a long day by tuning in to whatever Netflix show she’s currently addicted to with her husband.
You can follow Carly’s journey over at ModernHippieHousewife.com, where she shares how easy it can be to live a cleaner, greener life!


Have you ever had an issue with ants coming after your ACV? I have a bad ant problem — they even come for my homemade cleaners! 🙁
I haven’t experienced a problem with ants in my home yet, but unfortunately, I imagine that they may be attracted to it!
Ants hate turmeric! I read that last year and all I had was curry powder that had turmeric in it and the ants disappeared. Diatomaceous earth works too!
Hello Heather. My ACV has black mold on the top 1/4 inch liquid, because I did not keep Apple’s submerged? It has been strained twice and mold came again just less. Is it ok or should I do the process again? Thanks, Patty
This will actually work in your favor to get rid of the ants! Take a small, open container (I use a very small mixing bowl or a ramekin) and put 1-2 drops dish liquid and a few tablespoons of apple cider vinegar. It will attract the ants (and fruit flies as well) to climb into the vinegar, but they won’t be able to get back out and will die in the bowl. It gets pretty gross, so you’ll want to change it out every day or two.
I recently experimented with this making my own a ACV. I am concerned that maybe some of the apples were exposed. But how do I know if what’s on top is good Or bad? I restrained the apples and have “mother” at the bottom of the jar but on top is a light skin of what appears to be pinkish color and the cider seems to be somewhat slimy and thick. I’m wondering is this a bad thing?
I make one batch after the other, two weeks apart. You may find you’ll need 3 – 4 containers, but these are easy to obtain from ‘cheap buy’ stores…. Just keep going. I’ve got three on the go at the moment….
I agree you need to keep everything clean, but “…if you wouldnt eat it it shouldnt go into your ACV.” is a bit over the top. I only use apples to make ACV when I would no longer eat them.
Do you check the pH of your ACV before calling it “ready”?
How long will the completed ACV keep in storage? I am pretty sure I’ll use it up pretty fast but what is your system for making, using and storing ACV so you always have it on hand but it doesn’t go bad?
When do you take the apples out and throw them away?
Could I make a vinegar out of any fruit? Or would it just become alcohol?
And would I be able to use it similarly to ACV if I did make it from a different fruit?
Yes most fruits can be made into vinegar. I’m making pineapple vinegar now, and raisin vinegar is also very common.
What can you use it for? Well what do you use ACV for?
The product that developers and sinks to the bottom of the jar after a period of time……
Should it be strained out? How long does apple cider vinegar last.
I have some that I have been using for a long time, it seems to be getting stronger, I’ve been adding water here and there to make it less potent. Need a little help here, please…
I would prefer to use apple cores and skins to make my ACVand cut down on waste… My question is if you think I could set aside these apple bits over time in the freezer until I have enough for a batch? This is what I do for chicken broth but unsure if freezing would effect the ferment?
I’m very interested in this too.
I have not actually tried it myself, but in the process of researching ACV making, I came across a fermenter who claimed to frequently freeze bits of apple until she had enough for a batch.
I have a large plastic jar that would be a great size to make ACV. Can I use platic to ferment?
As long as it is food safe, I would say so. Yes some say only glass, but I know of a commercial vegetable fermented that uses the 55 gallon blue plastic drums and simply covers the brine with big sheets of plastic wrap.
When I’m experimenting with different tea for kombucha I have a plastic half gallon pitcher I use.
One of my batches is the consistency of syrup before I took apple peels out. Does this just mean I was a little late in straining the the Mother is forming?
Thank you,
Cindy
I have been fermenting for 4 weeks while I was away on a trip and came back to find fruit flies and their maggots all over the cheese cloth and some even found their way into the jar. Is it toast? Do I throw it out? or should I just transfer to another clean container and put a better cover on it (since apparently cheese cloth wasn’t enough to hold the buggers back). It’s definitely still in the apple wine stage, not smelling vinegary yet.
I hate to say it, but I would throw it out. At this stage of the fermentation, any foreign object, bacteria or pest will undoubtedly compromise your brew. It’s just not worth the risk, honestly. I know it’s a shame to ‘waste’ the brew, but better be on the safe side, and not gamble. After all, the initial ingredients, mercifully, are neither expensive, nor scarce. Put it down to experience, and start again….
Dumbo here has just realised this question arose in November last year! How did you get on with that brew? What did you do, Jaclynn….?
I notice that everyone seems to prefer a glass jar for making ACV. Could I make it in my 2 gallon crock as well ? If so, can I use the lid or does it still need to be covered with cheese cloth?
After much trial and error, what I have managed to accomplish, is a perfect brew every time. I merely chunk the apples into reasonably-sized pieces, and fill my container to around half full, or just over. Then I pour in as many cups of spring water as the container will take, to enable the apples to float, leaving about a two-inch between the apples (suspended in the water), and the base of the container. I then add as the same quantity of tablespoons of sugar, as cups of water used. Just this morning I used 12 apples, 10 cups of water, and 10 tablespoons of sugar.
Thank you for your page. it is inspirational, and without it I probably would never have thought of making my own ACV.
Hi
My batch after throwing the chunks is delluted can i add more apples and leave it for a week to ferment maybe?
And simultaneously im doing another batch and it doesn’t smell any alcohol or acidic it smells more like rotten apples as this one i made in a narrow neck jar .. would i throw it away or can i just transfer and keep going
Thanks a lot
Mine has been fermenting for a week now and some of the apples are turning green. Should I toss it out and start over?
I have cider that started fermenting and what should I do to make vinegar.
Recently after an ant problem I used Liquid dishwasher in a spray bottle and which I sprayed all areas where ant were crawling after which no more ants.Try this it may help
Can you help me. I have a lovely acv mother culture (scoby) from a previous batch. Im wondering how I go about using it to make more acv. Do i use sugar and water or hard cider and water?
I started my ACV 7 weeks ago. I see some residual stuff at the bottom of the jar but no mother. The taste isn’t quite vinegary yet, is that normal? I have read in winter ACV can take longer to ferment. I have stirring it every couple of days. Is there something I can do or should I wait patiently? I have it on the kitchen counter tucked in the corner which gets no light. Any advice would be helpful. Thank you.
Yes, in cooler weather ferments can take longer. I would let it sit a bit longer 🙂
I didn’t check my ACV for a few days and the apples submerged! There’s a funny creamy film that looks like it could be the start of mold, but not mold, if that makes sense. What should I do? I hope I dont have to throw all this out!