
Have you ever pulled up a chair to a mouthwatering outdoor meal, only to realize that you are on the menu? Personally, I prefer to eat my shish kabobs without becoming a mosquito snack.
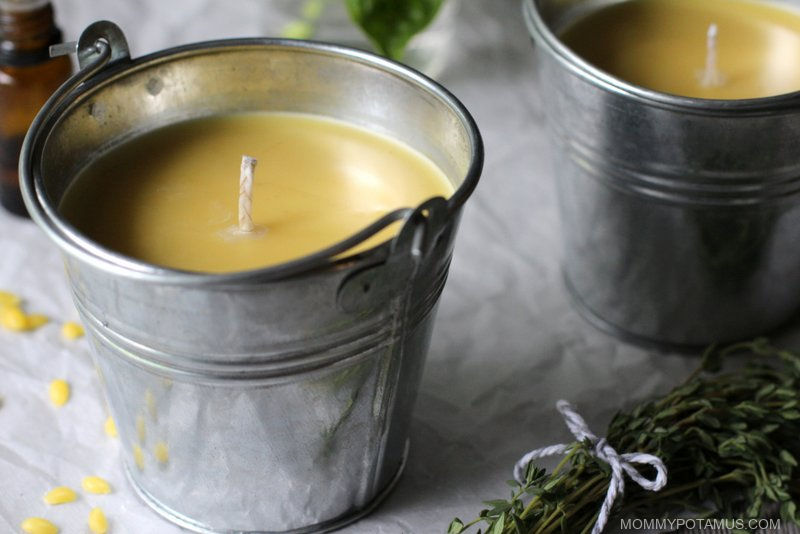
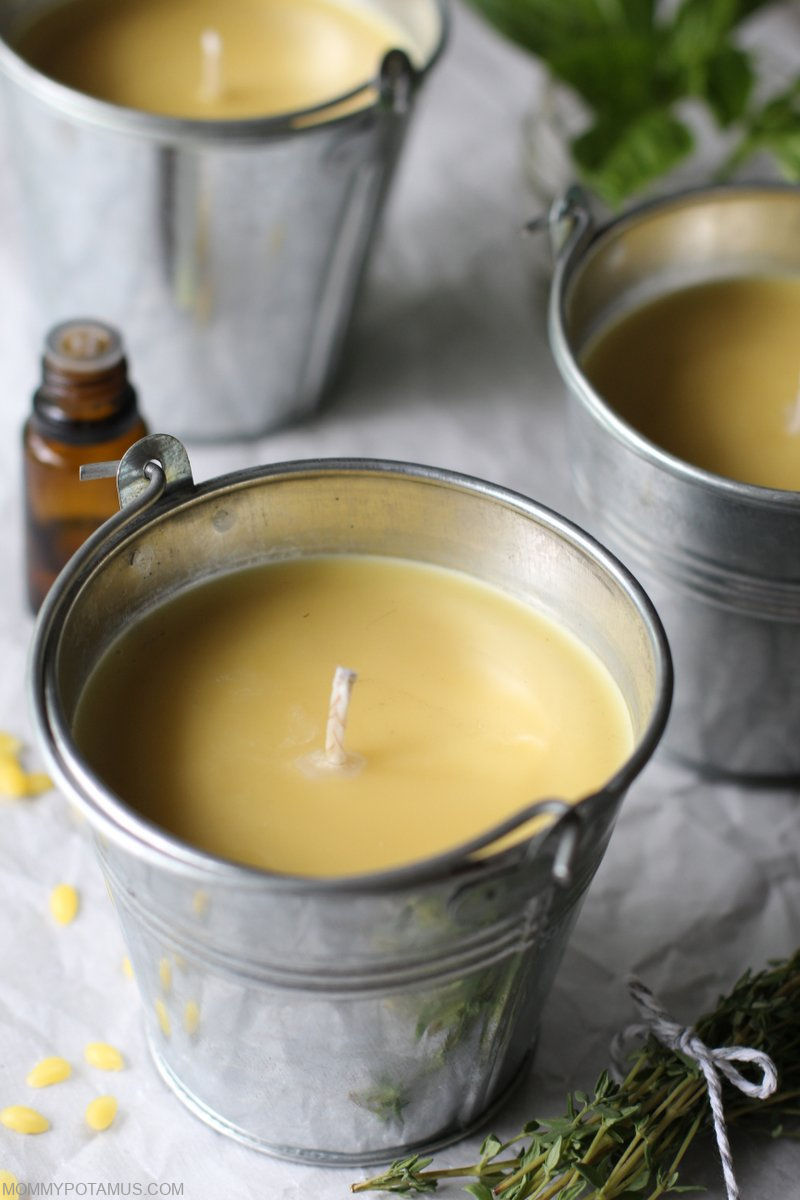
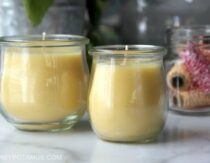
If you feel the same way, these DIY citronella candles are a safe, non-toxic way to repel mosquitos and other flying insects. They’re adapted from my homemade beeswax candle tutorial and super simple to make using leftover glass jars or candle containers. I love the way they add a bit of ambiance to our deck, too (especially around sunset).
Does citronella oil really repel insects?
Derived from a cousin of lemongrass, citronella essential oil is distilled from the leaves and stems of the Cymbopogon plant.
According to the Environmental Protection Agency, “Oil of citronella has been in continuous use as an insect repellent with human applications for almost 50 years without any adverse incidents being reported to the EPA.” (1)
However, recent studies suggest that another oil – lemon eucalyptus – may work even better. (2) Since essential oils often have a synergistic effect, I blend both together in my recipe.
How To Make Citronella Candles
This recipe will make two 12 ounce candles (the size of the buckets I used in the above photos) or three 8 ounce candles (the size of a half-pint mason jar). You’ll find a printable version of these instructions at the bottom of this article.
Equipment
- 1 pound pure beeswax (If you’re using raw, unfiltered beeswax, here’s how to filter it.)
- 1/2 cup coconut oil, melted
- 1 – 1 1/2 teaspoons (1/4 – 1/2 ounce) citronella essential oil
- 1- 1 1/2 teaspoons to 1 (1/4 – 1/2 ounce)lemon eucalyptus essential oil
- Medium cotton wicks with wick tabs attached, like these*
- Wick stickers
- Two 12 ounce candles (the size of the buckets I used in the above photos) or three 8 ounce candles (the size of a half-pint mason jar)
* Because beeswax candles are slow burning, they require thicker, sturdier wicks than what is used for paraffin candles. Keep in mind that the way a wick burns will vary based on many factors, including the size of the container and how refined the beeswax is.
I’ve shared which wicks have worked for me using refined beeswax and the jars above, but it may take a little experimentation to find the perfect size for your wax/container combo.
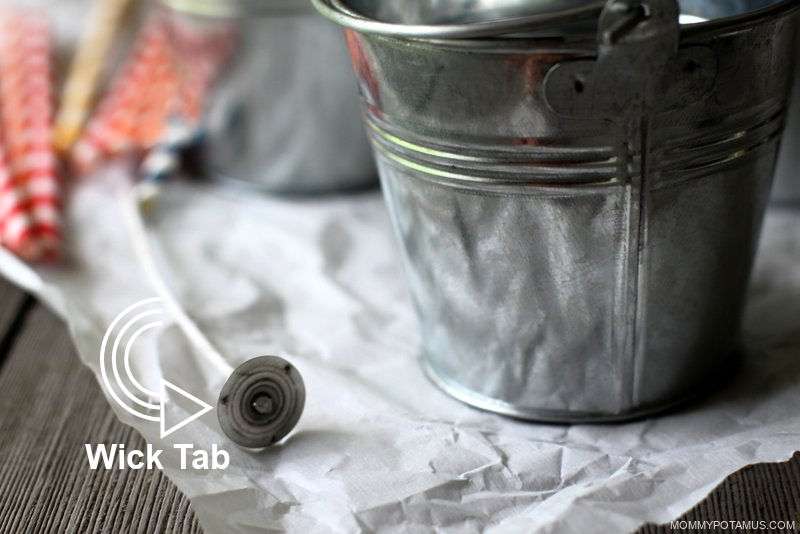
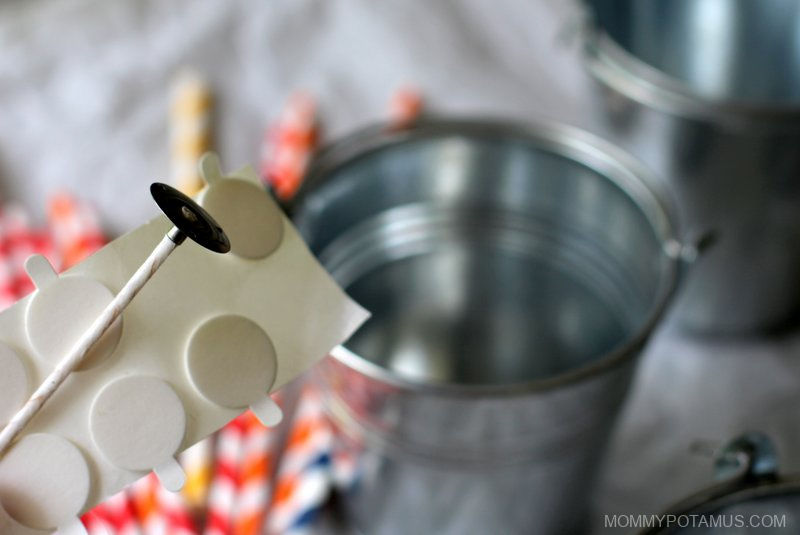
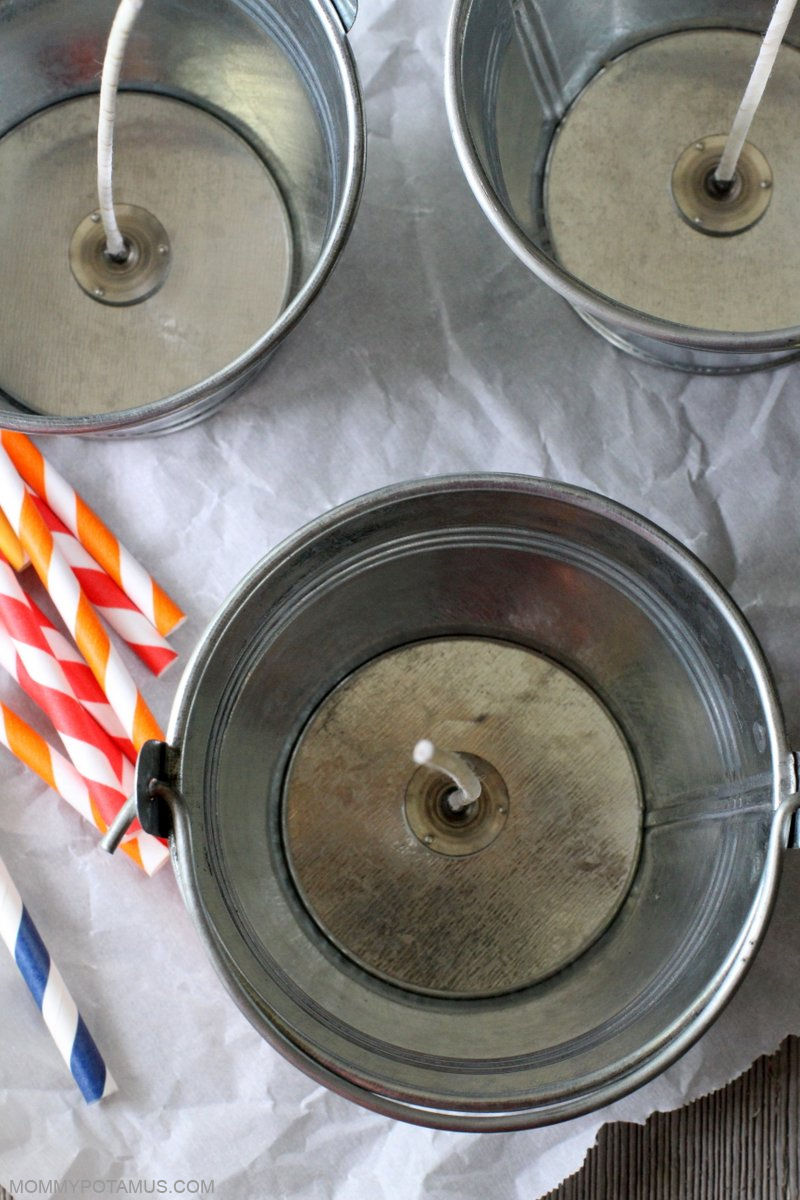
Step 1: Prepare your candle jars
The wicks I recommend come with a metal tab attached to the bottom. The tabs keep the wicks from floating as the candle wax melts. Attach one of the stickers to the bottom of the wick tab and then place the wick in the center of your container.
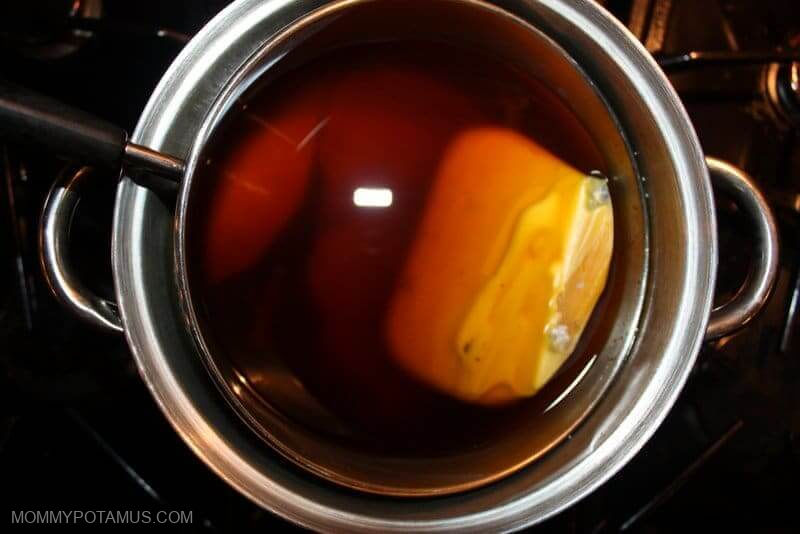
Step 2: Melt beeswax and coconut oil in a double boiler
In a double boiler (or large pot of simmering water with a stainless steel bowl or smaller pot resting inside), gently melt the beeswax and coconut oil over low heat.
Step 3: Add citronella
Once the wax is fully melted, remove it from heat and stir in the citronella. Move quickly to the next step – the wax begins to harden as soon as it cools.
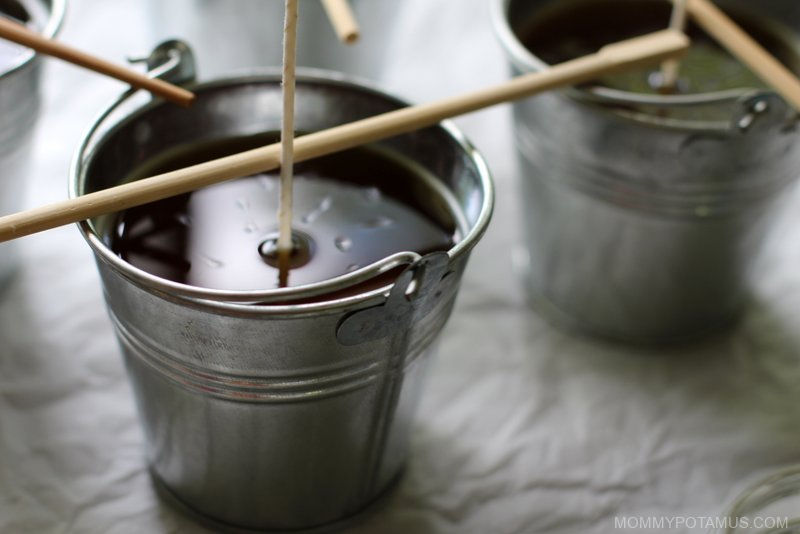
Step 4: Pour beeswax mixture
Pour the melted wax into your container and check the position of the wick to make sure it is still centered.

Step 5: Set the wick
Use a pencil or chopstick to prop the wick up in the center. My wicks are dipped in wax so they stand up well with just a little support. If you’re using wicks that are not dipped, you may need to tape them to the pencil/chopstick to keep them in place.
Step 6: Allow candles to set
Sometimes candle wax cools too quickly it tends to crack down the center. With the galvanized buckets I used for this set that wasn’t an issue at all.
However, if you find that your candles do crack while cooling, you can heat your oven to 300F, place them inside and then turn off the oven. The candles will melt just enough to fill in the crack – all you need to do is leave them in there until they’ve completely cooled. Make sure to keep your pencil/chopstick in place to secure your wick.
Step 7: Trim wick
Allow your candles to harden for 24 hours, then trim the wick to about 1/4 inch. Allow to cure for another 24 hours before using.
When lighting your candle, direct the flame at the base of the wick so that some of wax melts and is drawn up into the wick – this helps it burn properly. Allow candle to burn long enough so the wax melts out to the side of the jar. This helps to prevent tunneling (when the middle melts down with lots of wax left over around the edges). Never leave a candle unattended.
Cleaning Tip: Place any oven proof containers in a warm oven to melt wax that has dried on the sides. Once the wax is melted, wipe it out with a paper towel or old newspaper.
What To Buy If You Don’t Want To DIY
Candle making is one of my favorite DIY projects, but when time is short I sometimes opt for safe, pre-made options.
This organic beeswax and citronella candle is my top choice. It’s a beeswax-based candle that also incorporates “gleanings,” which are food-grade organic oils and butters used to make non-toxic skincare products. I love that it helps to reduce waste and it has a long burn time (up to 30 hours).
Frequently Asked Questions
It’s possible if you use a wider container that holds 24 ounces and double the amount of beeswax, coconut oil and citronella oil you use. However, I’d definitely recommend the medium wicks instead of the large ones if you are going to have more than one.
I haven’t tested it but candelilla wax might work. It has a similar melting point to beeswax.
These handmade citronella candles burn for 40 hours.
It depends on a lot of factors. If it’s a windy day you’ll likely need more, and if there aren’t many critters out you’ll likely need less.
To make bug spray!
Unlike true eucalyptus, which contains high amounts of 1.8 cineole that can cause breathing problems in children, both citronella and lemon eucalyptus are considered safe for children.
Homemade Citronella Candles
Ingredients
- 1 lb pure beeswax (If you're using raw, unfiltered beeswax, here's how to filter it.)
- ½ cup coconut oil
- 1-1½ tsp citronella essential oil (1/4 – 1/2 ounce by weight)
- 1-1½ tsp lemon eucalyptus essential oil
- 2-3 medium cotton wicks with wick tabs attached
- wick stickers
- Two 12 ounce candles (the size of the buckets I used in the above photos) or three 8 ounce candles (the size of a half-pint mason jar)
Instructions
Prepare Your Candle Jars
- The wicks I recommend come with a metal tab attached to the bottom. The tabs keep the wicks from floating as the candle wax melts. Attach one of the stickers to the bottom of the wick tab and then place the wick in the center of your container.
Melt & Pour The Wax Mixture
- In a double boiler (or large pot of simmering water with a stainless steel bowl or smaller pot resting inside), gently melt the beeswax and coconut oil over low heat.
- Once the wax is fully melted, remove it from heat and stir in the citronella. Move quickly to the next step – the wax begins to harden as soon as it cools.
- Pour the melted wax into your container and check the position of the wick to make sure it is still centered.
Set The Wick
- Use a pencil or chopstick to prop the wick up in the center. My wicks are dipped in wax so they stand up well with just a little support. If you're using wicks that are not dipped, you may need to tape them to the pencil/chopstick to keep them in place.
- Sometimes candle wax cools too quickly it tends to crack down the center. With the galvanized buckets I used for this set that wasn't an issue at all. However, if you find that your candles do crack while cooling, you can heat your oven to 300F, place them inside and then turn off the oven. The candles will melt just enough to fill in the crack – all you need to do is leave them in there until they've completely cooled. Make sure to keep your pencil/chopstick in place to secure your wick.
Trim The Wick
- Allow your candles to harden for 24 hours, then trim the wick to about 1/4 inch. Allow to cure for another 24 hours before using. When lighting your candle, direct the flame at the base of the wick so that some of wax melts and is drawn up into the wick – this helps it burn properly. Allow candle to burn long enough so the wax melts out to the side of the jar. This helps to prevent tunneling (when the middle melts down with lots of wax left over around the edges). Never leave a candle unattended.
Notes
Want a FREE ebook of non-toxic cleaning recipes that WORK?
I’ve created a free ebook for you as a gift for signing up for my newsletter. 7 Non-Toxic Cleaning Recipes That Really Work covers seven recipes that you can make in just a few minutes each for squeaky clean windows, sparkling dinnerware, lemon-fresh countertops, and more. Subscribe to my newsletter below and you’ll be redirected to a download page for immediate access to this PDF ebook.
Sources:
1. Peters, Paul and Schaefer, Christof (2007) Insect Repellent.
2. Marta, Ferreira Maia and Moore, Sarah J. Plant-based insect repellents: a review of their efficacy, development and testing.


Love the idea of making my own citronella candles. At the moment I don’t have the time/ energy (chronic illness). Do you know a good company to buy citronella candles from?
Yes! Badger makes a beeswax and citronella candle that uses leftover trimmings from their body care products to reduce waste. I’ll look up a link and add it to the article.
Is there another wax I can use? I’m vegan.
Use soy isnt that what vegans use for everything? You can use any wax. bees wax is just the best as everything that comes from animals is better. Kinda like chicken tastes better then tofu.
Candellia wax is derived from plants. I use it for my extreme Vegan daughters lip balm & sunscreen. Costs the same as beeswax on Amazon
Can you confirm this recipe info please it is a bit confusing. In the ingredients, you have for the citronella essential oil, you have 1-1/2 tsp to 1. Is that 1-1/2 step of citronella per ounce? That would be 1-1/2 tsp x 24 which is a lot of citronella oil. Please clarify on this, or if you can put it into the amount of drops needs for this recipe. Thank you.
Hi Kim, sorry about that. It should say 1-1.5 teaspoons.
Can I use fractionated coconut oil instead of solid coconut?
Unfortunately, no. It would make the candles too soft.
Rob, I wonder what happens when the vegans realize plants have feelings too. I need to study up on this monoculture soy crop. What will we use all our land for if we don’t grow plants. And, how do we know the bees did not get into a non organic plant or field.
I’m wondering the same thing.
How many candles do you recommend for a small backyard and how far about should I spread them to keep mosquitoes at bay.
It depends on a lot of factors. If it’s a windy day you’ll likely need more, and if there aren’t many critters out you’ll likely need less.
The beeswax you linked to is not available on amazon. Do you remember how much it cost so I can do a price comparison? Love, love this.
We have citronella plants at each exit. The kids grab a leaf and rub in it on exposed areas. How can I make these with the actual plant?
How lovely that you have citronella plants! Unfortunately I am not aware of a way to do that without distilling them.
To make citronella essential oil, you need to shade dry the shoots, including the leaves, of the plant.
After they are dry, chop them and add to a solvent; like oil or alcohol. Since you need it for candles, you may use any smell neutral oil.
Heat the mixture to about 100 degree Celsius, for about 10 minutes and allow it to cool overnight.
Strain the oil next day and add more shoots. Repeat the process.
More the repetitions, more concentrated will be the final product.
Cool Can I use this same recipe for making bug spray with lemon eucalyptus and if I use alcohol should I avoid the cooking and just let it steep longer?
You can look on directions of how to make your own essential oils. Three ways one is put enough oil to cover the leaves and let sit for a month shaking periodically, let sit in crockpot and once a week for four weeks strain and add more leaves, three is put leaves in a pot and cover with oil put over a double boiler and gently boil for five minutes and let sit until cool and then strain. If you feel it’s not strong enough add more leaves and repeat the process.
What you guys are describing in an infused oil, not an essential oil. Infused oils are great and they serve a purpose, but an essential oil is the actual oil from the plant and can not be made from home with out a distiller.
Essential oils aren’t actually an oil, they are just labeled as such because they are hydrophobic – they don’t like water. Technically, they are volatile liquids containing essences of the plant they are derived from. That being said, essential oils can be extracted in many ways, an infused oil will still be effective, even if it isn’t as concentrated as an essential oil, because it is still extracting the essence from the plant, it just isn’t pure essence. But if you use enough infused oil in a recipe, it will probably be as effective as the very little essential oil used in a recipe, particularly if the oil has been infused several times.
The link you give for the beeswax is currently unavailable. Do you have another recommendation as to where to buy on Amazon? Thanks! Excited to make this!
Just updated the link!
Can you substitute other oils for the citronella for other scents around the house and would the amount of oil vary based on the fragrance?
Yes, I share some additional scent options here: https://mommypotamus.com/beeswax-candles/
Some essential oils, like peppermint, are very strong compared to others so you’d probably want to reduce the amount used in those situations.
I love this tutorial Heather! Candle making is quite enjoyable 🙂
Maybe I’m just missing it, but where does the 1/2 cup of coconut oil come in? I don’t see it referred to in the directions
Glad you ask that cause I was wondering also.
Ohhh, thanks for catching that! The coconut oil should be melted with the beeswax in the double boiler. Updating the instructions now.
Would these be safe to burn around a 17 month old child?
Thank you
It is generally considered a kid-safe oil, yes. You can read more about using essential oils with children here.
Any other receipes regarding candle making .kindly do share
You can find my other recipe here: https://mommypotamus.com/beeswax-candles/
Hi just curious if it truly requires that much essential oil for just two candles? That seems like a lot so just checking! Thanks!
Yes 🙂
These look perfect for the summer months. I am about to have a go at making some candles so will try this recipe out too.
These look great for the summer outdoor scene, I will most certainly try these candles and appreciate your posting the recipe for making them. Thank you so much.
Sandy Skirlock
Hi,
I am glad I have found this recipe as I wasn’t sure on the amount of essential oils to use in my candles. But I’m a bit confused about the measurement. (Might be because I’m in Australia. 😉 )
When you say “1 1/2 teaspoons to 1”, does this mean half a teaspoon to 1 teaspoon or 1 and a half teaspoons?
Thanks. 🙂
Poops, I see why that’s confusing. It should say 1-1.5 teaspoons.
I made these with my son, and did have a very fun time! Thanks for sharing it!
Love making candles but I am no expert, still learning. I was wondering why you use coconut oil with the wax, does this make a better candle or is it just for bees wax only, I usually use wax and I have never heard or read about using coconut oil.
1/2 oz essential oil by weight? Or do you mean by fluid ounce?
Weight.
Good morning Heather
I want to make these this coming Saturday, but are they safe to use indoors?
They would be pretty strong smelling for indoor use. I’d go with this recipe instead.
Like your idea for the candles. I was wondering have you ever made any essential oils yourself. If so how did you do it. I haappen to have a lemon eucalyptus tree in my back yard, I would love to try. I’ve made dye with it to color papers with they come out to a nice sage color. Thank s for any advice.
No, I have not personally distilled any essential oils.