
Although my paleo almond flour pie crust has been my go-to for years, that was pretty much because I was busy keeping tiny humans alive and couldn’t figure out how to create a rollable dough that was buttery, flaky and SIMPLE.
As in, one that wouldn’t require me to special order 87ish types of flour that my local health food store doesn’t carry. Lately though, my daughter – who published a cookbook with her friends last spring – has been all about developing new recipes, so we decided this was the year to create a rollable dough.
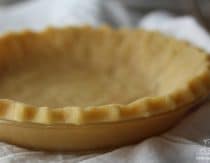
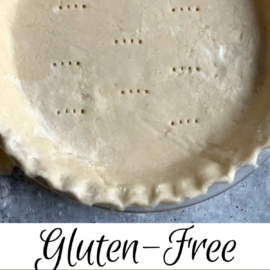
This soft, pliable gluten-free dough is made with ingredients that are pretty easy to find and yields a flaky, golden brown crust that my family loves. It’s also free of xanthan gum, which can cause digestive upset for some people.
How To Make A Gluten-Free Pie Crust
If you’ve ever read the instructions for making a pie crust, you might have wondered exactly what a pea-sized amount of butter looks like or how to know when the dough is 1/8 inch thick.
With that in mind, I thought I’d show you visually what the process looks like. There’s also a recipe card with the full recipe and instructions below.
Step 1: Freeze Your Butter (Or Other Fat)
The first step is to divide your butter, palm shortening or lard into 1 tablespoon increments and place them in the freezer while you measure out your other ingredients.
One of the keys to getting a flaky crust is to have little pea-sized pieces of fat distributed throughout the crust instead of being completely mixed in. Using a very cold fat is essential to achieving those little pea-sized pieces.
Step 2: Measure Your Ingredients
Whisk your wet ingredients in a bowl and set them aside until they’re needed.
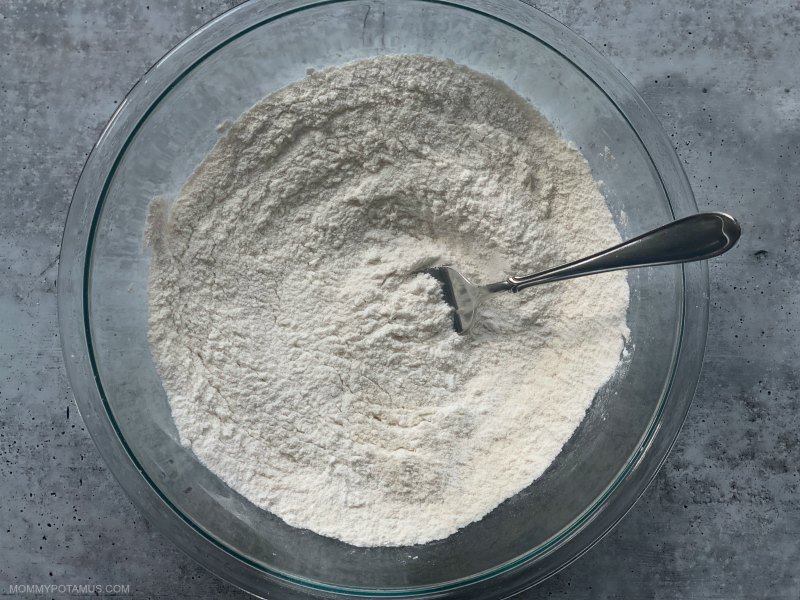
Next, add your dry ingredients to a large bowl.
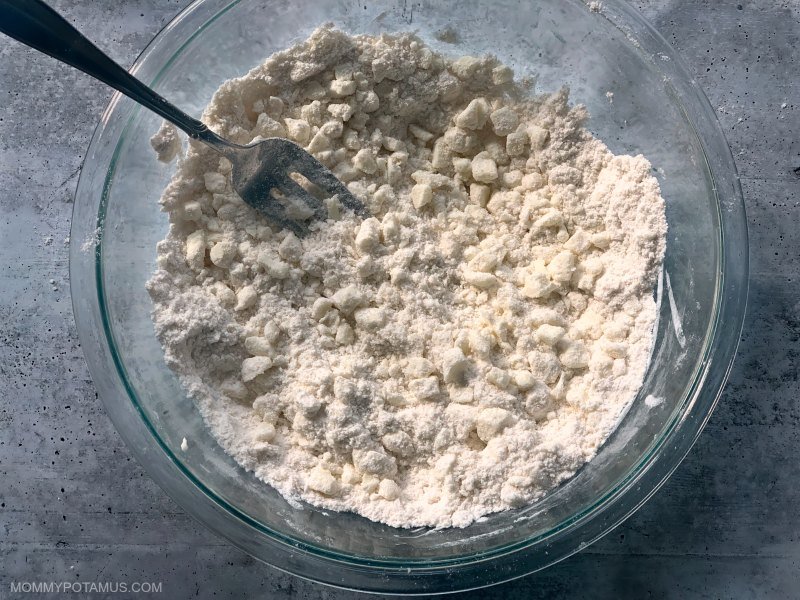
Step 3: Mix
When the fat is very cold, cut it into pieces that are a little larger than the size of a pea and add them to the bowl. Using a pastry cutter or large serving fork, cut the fat into the flour until it is in pea-size pieces.
Next, add the wet ingredients and lightly mix until the mixture is evenly distributed. If there is still some flour that is dry (and there likely will be), add ice cold water in 1 teaspoon increments until the dough holds together.
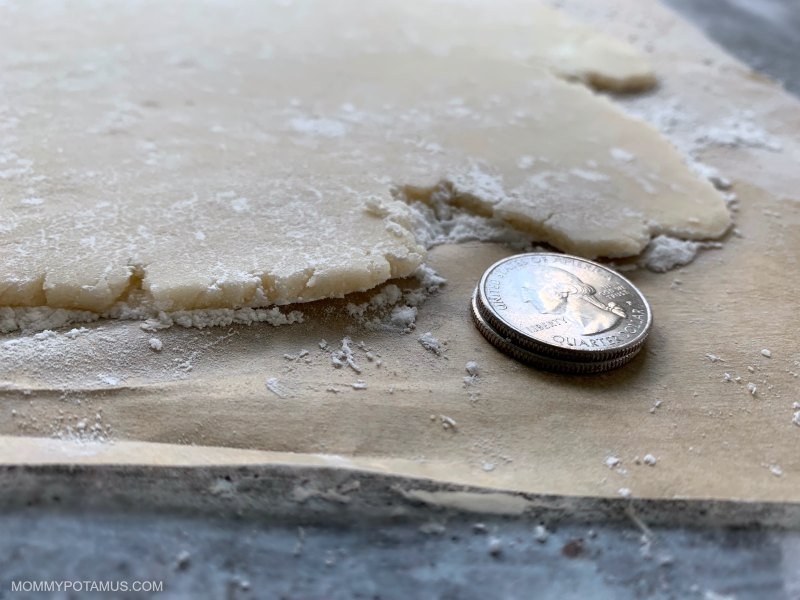
Step 4: Roll
Sprinkle some arrowroot flour on parchment paper and place the dough on top. Cut it in half and set one half in the fridge until you’re ready to use it.
Roll the first piece of dough out until it is 1/8 inch thick . . . that’s about the thickness of two quarters on top of each other.
Place the pie pan on top of the dough and your hand underneath the parchment paper. Gently flip the pie pan over so that the dough is inside, then peel away the parchment paper.
Tip: When making pie crusts, I find it’s easier to work with too much dough rather than too little. However, if there is a lot of dough hanging over the edge when you flip the dough it can weigh the crust down and cause it to pull apart. For that reason, I trim the dough a little before I place the pie pan on top of it and flip.
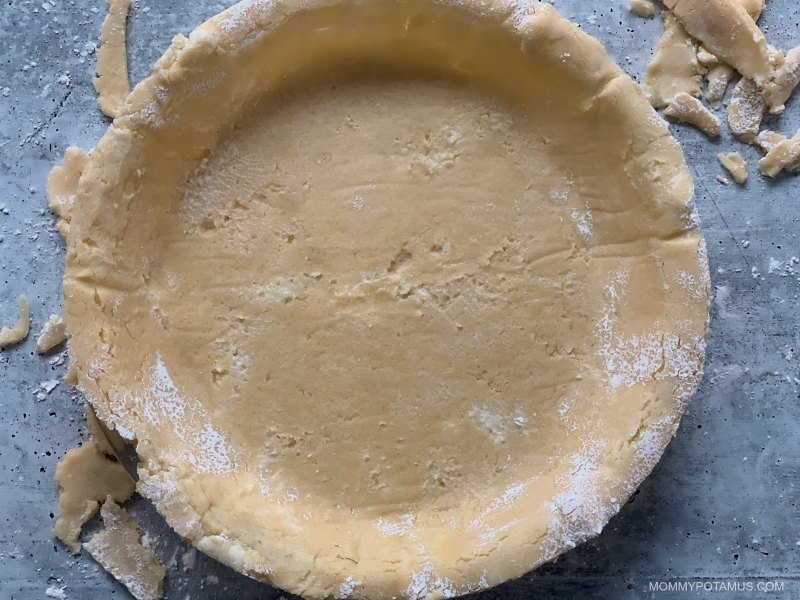
Step 5: Trim & Crimp
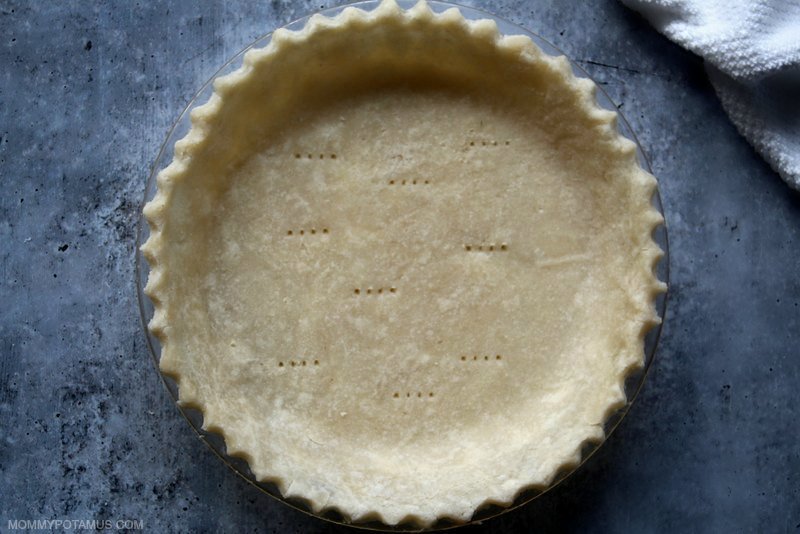
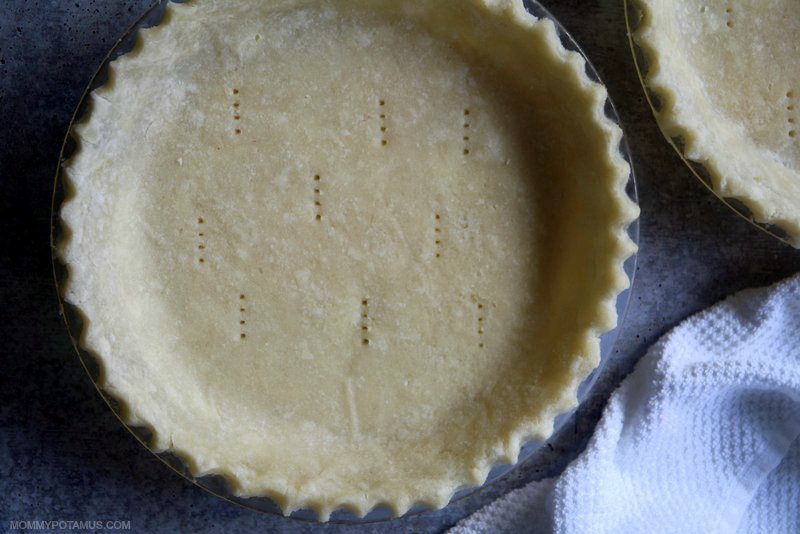
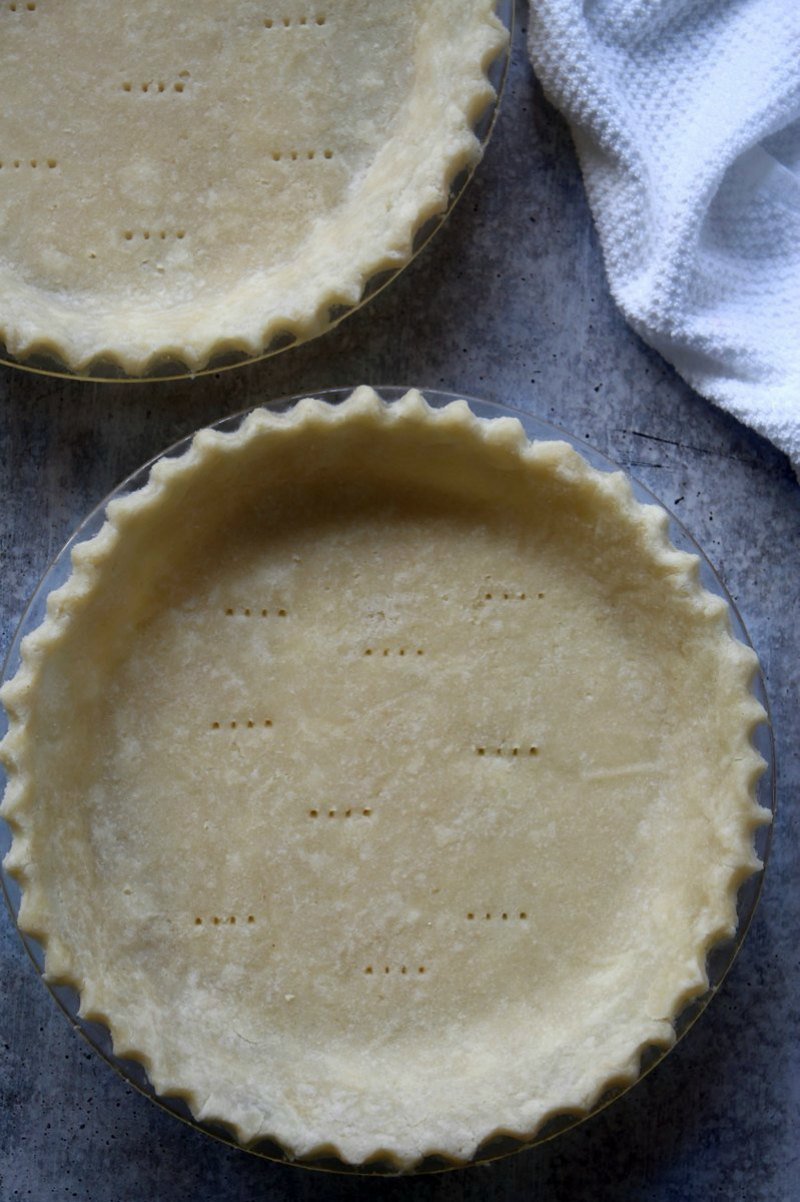
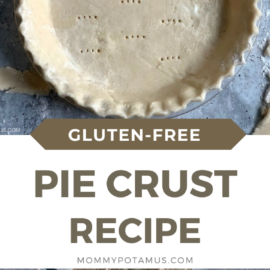
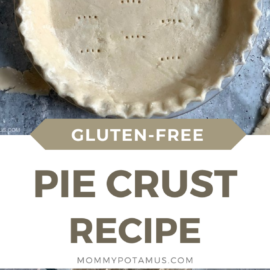
Cut away any dough that is hanging over the edge of the pie plate and crimp the dough with your hands. Using a fork, place some holes in the bottom of the crust.

Step 6: Bake
Place the pie crust in the the oven for 12 minutes if it needs to be pre-baked. If it need to be fully cooked, bake it for 40-45 minutes. Repeat the process with the second piece of dough.
Tips & Tricks
Before I share the recipe, here are a few tips for getting the best results:
- Use a pie crust shield to protect the crust edges from overbaking.
- If you typically roll lopsided or uneven crusts that don’t quite fit in your pie pan, a pie crust bag can be helpful for rolling even, round dough that’s easy to work with.
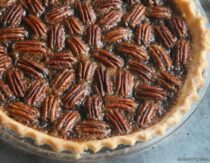
- If your filling is very wet (think quiche, pumpkin pie or pecan pie), you’ll want to pre-bake the crust for 10-12 minutes to prevent the bottom from becoming soggy. After you’ve done that, let it cool for 5-10 minutes, then add the filling and bake according to the recipe instructions.
- If you’re making something like a coconut cream pie that calls for the filling and pie shell to be cooked separately, you’ll want to fully bake the crust for 40-45 minutes at 350F before letting it cool and adding the filling.
- If you’re making an apple pie or similar fruit pie, you don’t need to pre-bake your crust unless the recipe specifically calls for it.
- Although most crust recipes call for chilling the dough in refrigerator for an hour or more, that’s mostly to allow some of the gluten in traditional crusts to break down so that the crust is easier to work with. This recipe doesn’t contain any gluten that needs to break down so it doesn’t require a long period of refrigeration. If you’re using a very cold fat as recommended it should be cool and easy to work with.
Gluten-Free Pie Crust Recipe
Equipment
- Pastry cutter or large fork
- Two 9 inch pie dishes
- Pie crust bag or parchment paper
Ingredients
- 18 tbsp arrowroot powder (plus more for rolling)
- 1 cup white rice flour
- 1 cup brown rice flour
- ¼ + ⅛ tsp sea salt
- 3 egg whites from large eggs
- 1 tbsp lemon juice
- 4½ tsp maple syrup (substitute with water for savory pies)
- 1½ tsp vanilla extract (omit for savory pies)
- 14 tbsp cold palm shortening, unsalted butter, or lard cut into chunks (can maybe sub coconut oil)
- 1-3 tablespoons cold water if needed
Instructions
- Divide your butter, palm shortening or lard into 1 tablespoon increments, place them on a plate lined with parchment paper, and pop them in the freezer freezer to chill for 15-20 minutes.
- When the fat you're using is done chilling and you're ready to start, preheat your oven to 350°F.
- Place the eggs, lemon juice, maple syrup (or water for savory crusts), and vanilla extract (if using) in a small bowl and whisk together. Set aside.
- In a medium bowl, combine all the dry ingredients (arrowroot, white rice flour, brown rice flour, and salt).
- Remove the fat from the freezer and cut it into small chunks that are a little bigger than a pea. Add them to the bowl with the flour. Using a pastry cutter or large fork, cut in the butter/fat until it's in pieces that are a little smaller than a pea. (It's okay if there are a few pieces that are larger, too.)
- Once the fat is worked in, add the liquid mixture and lightly mix until evenly distributed. If it's too dry, add cold water in 1 teaspoon increments until it holds together. If very cold butter (or another fat) is used, the dough should be cold enough to roll right away. However, if you're working in a hot environment or the dough feels warm, place a moist towel over the bowl and chill it for 10-15 minutes before going to the next step.
- Sprinkle some arrowroot powder on parchment paper and place the dough on top. Form the dough into a ball and cut it in half. Place half of the dough in a bowl that is covered with a damp towel and place it in the fridge.
- Dust your rolling pin and parchment paper with more arrowroot powder and place the remaining piece of dough on the surface. The flat side that you just cut should be facing down. Roll the dough until it's about 1/8 inch thick. That's about the height of two quarters stacked on top of each other. Tip: I usually rotate the parchment paper a little after each roll in a circular motion to achieve a round shape and place the pie pan over the top throughout to see when it's large enough. It should overlap the pan edge a little when it's ready. A pie crust bag makes rolling an even, nearly perfect round crust much easier.
- After reading the tip below, transfer the pie dough to your pan. I usually do this by placing the pan on top of the crust, sliding my hand underneath the parchment paper, flipping everything over, and then peeling off the parchment paper. Tip: When making pie crusts, I find it's easier to work with too much dough rather than too little. However, if there is a lot of dough hanging over the edge when you flip the dough it can weigh the crust down and cause it to pull apart. For that reason, I trim the dough a little before I flip.
- Cut away any dough that is hanging over the edge of the pie plate and crimp the dough with your hands.
- Using a fork, place some holes in the bottom of the crust. Place the pie crust in the the oven for 12 minutes and get ready to work on the next crust. (Make sure you remove the crust when the timer goes off, even if your second crust is not quite ready to go in.)
- Remove the second piece of dough from the fridge and place it on the floured work surface. If I have a lot of trimmings left over from the first crust I sometimes dust off any excess flour and work them into the second batch of dough before rolling. Repeat rolling process.
- Using a fork, place some holes in the bottom of the crust. Place the pie crust in the the oven for 10-12 minutes, then remove and allow to cool for 5-10 minutes before adding your filling.
- Add filling bake according to recipe instructions. See the Tips & Tricks section for details on making fruit pies or pies that require the pie crust to be fully cooked before adding the filling.
Notes
 Tried this recipe?
Mention @mommypotamus or tag #mommypotamus!
Tried this recipe?
Mention @mommypotamus or tag #mommypotamus!
Nutrition
More Recipes To Try
Chicken Pot Pie – This homemade chicken pot pie has a buttery crust and creamy chicken and veggie filling that makes it one of my family’s favorite comfort foods. It’s gluten-free (and dairy-free optional) and can be made into five mini-pot pies or one big pot pie casserole.
Gluten-Free Artisan Bread (Boule Bread) – If you love sourdough bread but just can’t commit to maintaining a starter, this boule bread recipe is for you. It has a golden, crusty outside and a soft, airy inside, and it incorporates yogurt to give it a flavor that is similar to sourdough, but without all the hassle.
Want more delicious, easy recipes?
No problem, I’ve created a free ebook for you – 35+ Gluten-Free Desserts – as a gift for signing up for my newsletter. Every Sunday you’ll get recipes, actionable health tips, and highly-vetted product recommendations delivered fresh to your inbox.
Sign up using the form below.


Thanks for the recipe. I’d like to try this, but I have no idea how to measure 14 tbsp butter unless it’s melted first. Perhaps next time you make it you could weigh your ingredients and provide the weight in grams or ounces? (I assume you’re using US tablespoon measurements, which are not universal.)
Would appreciate measurements by weight 😀