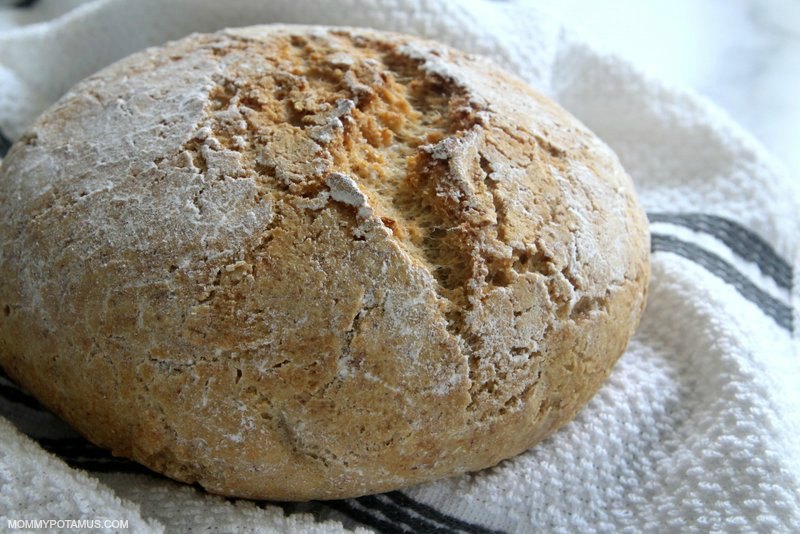
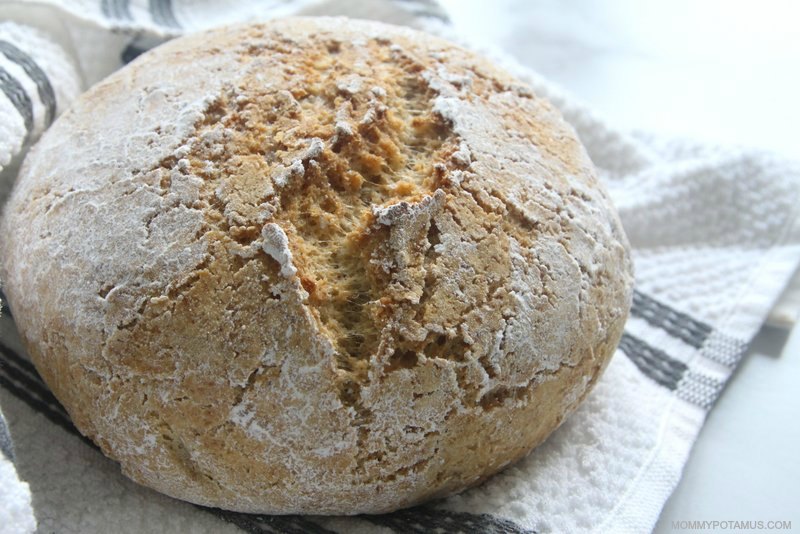
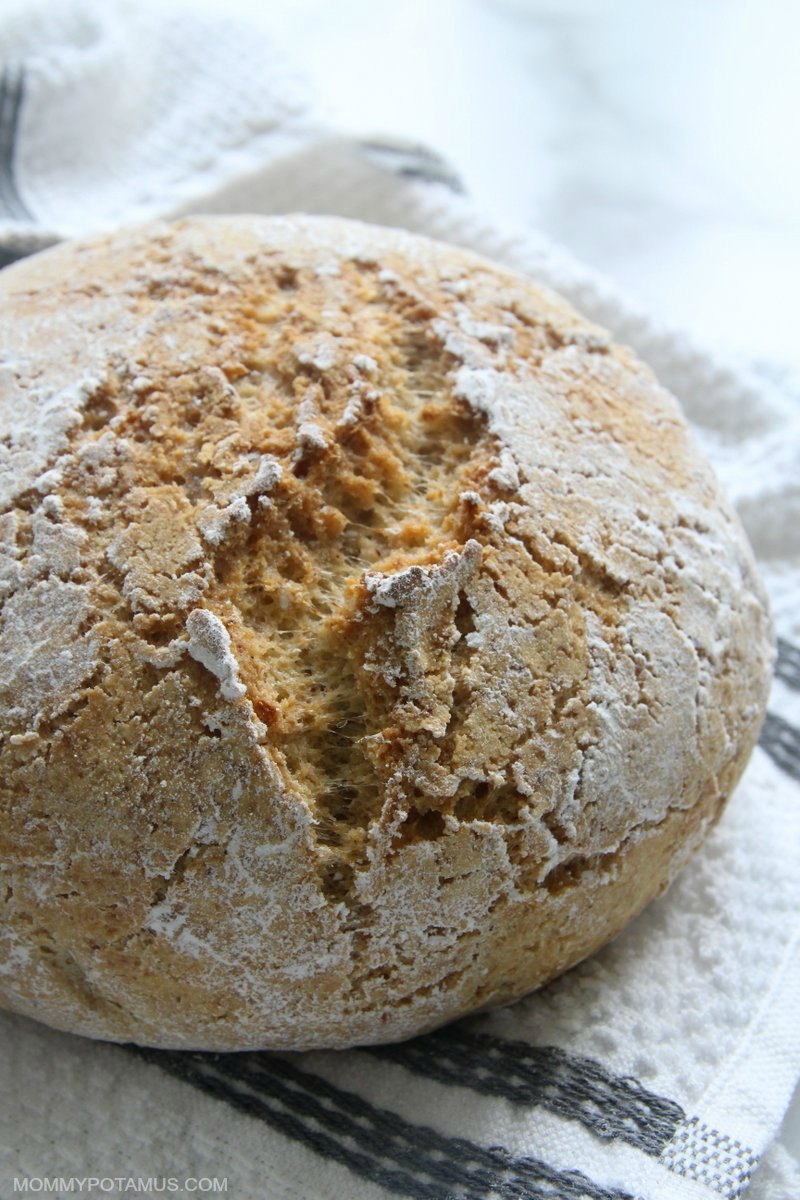
Sometimes a nice, soft loaf of paleo bread is just what you need . . . especially if it’s slathered in strawberry jam. Other times, though, nothing but a crusty artisan loaf will do. If you love sourdough bread but just can’t commit to maintaining a starter, this recipe is for you.
Also called boule bread (boule is French for “ball”), this gluten-free artisan bread can be made in just a few hours (including rising time) from start to finish.
My version incorporates yogurt to give it a flavor that is similar to sourdough, but without all the hassle. Dairy-free yogurt works just as well as regular, making this recipe both gluten-free and dairy-free if needed.
The Secret To Crusty Bread
The secret to crusty bread is, ironically, steam. During the first part of the baking process, steam keeps the outer dough moist while the inside of the bread rises and cooks. It also reacts with the starch on the surface of the dough to create a crisp, golden crust.
To achieve this effect I bake my boule bread in this super affordable cast iron dutch oven. It has a heavy lid that captures and holds moisture in for the first part of the baking process. After that, the lid is removed so that the outer crust can bake into lightly golden, crispy goodness.
Video: How To Bake Gluten-Free Artisan Bread
3 Important Tips
I’ve tried to think of every way this recipe could potentially flop and let you know in advance, the the instructions are SUPER detailed below. It’s not because making this bread is difficult – it’s not – I just want you to have all the info you need to easily enjoy hot, crusty, gluten-free goodness.
For example, rule number one to baking success with this recipes is . . . .
1. Make Sure Your Yeast Is Active
While flatbread is delicious, no one wants a dense loaf of boule bread. With that in mind, it’s important that your yeast is active and therefore able to help the dough rise. If it’s brand new it should be fine, but if you’ve had it for awhile and you’re not sure if it’s still good, there’s a simple way to check.
The process is called proofing, and here’s how you do it: Heat a little water to 110-115F, add a couple tablespoons to a small bowl with a generous pinch of yeast and a little bit of honey. If it’s foaming within a few minutes it’s good.
2. Measuring Wet Vs. Dry Ingredients
In some recipes it’s perfectly fine to use the same measuring cup for wet and dry ingredients. Others, like this one, work better when you use liquid measuring cups (the ones with handles and spouts for pouring) for liquid ingredients and dry measuring cups (like these) for dry ingredients.
When measuring dry ingredients, spoon the flour into the cup and run a flat edge over the top to remove any excess flour. Shaking the cup until the top is even packs the flour down and can result in a more dense loaf.
2. Keeping Yeast Fresh
If you don’t bake with yeast frequently, store it in the freezer to keep it active for a longer period of time. Make sure to let it thaw to room temperature before using it in recipes.
Ways To Use Gluten-Free Artisan Bread
- To make hot, oven roasted garlic bread
- With soups & stews
- Slathered in garlic herb compound butter
- As a side for blackened shrimp and scallop fondue
- To make homemade croutons
- With a generous spoonful of homemade jam (strawberry, blackberry, peach, elderberry & strawberry,
Gluten-Free Artisan Bread Recipe (Boule Bread)
Equipment
- Thermometer
- Dutch oven
- Wire rack (optional)
Ingredients
- 2 cups white rice flour
- 1½ cups sorghum flour
- 3¾ cups tapioca starch
- 2 tbsp psyllium husk powder
- 4 tsp sea salt
- 2 tbsp active dry yeast
- 2 tsp honey
- ¾ cup water
- 1½ cups yogurt (room temperature)
- 2 tbsp olive oil (or avocado oil)
- 4 eggs (room temperature)
Instructions
To Make Your Dough
- Set eggs and yogurt out on the counter so that they can reach room temperature. I don't like to wait so I place my eggs in a bowl of warm water for about 20 minutes and gently warm the yogurt on the stove until it's room temperature to touch.
- Gather all remaining ingredients (white rice flour, sorghum flour, tapioca starch, psyllium husk, salt, active dry yeast, honey and oil) except water and place them on the counter.
- Place the active dry yeast in a bowl that will hold at least 1.5 cups of liquid.
- Combine all remaining dry ingredients (white rice flour, sorghum flour, tapioca starch, psyllium husk and salt) in a large bowl and stir together until fully incorporated.
- Heat 1½ -2 cups of water to 110°F-115°F. You want there to be enough water in the pot that you can place the thermometer in and measure the temperature without the thermometer touching the bottom of the pot.
- When the water is the right temperature, measure out 3/4 cup of water and add it to the bowl with the active dry yeast.
- Add honey to the bowl with the water and the active dry yeast and stir until the yeast is mostly dissolved. There may be a few small granules or lumps even after you've stirred – that's totally fine.
- Let the mixture sit for 10 minutes, until the foams vigorously. While it's doing that, it's time to mix up your other ingredients.
- In a separate bowl from the dry ingredients, whisk together the eggs, yogurt, and oil.
- When the yeast mixture is foaming vigorously, gently add it to the liquid mixture. It doesn't need to be whipped in, just loosely mixed. Try to maintain as much of the foam from the yeast mixture as possible.
- Slowly pour the wet ingredients into the dry, about a 1/3 of the mixture at a time. With each pour use a wooden spoon or spatula to incorporate the liquid. Rather than mix intensely, gently toss the flour like it's a salad so that the liquid retains as many air bubbles as possible.
- Mix everything together well and cover the bowl with a damp towel. Let the bread dough rise for at least two hours in a warm spot. In the summer I place my dough on our back porch, but the top of the fridge is a good spot, too.
- Set a timer for 1 hour and 15 minutes.
Baking Your Boule Loaf
- When the timer goes off, set your oven to 500F and place the dutch oven inside.
- After the oven has been heating for 45 minutes, gently lift half of the dough out of the bowl and replace the moist towel. Don't knead or flatten the dough – you want as many of the bubbles to stay intact as possible. Gently form the dough into a ball with your hands and then place it onto a piece of parchment paper that will fit inside of your dutch oven.
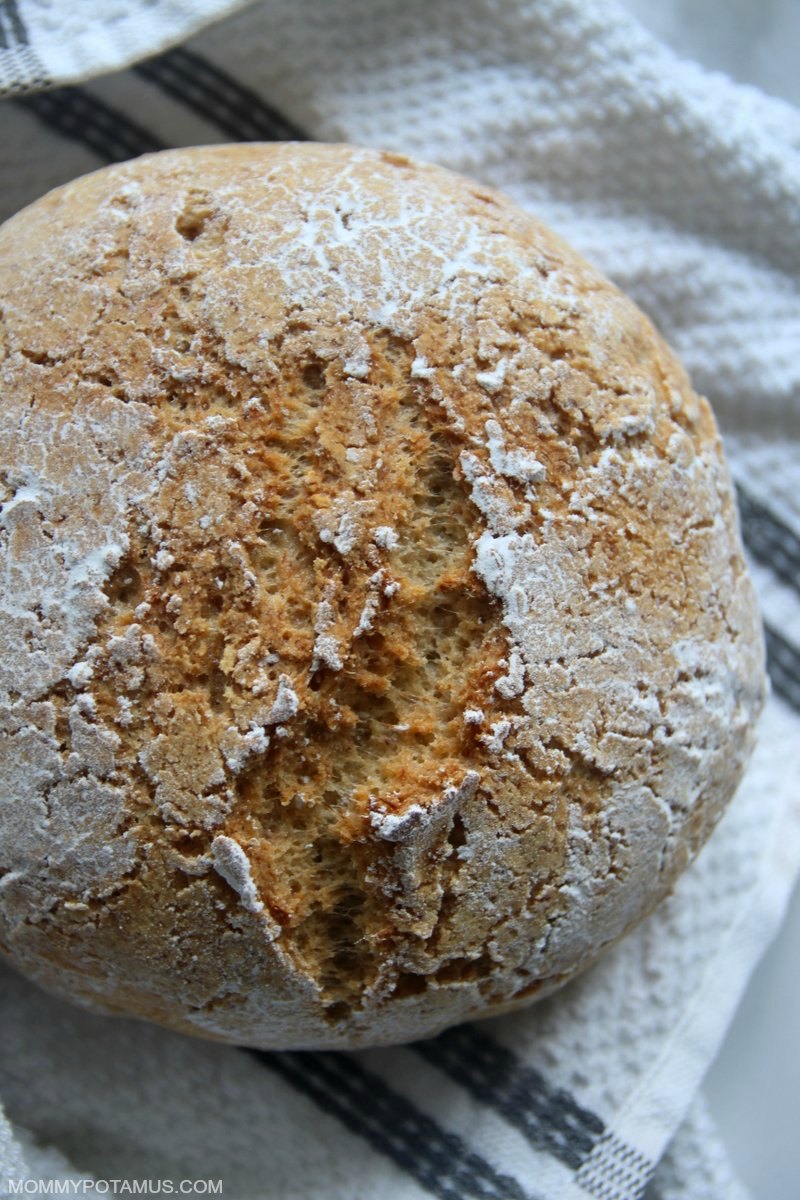
- In order to smooth the dough on the outside, flip it over a few times on the parchment paper. The parchment paper smooths the dough and if you try a few different sides you'll usually find a pretty one, which in my opinion is one with some cracks but not a lot. If your dough is too wet or dry to do this, see the Troubleshooting & Tips section below.
- Remove the dutch oven and place it (and its lid) on a heat-proof surface such as a thick oven mitt or trivet. Carefully use the edges of the parchment paper to lower the dough inside. Replace the lid and bake covered for 20 minutes.
- When the 20 minutes is up, remove the lid and lower the heat to 450*F. Bake for another 15 minutes until golden brown.
- When the 15 minutes is up, set the oven to broil and brown the crust for a few minutes if desired. Remove the dutch oven and place it on a heat-proof surface. Remove and place the lid on a heat-proof surface, then carefully lift the corners of the parchment paper to remove the bread loaf. Be careful not to touch the hot dutch oven.
- Set the first boule loaf aside to cool, preferably on a wire rack if you have one.
- Place the dutch oven back in the oven and return the heat to 500F. Once the oven has reached five hundred degrees, bake the second loaf using the same process as the first.
- Optional Step: Put some tapioca flour or arrowroot in your hands and rub them together. Flip the bread upside down and rub the top of the bread to give it an artisan look. I flip mine because I don't want the tapioca/arrowroot to settle in the cracks, just the surface.
Nutrition
Troubleshooting & Frequently Asked Questions
After making this recipe countless times in an effort to make it as fail-proof as possible, I’ve put together some troubleshooting tips that have helped me “rescue” a batch that is too sticky, dry, etc.
I’ve also included answers to some of the top frequently asked questions I’ve received about other gluten-free baking recipes.
My dough is too wet or too dry – how do I fix it?
I have made this bread many times using the exact same recipe. Sometimes the dough turns out wet, and sometimes it’s on the dry side. Some of that may be due to differences in the amount of liquid in one egg versus another, but I’ve found that even when measuring the actual volume of the egg there is some variance. Other possible reason for variation are the fat content of the yogurt, the warmth of the room or porch, and the amount of time the dough rises.
Fortunately whatever the cause, all the dough forms can create a delicious, crusty loaf of bread.
If your dough is too wet to form:
Refrigerate it for 1-2 hours, or until it’s moldable. Form it into a ball and place it on a square of parchment paper, then let it return to room temperature for 1-2 hours before baking. Remember to preheat your oven to 500F and place your dutch oven inside about 45 minutes before you want to start baking.
If your dough is too dry to create a smooth ball of dough:
Use moistened (but not sopping wet) hands to smooth out surface texture. Keep in mind that too much water can create too much steam and lead to a softer crust.
If your dough is sticking to your hands:
Try flouring them with tapioca or arrowroot starch.
Can I use this recipe with my gluten-free flour blend?
Different all-purpose flours have different liquid absorption rates, so I can’t say for sure whether your pre-made blend will work. If you try it with a particular blend please leave a comment and let me know how it worked out.
Most gluten-free bread recipes call for xanthan gum. Why doesn’t yours?
Xanthan gum is difficult for a lot of people to digest, so I don’t typically use it in recipes. Psyllium husk powder serves the same purpose in this recipe.
Can I use this recipe to make baguettes?
Possibly, but since baguettes don’t fit in a dutch oven I haven’t been able to get them as crispy as I’d like. I’m working on a slightly different recipe using a loaf pan or baking stone and will post it when it’s ready.
More Gluten-Free Bread Recipes
Grain-Free Flatbread – If you love Indian curries, Greek-style gyros, soft tacos, and mini personal pizzas, it’s time to grab a bowl and make up a batch of these soft and pliable gluten-free flatbreads.
Paleo Bread from Ditch The Wheat -This light, fluffy bread from my friend Carol’s cookbook, Ditch The Wheat, can be made with just ten minutes of hands-on time.