How To Make Coconut Yogurt In An Instant Pot, Oven or Yogurt Maker

Heather Dessinger

This post contains affiliate links.
Click here to read my affiliate policy.
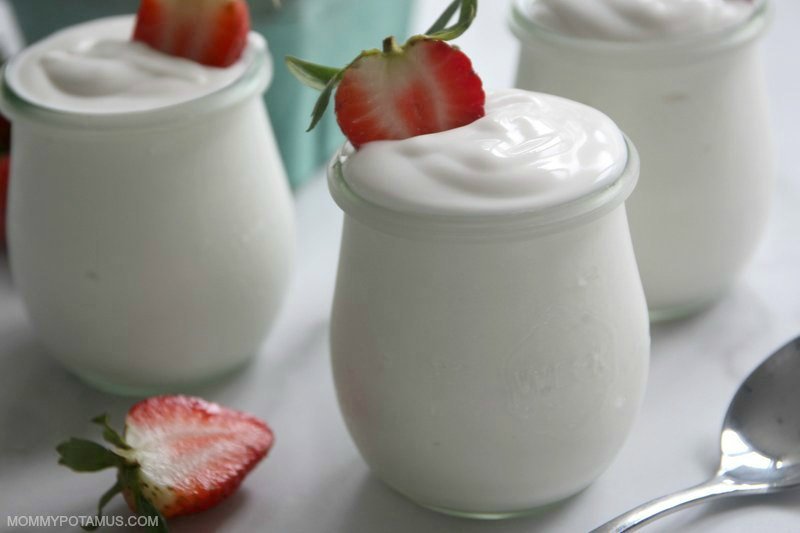
Homemade coconut yogurt in jars

This creamy, thick coconut yogurt is an easy way to support immunity with probiotics, and you probably have everything you need to make it right now. Unlike some methods, you don’t need a thermometer or a lot of hands-on time. It’s super easy, delicious, dairy-free, way more affordable than store-bought and did I say delicious?

Although the exact type of “good guys” in your yogurt will vary depending on which kind of starter you use (probiotic capsules, store-bought yogurt, or powder), in general probiotics are associated with all kinds of good things – immune health, clear skin, heart health, blood sugar balance, improved digestive function and more. 

And of course it will also be rich in nourishing fats like medium chain triglycerides, which are associated with cognitive function and a healthy metabolism. Coconut milk or cream is also one of the best sources of monolaurin, which supports the immune system. 

Here’s the best part, though . . . 

Making Coconut Yogurt Is Probably Easier Than You Think

Although it sounds complicated (like braiding bread or making pasta), making yogurt is probably less effort than picking it up at the store . . . and cheaper, too! The basic recipe is coconut milk + good bacteria + warmth = tangy, coconutty goodness. 

However, because I like CREAMY, tangy, coconutty goodness, I add a thickener into the mix. Gelatin is my go-to, although I’ve heard others have had success with agar agar (seaweed) powder. (If you’re one of those people, please share any tips you have in the comments below!) So my process looks like this: 

  1. Add gelatin to one cup of of room temperature coconut milk and stir (or blend in a blender) to combine.
  2. Activate the gelatin by adding one cup of hot coconut milk and stir (or blend) again. 
  3. Cool the mixture down by adding two more cups of coconut milk so you don’t kill the good bacteria when you add them. 
  4. Add the good bacteria (options below) plus some food for them to eat (maple syrup)
  5. Let warmth and time work their magic. In 12-24 hours you’ll have creamy, homemade coconut yogurt.

3 Starter Culture Options (You Probably Already Have One of These)

  • Store-bought coconut yogurt with active cultures – SO Delicious makes one with several beneficial types of bacteria ( L. Bulgaricus, S. Thermophilus, L. Rhamnosus, L. Acidophilus, Bif. Bifidum, and Bif. Animalis) that love coconut milk and will work beautifully. The best part about this approach is that every time you start running low, you can just use what’s left of your last batch to start a new one. 

  • Probiotic capsules – Make sure they’re PRObiotics without any PREbiotics. Look for the following strains: Lactobacillus acidophilus, Bifidobacterium bifidum, Bifidobacterium lactis and Streptococcus thermophilus. I have used GUTPro capsules with good success, but from what I’ve read there are lots of other options that will work, too.All of these probiotics are dairy-free and have at least one strain in common with the SO Delicious store-bought yogurt are are reported to work well: Klaire Labs Ther-Biotic,  Renew LifePure EncapsulationsMegafloraNOW Probiotics

  • Dairy-free yogurt starter – Instead of capsules, these starter cultures come in little packets that can be added to each batch. The strains used are perfect for making yogurt. 

Instant Pot, Oven or Yogurt Maker?

After you mix everything together, all you need is time and a warm spot . . . pretty much any warm spot will do. Here are some good options: 

Instant Pot– The one I use has a yogurt button that allows me to just pop my jars inside and set the number of hours I want to let it culture. I usually opt for 24 if I have time, which is a lot longer than I’m willing to tie up my oven.

Oven – If you want to culture for eight or so hours, you can make a batch just before bed and then place your jars in the oven. Turn on the oven light and place the jars near it so they can soak up its warmth overnight. If you need your oven in the morning but are not quite ready to stop culturing yet, you can move the jars to a warm spot and allow them to continue for as long as you like (up to about 48 hours).

Yogurt Maker – I’d look for one that doesn’t automatically shut off after eight hours. This one will ferment for nearly double that amount of time (15 hours). 

Delicious Ways Use Coconut Milk Yogurt

Important Tips Before You Get Started

#1 – Make sure you use clean jars, bowls (if using), blender components (if using), whisks, etc. We want them to be free of microbes that might interfere with the good guys we are trying to culture.

To get everything ready you can run it through the dishwasher with hot water (preferably using the “sanitize” setting) OR you can pour boiling water into the jars/vessels you are planning on using and use hot, soapy water to clean everything else. I keep my extra clean jars in a particular spot in my kitchen so that I can grab them when needed. 

#2 – The maple syrup in this recipe is food for the good guys, so don’t leave it out. Unlike dairy milk, which contains naturally-occurring sugars that feed friendly bacteria, coconut milk doesn’t contain natural sugar. For that reason we need to add some to power our good guys.

Honey is not a good option because it can negatively impact microbial growth – a property which is great wound healing but not making yogurt – which is why maple syrup is recommended. Although some might remain in the final product (depending on how long you ferment it), most will be used up during the fermentation process.

#3 – If you’re sensitive to dairy, make sure your probiotic powder (or starter culture) is labeled dairy-free and/or vegan. A lot of probiotics have the same strains, but they come from different sources.

Print Pin
4.65 from 14 votes

How To Make Coconut Yogurt In An Instant Pot, Oven or Yogurt Maker (Dairy-Free, Paleo)

Course Snacks
Prep Time 15 minutes
Fermenting Time 1 day
Servings 8 1/2 cup portions
Calories 239kcal
Author Mommypotamus

Equipment

  • blender (or mixing bowl)
  • measuring cup
  • measuring spoons
  • 3 mason jars with lids
  • instant pot, oven, or yogurt maker

Ingredients

  • 4 cups coconut cream or full-fat coconut milk
  • 2 tsp grass-fed gelatin
  • 6-8 probiotic capsules (options in notes below) – OR – 1 package dairy-free yogurt starter – OR – 1/3 cup plain yogurt with live cultures
  • 2 tbsp maple syrup (See tips section above for why it's essential)

Instructions

Step 1: Combine Ingredients

  • Place 1 cup of room temperature coconut milk and 2 teaspoons gelatin a blender jar or glass bowl. Blend or stir to combine.
  • Place 1 cup of coconut milk in a small pot or saucepan. Heat until steaming but not boiling, then remove from heat.
  • Pour the hot coconut milk into the blender jar or bowl and blend/stir until well-combined.
  • Pour the remaining 2 cups of coconut milk into the blender jar or bowl and mix again.
  • Add the maple syrup and starter and mix one more time.
  • Divide the mixture between three clean 16 ounce mason jars or other sturdy glass jars. Place the lids on top.

Step 2: Ferment in an Instant Pot, oven or yogurt maker

  • If using an Instant Pot: Place your trivet inside the Instant Pot bowl. Pour in two cups of water. Place the jars on top of the trivet and secure the lid on tip. Press the "yogurt" button and increase the number of hours to 24. It will automatically set from there.
  • If using a yogurt maker: Place jars in the yogurt maker and set for 8-24 hours according to manufacturer's instructions.
  • If using an oven: Turn the light on and place the jars near it so they can soak up its warmth for at least 8 hours. If you need your oven after that but are not quite ready to stop culturing yet, you can move the jars to a warm spot and allow them to continue for as long as you like (up to about 48 hours).

Step 3: Cool

  • When the incubating time is up, remove the jars from the warm area and shake well to mix the milk and "whey" that have probably separated. The yogurt will be thin and runny because it's warm, but will continue to thicken as it cools. Refrigerate for at least a couple of hours – preferably overnight – before serving. Keep refrigerated and use within two weeks.

Notes

Probiotic capsule options – I have used GUTPro capsules with good success, but from what I’ve read there are lots of other options that will work, too. All of these probiotics are dairy-free and have at least one strain in common with the SO Delicious store-bought yogurt are are reported to work well: Klaire Labs Ther-Biotic,  Renew LifePure EncapsulationsMegafloraNOW Probiotics.
Nutrition estimates are based on coconut milk.
 
instagram iconTried this recipe?
Mention @mommypotamus or tag #mommypotamus!
 

Nutrition

Calories: 239kcal | Carbohydrates: 7g | Protein: 3g | Fat: 24g | Saturated Fat: 21g | Sodium: 17mg | Potassium: 260mg | Sugar: 3g | Vitamin C: 1mg | Calcium: 26mg | Iron: 4mg

Frequently Asked Questions

Can I use agar agar powder instead of gelatin?

I’ve heard that agar agar powder will work, but I think it needs to be boiled in water to dissolve properly. I’ll test it sometime and let you know – or if someone already does please leave a comment! I do know that typically you use about half the amount of gelatin called for, but I have not tested it in this recipe.

Can I use almond milk instead of coconut milk?

​I don’t recommend it. Coconut milk has a much higher fat content which yields a much richer, creamier result.

How can I make this into greek-style yogurt?

To make it thick like greek yogurt, you can place it in a cheesecloth and allow some of the liquid to drain off. 

Can I use a slow cooker to make coconut milk yogurt?

Some people have with great success, but I’ve found that even my “warm” setting was too hot and killed the beneficial bacteria. 

More Dairy-Free, Gluten Free-Recipes

Strawberry Shortcake Biscuits – These strawberry shortcake biscuits are so simple and delicious! When strawberries aren’t in season, be sure to check out the suggestions for different fruits that go well with this recipe.

Homemade Chicken Pot Pie – This pot pie has a golden crust and creamy chicken & veggie filling that makes it one of my family’s favorite comfort foods. 

Gluten-Free, Dairy-Optional Peach Cobbler – This easy, Southern-style peach cobbler is one my favorite summer desserts. Cinnamon, vanilla, & heaps of fresh peaches meld beautifully with the buttery, sweet topping.
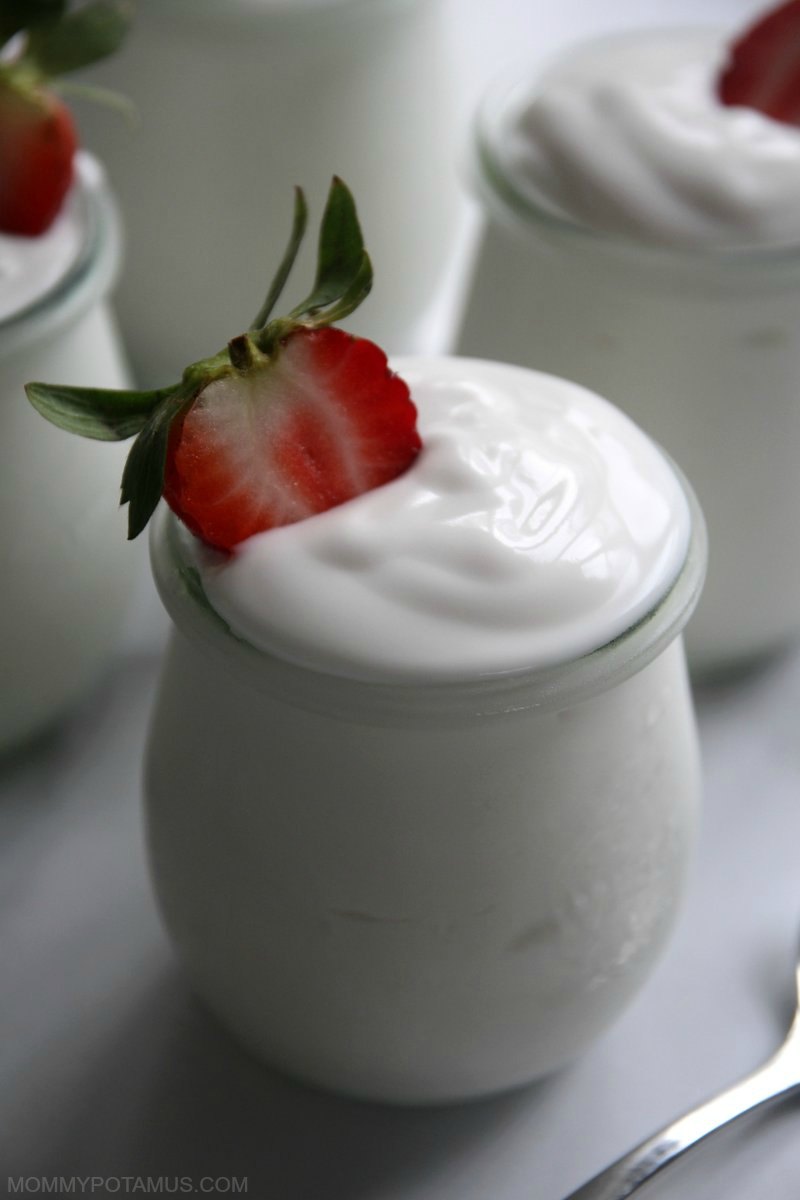
Overhead view of coconut yogurt in jar

Related Posts

About HEATHER

Heather is a holistic health educator, herbalist, DIYer, Lyme and mold warrior. Since founding Mommypotamus.com in 2009, Heather has been taking complicated health research and making it easy to understand. She shares tested natural recipes and herbal remedies with millions of naturally minded mamas around the world. 

4.65 from 14 votes (9 ratings without comment)

Leave a Comment

Recipe Rating


69 thoughts on “How To Make Coconut Yogurt In An Instant Pot, Oven or Yogurt Maker”

    • You begin the comment section with 2 replies to questions or comments. Where are the original comments you are replying to???

      Reply
    • I have tried using probiotics and also using actual coconut yogurt by SO Delicious in plain flavor…..I have not strained it because it has been too liquidy…but I am still experimenting!!! 🙂

      Reply
      • I know this post is kinda old but I saw a tip on a site where they used 1 tsp of agar powder before adding starter and they said it came out nice. Might be worth a try.

        Reply
  1. It won’t thicken up much by dehydrating longer. It’s weird, but there is a culture in raw milk that actually keeps it runny, so if you want it thicker you can strain it in a cheesecloth or buy a special culture that will help it thicken more (see link above). I strain mine and use the whey for fermenting veggies.

    Reply
  2. Hi Christine! I believe raw milk is wonderful, but people who have abnormal gut flora often have trouble breaking down the lactose in it (probiotics in our gut actually do this for us). Fermenting it into yogurt or kefir converts the lactose so it’s not a problem, but long-term I think the best solution is to repopulate the gut with beneficial bacteria via GAPS or another protocol so that we can digest milk easily. Does that make sense?

    Reply
  3. My gut right now is a disaster. I had 3 days of intraveneous antibiotics. Followed by taking 4 pills a day for about 10 days. I have breast cancer stage 4 but the last 8 years have sustained with chemo pills etc. and hope to do this for awhile yet.
    The last week have had to use the ladies room about once an hour–and now never make it—I almost can’t leave the house due to this. A doctor is culturing samples right now. Every time I eat it seems to trigger my intestines to empty.

    I just discovered this gut thing -I think it cud help me. I don’t have time or resources to make all this stuff by hand. Can’t I just buy everything somewhere? thanks much sophie

    Reply
    • Sophie-I know this is months after you posted, but just in case this will still be helpful-there are companies that make GAPS “friendly” food, its more expensive than making at home, and the quality of food will usually be best if homemade, but if someone if unable to do the food prep that the GAPS diet requires, I’d definitely say its better to buy and eat the closest to GAPS quality that you can, I’ve still seen people benefit. For yogurt, try Maple Hill-https://maplehill.com/ the rumor is their yogurt is cultured 24 hours, check with them to verify, but they told my friend who contacted them that it is. For broth, you can try The Flavor Chef, https://www.bonebroth.com/ for organic bone broth. You can avoid chopping tons of vegetables by buying pre-chopped frozen organic veggies that are low in fiber and GAPS approved, (consider avoiding too much broccoli, etc if it causes bloat for you) and if you need to blend the soup to make it easier to eat or digest, get an immersion blender. And an Instant Pot-you can throw in all your ingredients, turn it on and off you go! And there are many options for sauerkraut, we’ve enjoyed Bubbies, Pickled Planet, Blue Bus, Oregon Brineworks and Wildbrine. Also, azurestandard.com is an online affordable organic food co-op, an excellent resource for GAPS people. Anyone choosing to do the GAPS diet-buy the book to get the full picture, and consider working with a GAPS certified practitioner to support your journey. Just a note-I’m not a dietitian or a doctor, just a mom of three little people in a family that has experienced much healing from the GAPS diet. Our family has had times where we can make everything ourselves, and other times where we’re exhausted, and we grab the frozen veggies to cook instead of chopping fresh because its been a long day! Find “shortcuts” if you need them but don’t compromise-you still need to completely avoid all non-GAPS approved foods while on the diet! People can get into big discussions about the best way to do GAPS, but life happens, we can’t always get every detail exactly right some days, so we found that you just do the best you can with the resources you have and know which “shortcuts” are ok without compromising all of your healing! Best wishes to you and be healed!

      Reply
  4. Have you had success using homemade coconut milk? You know, the kind one makes with only water and coconut shreds using a Vita-mix? Thank you.

    Reply
    • I have before using another recipe! I;m trying homemade with this recipe tonight. They are similar so I think it should work just fine.

      Reply
    • I’m back to report that it is delicious with homemade coconut milk. The recipe turned out great! I have noticed in the past that it does seem to go bad more quickly than you would expect though.

      Reply
  5. if you dont have a yogurt setting on your instant pot, can you still make the yogurt, and what setting would you put it on?

    Reply
  6. Would this recipe work using Califia Probiotic Dairy Free Yogurt (unsweetened and plain) cultured nut milk drink? If so, should the amount be adjusted since this type of yogurt is very thin and “drinkable”?

    Reply
    • Well, I tried this recipe with the Califia product I mentioned above and used my instant pot with the yogurt setting. I’m disappointed the yogurt did not work for me at all. I used my homemade coconut milk (Savoy brand coconut cream and water which, on a side note, is really yummy and didn’t need straining in my opinion), and unflavored gelatin. Not sure what went wrong, but my jars ended up just staying liquid. After incubating in the instant pot the contents separated and even when I shook it up and refrigerated over night the yogurt never thickened.

      Reply
      • Hi Annella, I’m not familiar with Califia, but if it’s a thin yogurt perhaps that’s why the end product was on the thinner side. If it tastes like the Califia, my guess would be that it cultured to replicate the properties of the yogurt that was used.

        Reply
  7. I was wondering if there is a way to keep this going so you don’t have to keep buying new bacteria for each batch. I know you can with Kefir and with Sour Dough so I was wondering if this is the same?

    Reply
        • I conclude, if she suggests we can use the culture from in a store-bought coconut yogurt to start this yogurt, we totally absolutely could continuously start our future batches from our created yogurt, reusing the leftovers as the next starter, ad infinitum, provided the culture remains stable and continues to make yogurt you like!

          Reply
          • Thought I’d chime in here. 🙂 Lately I’ve been fermenting yogurt with probiotic strains that support specific wellness goals. They’re not technically yogurt strains since the FDA only recognizes a product as yogurt if it fermented with a few specific strains (S. thermophilus and l. bulgaricus).

            Because I’m using somewhat expensive probiotics as a starter, I tried making a continuous batch with a little bit of starter taken from each previous batch. What I found was that after several generations the bacterial composition would often become contaminated. So here’s what I do now: Make a “mother” batch using my probiotic starter, then freeze that batch in pre-portioned amounts to use as starter. When I’m ready to make the next batch, I thaw the starter I need in the fridge and then add it to my recipe. With that approach, I am able to make lots and lots of “second generation” batches that are true to the “Mother batch” in composition. It’s far more cost effective while also maintaining the integrity of the culture. 🙂

    • I have heard with coconut-based yogurt it is better to use new bacteria each time but one website said you can do it 1-2 times again. It isn’t recommended.

      Reply
    • If you aren’t vegan or vegetarian, I think you could try adding collagen peptides to increase the protein content without making the yogurt extra thick. I add collagen peptides to my coffee in the morning and it imparts a creamy mouth-feel without gelatinizing my coffee. And it dissolves really well when added to warm/ hot liquids.

      Reply
  8. 5 stars
    I have tried and failed at several different coconut yogurt attempts. Truly frustrating AND expensive! I am happy to say that THIS ONE WORKED! I used Aroy-D coconut milk with a yogurt starter and followed the directions exactly for the InstantPot. It turned out sooooo tasty! I loved the tang that the 24 hour ferment gave it and it was so much better tasting that the purchased kinds (not to mention cheaper!). Thank you for sharing this! Excited to have found my “go-to” recipe!

    Reply
  9. hi Heather,

    If I don’t have beef gelatin, can I use either hydrolyzed collagen, or collagen peptides, or arrowroot powder for this recipe? Thank you!

    Reply
    • No. collagen/Peptides will not thicken anything. I don’t think arrowroot powder would thicken yogurt, either, plus it would give a nasty taste to the yogurt.

      Reply
  10. Step 6 says “Place the lids on top.” Does this mean all the way closed? I’m planning to use the IP method and I’m afraid that the jars will burst if I do this?

    Reply
  11. Hi Heather,
    I have bene enjoying your blog. I tried making the coconut yogurt and after 24 hours in my oven with light on, it was still the consistency of coconut milk. Any suggestions? Also, remind me how this is better than the So natural Coconut yogurt I found in the store?
    Thank you,
    Jean

    Reply
    • I used my yogurt maker, and coconut key lime yogurt (my complete weakness) as my starter. I found the consistency of yogurt is very spot on. However, I honestly didn’t care for the maple taste from the mae syrup. It processed 12 hours, cooled 2 hours, stirred (as it separated) and was moved to the fridge for 24 hours before trying it. It set wonderfully, and I was stunned how well it came out. The only things I didn’t like was my yogurt maker cups only were filled half-way (will do a double recipe to remedy this next time) and that maple taste. I’m honestly not much of a person who cares for sweets and that maple is so sweet to me. I tried eating it with fruit and it was still too sweet for me. Is there something else that I can use for the maple syrup?

      Reply
  12. Hi
    Was wondering do I need to the strain the coconut water out when measuring the coconut or is the water included as well?

    Reply
  13. I make my coconut yogurt using as a thickener – Gefen Clear Unflavored Jello, 3oz package. This makes a vegetarian product as gelatin is an animal product. I only use one tablespoon so a 3 oz package lasts for a number of batches. Also used is Aroy-D Pure Coconut CREAM, 33.8 Fluid Ounce instead of coconut milk. I use Probiotic capsules 2 each for each 33.8 oz batch., a jar of 100 capsules kept in the refrigerator lasts for years. I have used a yogurt maker set at 104 deg F and recently used an Instant Pot Max set at the same both with excellent results. I heat up 1/2 cup of the coconut cream to dissolve the Gefen Jello as there is no need to heat up the rest of the coconut cream before heating up the rest to 100 to 104 degrees although heating it as per the Instant Pot instructions would do no harm. When using Mason Jars I use Waterless Fermentation Lids to eliminate any danger of jars bursting. Be sure to use non metal spoons to mix the Probiotic into the coconut cream. I buy all the above ingredients and supplies on AMAZON.

    Reply
  14. Hi! Thanks for this recipe, so easy! I just put my jars into the instant pot. I made it with the probiotic capsules. Will I be able to use some of this batch as my starter next time?

    Reply
  15. 4 stars
    I made this in my Euro-cuisine yogurt maker, and used just under 1 tsp of agar-agar instead of the gelatin. I used their starter powder also. This is my 2nd attempt and it still came out runny! My first attempt was sour, this one a little less sour but not quite ‘tangy’. I added some raspberry jam to it and shook it up. Kefir. Still good for you I guess, but I’d love me some real yogurt consistency!

    Reply
  16. 5 stars
    FINALLY – An exhaustive explanation and ideal recipe for coconut milk yogurt in a yogurt maker. I’ve searched and tried many others but they failed to make thick, punchy yogurt.
    This is the one for me. THANK YOU

    Reply
  17. 5 stars
    I just tried this recipe with success but have a few questions!

    I used 3 cans of Native Forest Simple full fat coconut milk (no guar or any additives), and used 3 T. maple syrup and 9 capsules of the Mercola’s probiotic (no prebiotics!), set in my Luvele yogurt maker at highest temp for 14 hours…tastes LOVELY, tart, just like it should.

    Whey collected at the bottom of my large glass jar, probably measuring about 3 C.!! The top part of the yogurt was very bubbly, light, frothy and I gently scooped that off (about 3 C.) with a cookie scooper into a clean glass jar to refrigerate.

    I’m interested in texture of yogurt once it’s fully chilled. Should I have whisked it all together with the whey and then strained?? I was trying not to disturb the lovely airy texture.

    Is it normal to get that much whey from 3 – 13.5 oz. cans of coconut milk?

    I’m reserving some of the whey to use in my next batch so would I need to add any additional capsules of probiotics if I use 1/4 C. whey?

    Thank you!!

    Reply
    • If you scoop off the top and don’t mix in the whey you will get a very thick yogurt (similar to Greek yogurt). Mixing the whey in creates a smooth, stirrable yogurt. Separation can happen for a lot of reasons, including what temperature was used and what the particular strain you used prefers. Speaking from observation, I rarely get much separation unless I heated the culture above the strains preferred temperature.

      You can use the 1/4 cup whey to ferment your second batch. However, lately I’ve been fermenting yogurt with unique probiotic strains that support specific wellness goals.

      Because I’m using somewhat expensive probiotics as a starter, I tried making a continuous batch with a little bit of starter taken from each previous batch. What I found was that after several generations the bacterial composition would often become contaminated. So here’s what I do now: Make a “mother” batch using my probiotic starter, then freeze that batch in pre-portioned amounts to use as starter. When I’m ready to make the next batch, I thaw the starter I need in the fridge and then add it to my recipe. With that approach, I am able to make lots and lots of “second generation” batches that are true to the “Mother batch” in composition. It’s far more cost effective while also maintaining the integrity of the culture. 🙂

      Reply
  18. Could I potentially leave this outside on a sunny day? My oven doesn’t have a light (it’s a mini) and I do not have the other items you recipied out for. I have made dairy yogurt in the past by leaving it on a warm counter.

    Reply
  19. I don’t have a trivet for my instant pot. Is this something that was supposed to come with it? Is there something I can use in place of it?

    Reply