Lotions. Potions. Elixirs. Oh my!
Do you love the idea of homemade beauty products but think they are “too much trouble” to make? Or maybe it worries you that the exact form of sodium laurel sulphate in your bottle of suds is used to degrease car engines. (Don’t see it listed? It has about 150 aliases and is often used in “natural” and “herbal” shampoos!) Well then, I have just the thing for you!
This video/photo tutorial – adapted from and inspired by Andrea at Frugally Sustainable – is your guide to hassle-free soapmaking. Chocked full of natural humectants and softening butters, this recipe takes just 30 minutes of active time.* Oh yes! Half an hour and you’ll have a revitalizing, moisturizing rosemary mint bar – or eight – curing on your countertop. I am by no means an expert at soapmaking (this was my first time!), but this was really simple and fun to do. I am LOVING the results and want to share it with you!
Update: After relocating to an area with hard water my hair starting feeling gunky with this bar. I’m now using this coconut oil shampoo bar instead. I do still LOVE this bar as a face & body soap, though.
Okay, back to the tutorial!
New To Shampoo Bars? Here’s What You Need To Know
Before you get started it’s important to “detox” your hair. For a great explanation of why and how to do it check out this article.
The easiest way to use your shampoo bar is to lather in your hands and then work from root to tip. Like any shampoo it will leave a residue if you use too much, so go easy. 🙂 For a conditioning rinse spritz with a solution of 1/2 apple cider vinegar and 1/2 water in a spray bottle. Leave it on or rinse – either way the vinegary smell will fade away as your hair dries. Here are some more tips for making the transition from Dress Green.
- “There is a big difference between natural and commercial shampoos: natural bars don’t contain the preservatives, or the sulfates that cleanse by stripping everything – not just the daily dirt buildup but also the good natural oils on your hair. This means that natural shampoos leave hair generally more moisturized and with much more texture (as opposed to the sleek and squeaky feel).
- You may also find that your hair will need to adapt to the shampoo bars over time (don’t give up if after 2 or 3 days your hair is acting ‘differently’!). Many people’s hair tends to take a while to get accustomed to a natural shampoo when switching away from commercial shampoos – it is part of a ‘detoxifying’ process as the synthetics that have built up on your hair are slowly removed. To help your hair through this detox process, you may find that doing a daily or every-other-day vinegar rinse will help to remove excess buildup (or as I mentioned earlier you can use the instructions in this article).
- Once your hair has adjusted to your new shampoo bar, you may want to continue with weekly vinegar rinses to keep your hair’s pH balanced, help prevent tangles, and remove soap and product buildup.
- Shampoo bars can be a little challenging if you live in an area that has hard water. Hard water means that you will need to use more soap to get a good lather, and that soap is more difficult to rinse away. The minerals in hard water can react with soap, causing excess residue and tangling of the hair. If you have hard water, you may want to try using a vinegar rinse more frequently or using a water softener in your home.”
*Note: The process takes about 1 1/2 hours total (including non-active time), but you’ll need to wait 24 hours before using!
Video Tutorial
Disclaimer: I am not an expert soapmaker. Please consult a soapmaking guide before making soap.
Ingredients
All amounts are per weight. You will need to use a scale for these measurements.
- 10 ounces coconut oil
- 10 ounces olive oil
- 3 ounces castor oil (cold-pressed)
- 3 ounces jojoba oil
- 2 ounces shea butter
- 2 ounces cocoa butter
- 1 ounce beeswax (available at craft stores like Hobby Lobby, Joann’s or Michaels)
- 4 ounces water
- 6 ounces coconut milk
- 4 ounces lye (Usually available at your local hardware store. Make sure to get 100% lye!)
- 1/2 ounce rosemary essential oil
- 1/2 ounce peppermint oil
Equipment:
- crock pot
- stick blender
- digital scale
- glass measuring cups
- small glass bowls
- plastic spoon with long handle
- rubber spatula
- sink or bowl filled with vinegar and soap mixture (for cleaning anything that comes in contact with lye)
- protective equipment: long-sleeved shirt, plastic/rubber gloves, safety glasses or protective eye gear
- soap mold – I used a cardboard box lined with parchment paper. A lined bread pan is the perfect size for this batch, though. I’ll be using that next time!
Photo Tutorial:
Step 1: Place solid oils (coconut, shea butter, cocoa butter) and Beeswax in a saucepan and gently warm over low heat
 and Beeswax in a saucepan and gently warm over low heat")
Step 2: Place melted oils and liquid oils (olive, castor, jojoba) in a crockpot and set to low
 in a crockpot and set to low")
Step 3: In a well-ventilated area and while wearing protective gear slowly add lye to water/coconut milk and stir. Take care not to breathe the vapors and do not touch the bowl – it will be hot! Let lye cool for 5-10 minutes before proceeding to the next step.

Step 4: Add lye to crockpot (being careful not to splash) and stir a few times.
 and stir a few times.")
Step 5: Using the stick blender begin mixing toward “trace.” You’ll know trace is achieved when the mixture has the texture and thickness of pudding. Mine took about 3 minutes.

Step 6: Cover and let cook on low for 1 hour. During this process the oils should rise up the sides like a wave and then fold back into the mixture.

Step 7: At the end of one hour the mixture should look a little like semi-translucent vaseline. According to this post, “once the whole mix has this look, you can test it to see if it is done. Take a small sample of the soap and rub it between your fingers. It should have a waxy feel. Test the soap by touching it to your tongue. Keep cooking….if it ‘zaps’ like a nine volt battery, it’s not done.”

Step 8: Once the mixture is ready, add the essential oils and stir.

Step 9: Then spoon it into your mold and let firm up for 24 hours.

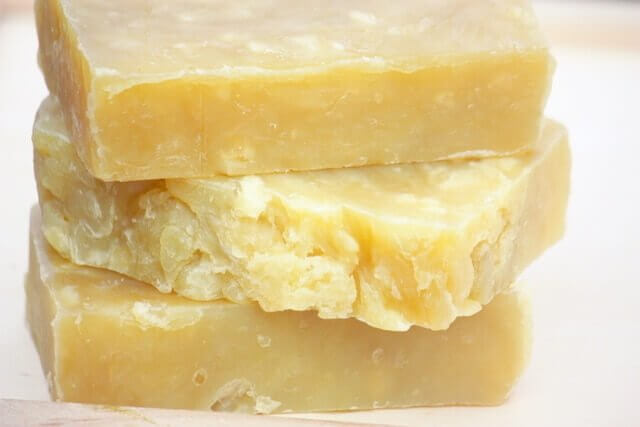
Step 10: Once the soap has had 24 hours to harden, remove from the mold and cut into bars.

Step 11: In an area with good air flow, place bars on a rack/tray to dry out and harden for another week or so. But by all means, go ahead and enjoy your first bar now!
FREE Ebook: DIY Body Care Gifts Made Simple
Do you want to give gorgeous, handcrafted gifts for family and friends, without spending a bunch of time on them?
Then I’d love to give you a free copy of DIY Body Care Gifts Made Simple – my step-by-step guide to making gorgeous handcrafted gifts without stressing yourself out – as a gift for signing up for my newsletter. I’ll show you how to make vintage labels, luxurious lotion bars, lip balms, sugar scrubs, body sprays and more like a pro. Sign up for my newsletter and you’ll be redirected to the download page immediately!