“Um, mom?” My son lifts an ornament out of the box and shows it to me. Tucked inside the glass frame is a photo of a little girl with a missing front tooth and no sense of fashion. It’s me, of course. Call me nostalgic, but even I can’t help but love this anti-glamour shot. It’s part of a living time capsule that we add to every year. For the past few holidays we’ve been making salt-dough ornaments – they’re my all-time favorite because they’re so versatile and easy.
Unfortunately, I’ve heard from several mamas who could not make them due to celiac disease or severe gluten sensitivity, so I decided to test out a gluten-free version. We had a few fails, such as this arrowroot version which seems to have random goo oozing out of the center . . . .
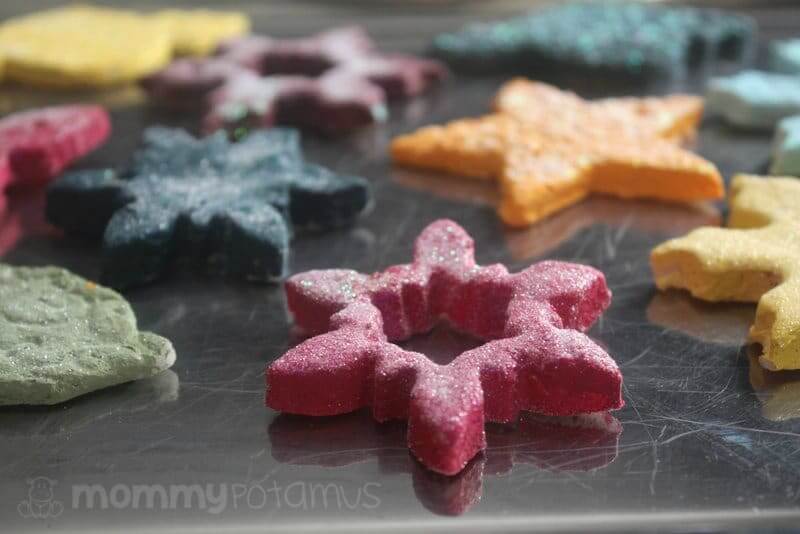
But we also had great success! The recipe below is pliable and easy to work with before baking. Also, unlike some of our attempts – which were brittle – it’s very sturdy after it hardens.
It’s easy to make, which is important to me because keeping up with our favorite family traditions requires that we keep things simple. Below you’ll find both video and step-by-step photo instructions. I hope you enjoy this recipe as much as do – I’d love to see photos of your finished creations!
Video Tutorial: How to Make Gluten-Free Salt Dough Ornaments
Gluten-Free Salt Dough Ornament Recipe
- 1 cup salt
- 1 cup cornstarch
- 3/4 cup water (or more if needed)
- non-toxic acrylic varnish (like this)
- Rolling pin
- Cookie sheet (This is a really good stainless steel one)
- Drinking straw
- Holiday shaped cookie cutters (I love this snowflake and this set)
- Acrylic paints
- Paintbrush
- Glitter
- Large stamp (optional – I couldn’t find the exact one I used online, but this one is similar in size)
- Ribbon
Step-By-Step Instructions
Step One: Mix cornstarch, salt and water together.
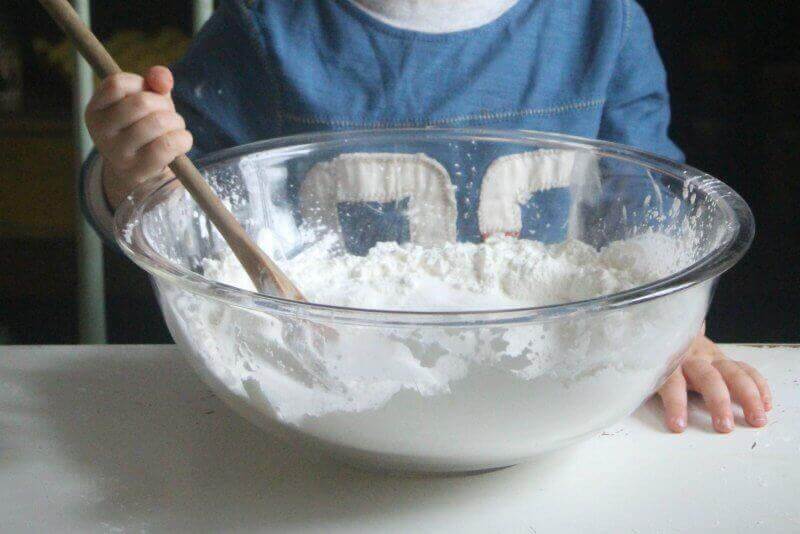
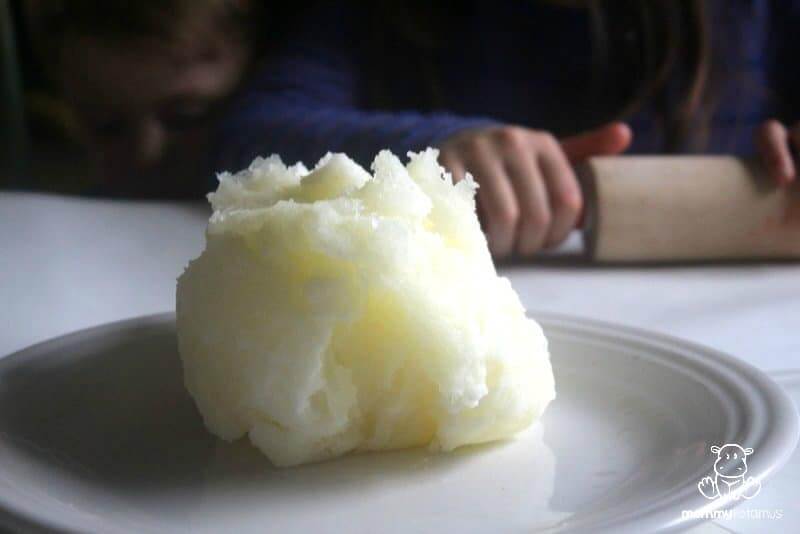
Step 2: In a small pot, cook mixture over medium heat until it forms a ball of dough.
Move dough to your work area and allow to cool slightly. As soon as it can be comfortably handled, knead it a few times to check for consistency. It should be soft and pliable but not overly sticky. If it is too sticky, add a little more cornstarch.

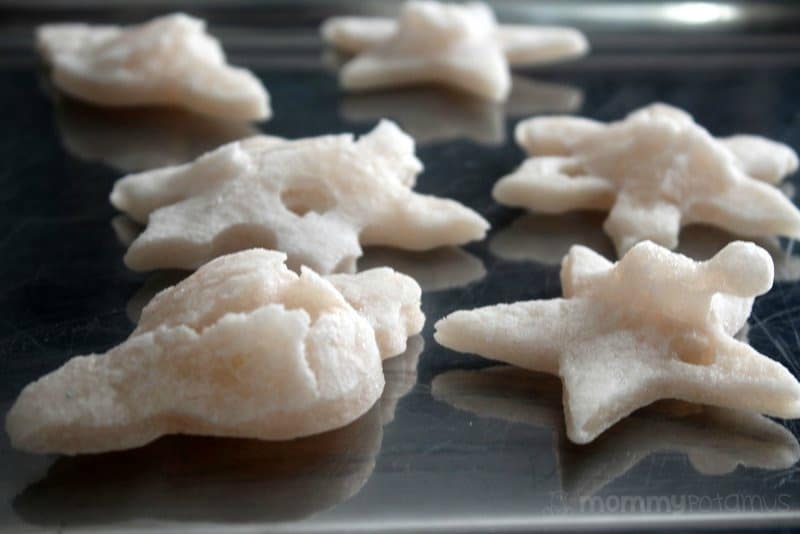
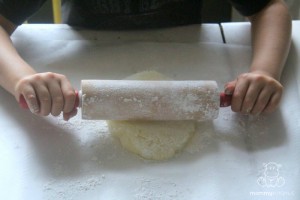
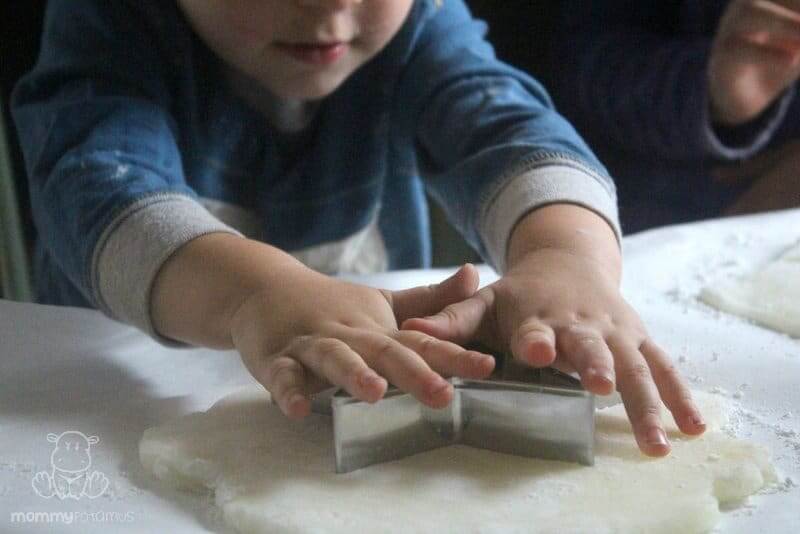
Step 3: Roll dough to 1/4 inch thickness.

Step 4: Cut out ornaments using cookie cutters.
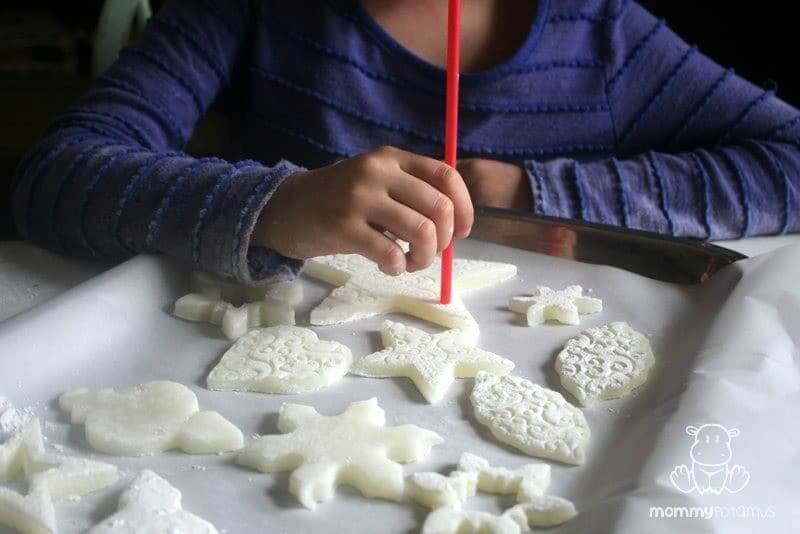
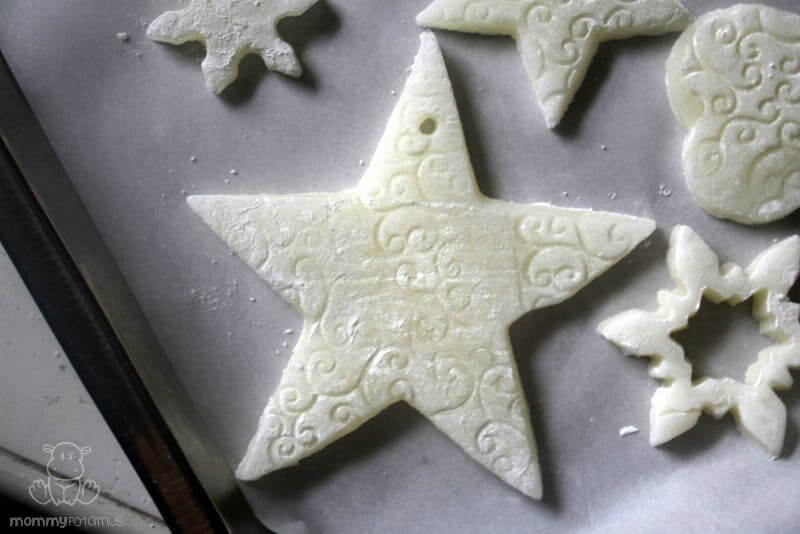
If desired, use a large stamp to create a design over the top.
Tip: When it’s time to gather your leftover dough and re-roll to make more ornaments, wet your hands slightly before you knead. It helps the dough integrate better.

Step 5: Using your straw, create a hole for the ribbon that will hang the ornament.
Step 6: Place ornaments in the oven and bake at 250F for two to three hours, or until completely dry.
Flip occasionally – exactly how long is needed will depend on how thick your ornaments are.
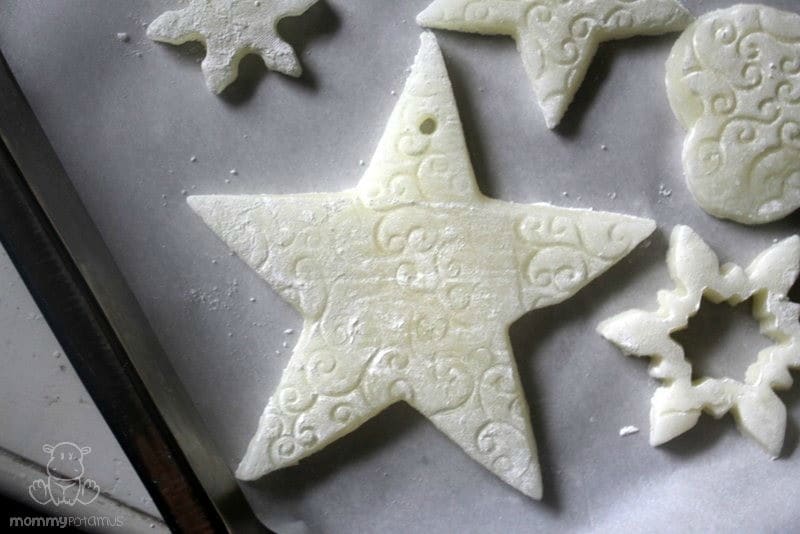
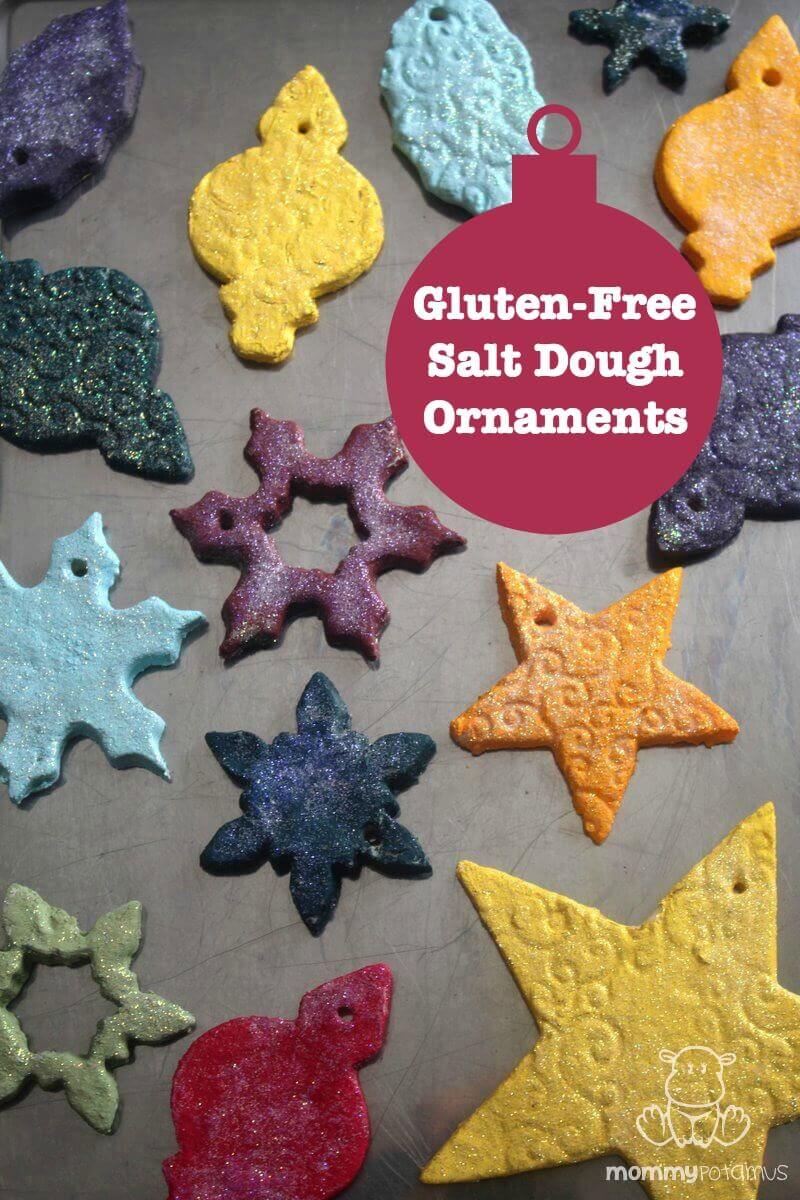
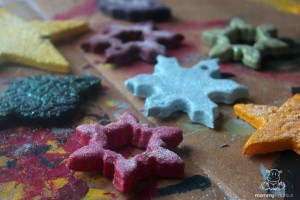
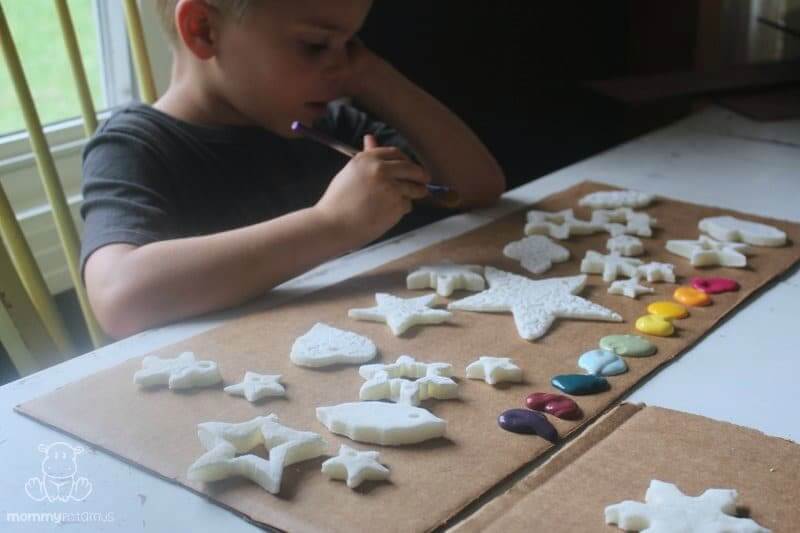
Step 7: Wipe off any excess cornstarch that may prevent paint from adhering, then decorate with paints and/or glitter if desired.

Optional step: Seal with three to four thin coats of non-toxic acrylic varnish after the decorative paint has fully dried.
If you want your ornaments to last for years and years, make sure to coat the entire surface with acrylic varnish to prevent moisture from getting in.

Looking for more fun projects?
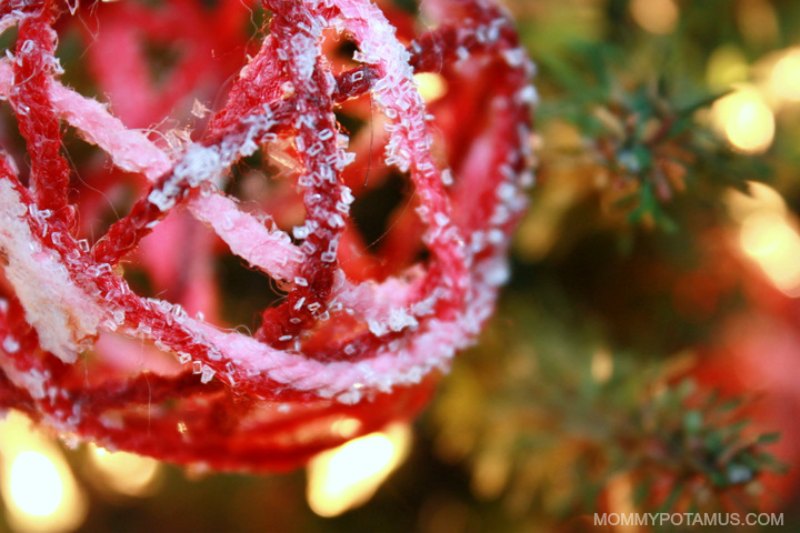
These yarn ball ornaments are made with yarn, balloons, glue and glitter. They’re one of my favorites to hang on the tree!

Completely edible homemade finger paint with just two ingredients.

All you need to make the chalkboard ornaments above are some wooden rounds, chalk paint and stencils or stamps.
How to Make Gluten-Free Salt Dough Ornaments
Equipment
- cookie sheet
- Holiday shaped cookie cutters
- Paintbrush
- large stamp
Ingredients
- 1 cup salt
- 1 cup cornstarch
- ¾ cup water (or more if needed)
- non-toxic acrylic varnish
- 1 drinking straw
- acrylic paints
- glitter
- ribbon
Instructions
- Mix cornstarch, salt and water together.

- In a small pot, cook mixture over medium heat until it forms a ball of dough. Move dough to your work area and allow to cool slightly. As soon as it can be comfortably handled, knead it a few times to check for consistency. It should be soft and pliable but not overly sticky. If it is too sticky, add a little more cornstarch.

- Roll dough to ¼ inch thickness.
- Cut out ornaments using cookie cutters. If desired, use a large stamp to create a design over the top. Tip: When it’s time to gather your leftover dough and re-roll to make more ornaments, wet your hands slightly before you knead. It helps the dough integrate better.

- Using your straw, create a hole for the ribbon that will hang the ornament.

- Place ornaments in the oven and bake at 250F for two to three hours, or until completely dry. Flip occasionally – exactly how long is needed will depend on how thick your ornaments are.

- Wipe off any excess cornstarch that may prevent paint from adhering, then decorate with paints and/or glitter if desired.

- Optional: If you want your ornaments to last for years and years, seal them with three to four thin coats of non-toxic acrylic varnish after the decorative paint has fully dried. Make sure to coat the entire surface to prevent moisture from getting in.


Video
What’s your favorite holiday ornament project? Please share it below!