
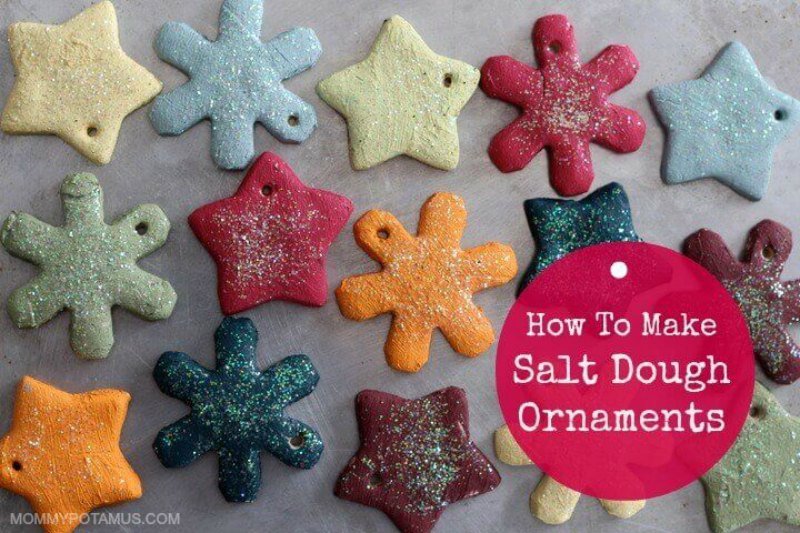
Ready, set, bake! If you’re looking for a fun project to do with your kids for the holidays, THIS IS IT. The process is super easy – just mix up three ingredients, bake, and decorate.
After all the fun is over you have a sweet keepsake for your tree . . . and possibly a thoughtful homemade gift for the grandparents, too.
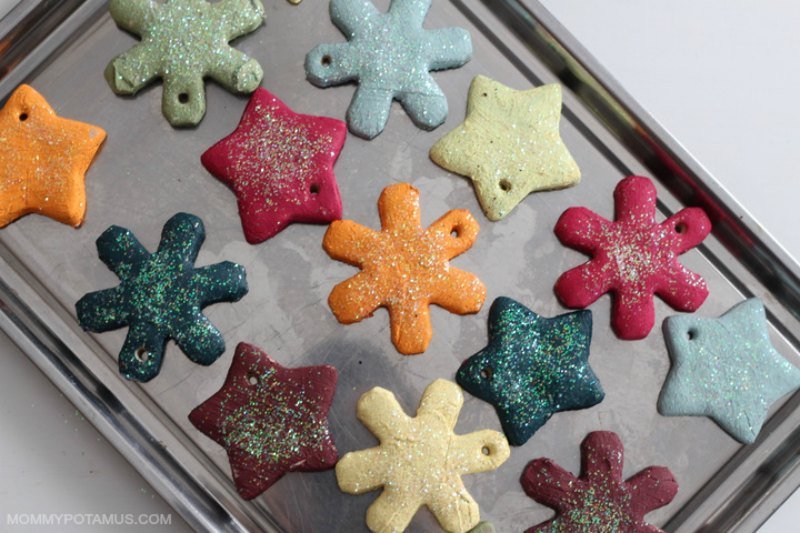
Now, if you’ve seen pictures of my home on Instagram you may have noticed I like bright colors. My Christmas tree is no exception, but these would be beautiful with more traditional colors, too.
Below you’ll find:
- A video my daughter and I filmed last year while making our ornaments
- Written step-by-step instructions and photos from a previous year
- Answers to the most common questions I’ve received since first posting this tutorial years ago
Oh, and this is important: I highly recommend whipping up a batch of homemade egg nog or hot chocolate while you work – it makes the the whole experience even more fun.
How To Make Salt Dough Ornaments (VIDEO)
Although my family is gluten-free, we are able to touch wheat without problems. For that reason I often use this recipe instead of my gluten-free salt dough ornaments.
Although still super simple, the gluten-free version requires heating twice – once on the stovetop to thicken the dough and once in the oven to bake the ornaments. With the recipe in this article, you can skip thickening the dough and just bake the ornaments. Here’s an overview of the process.
Oh, and if you need more ideas for under the tree, I’ve put together 100+ gift ideas for everyone on your list.
How To Make Salt Dough Ornaments (Step-By-Step Photo Instructions)
When the photos below were taken, my then six year-old was able to do everything on her own except the baking, and my four year-old only needed help a few times. When they were smaller I gave them a little more guidance but mostly let them figure things out on their own.
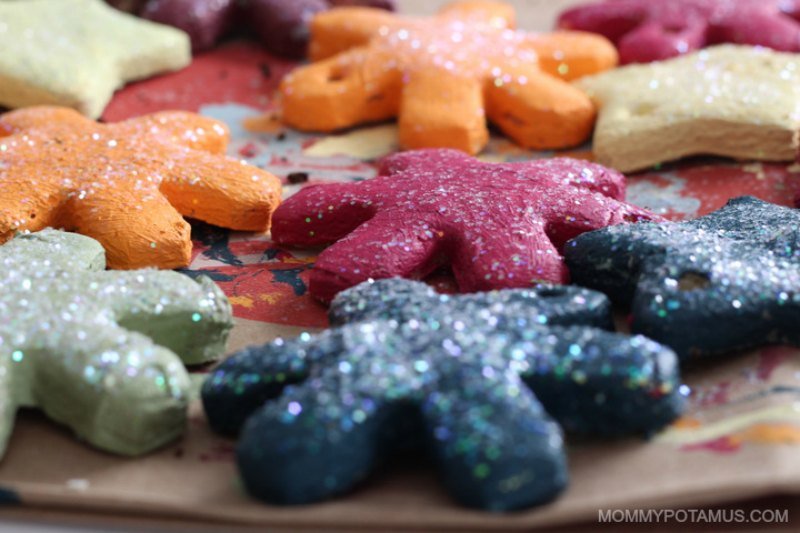
When a particular ornament didn’t turn out like they wanted – they didn’t love the color after all or the brush strokes look messy – I found that handing them the glitter usually resolved the issue. With that in mind, here’s the step-by-step process:

Step 1: Preheat oven to 225F. Measure flour and salt, then add them to a medium mixing bowl and stir.
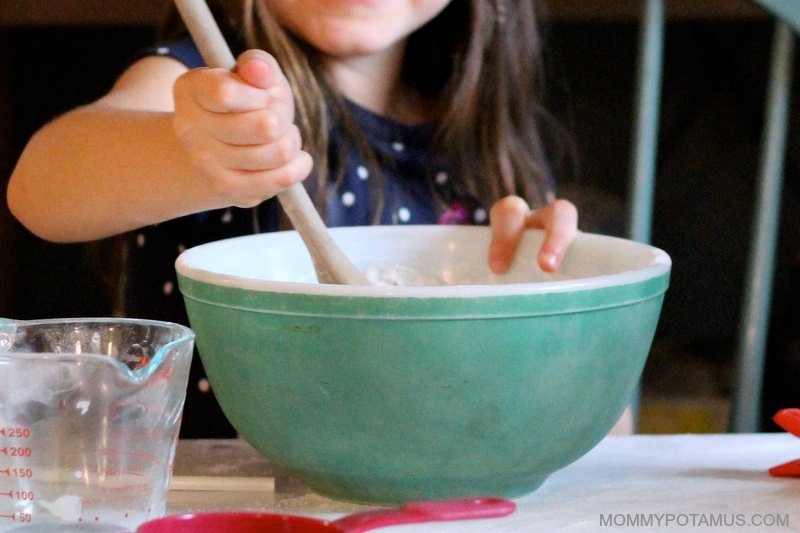
Step 2: Add water and knead the dough.
Measure out your water and add it to the bowl, then mix until everything is well combined.
Place parchment paper on your work surface and sprinkle it with flour. Set the dough on the parchment paper and knead it until it’s soft and pliable. (Tip: If your dough is super sticky, add more flour.)
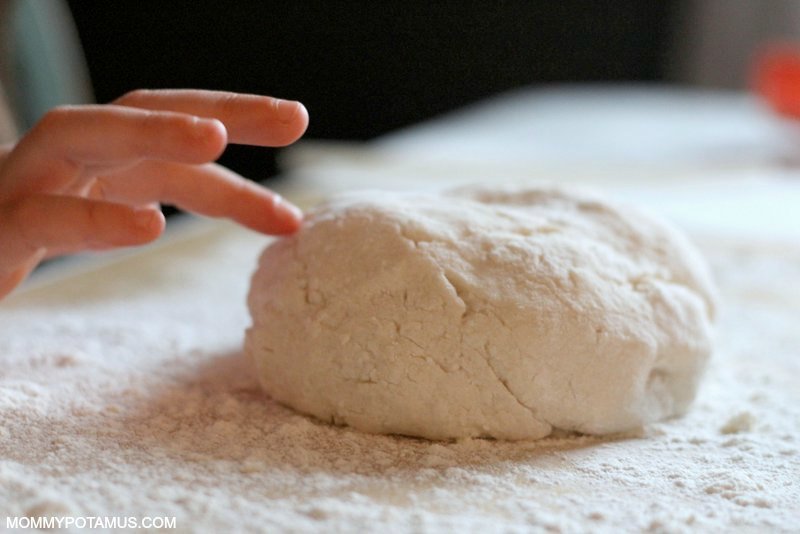
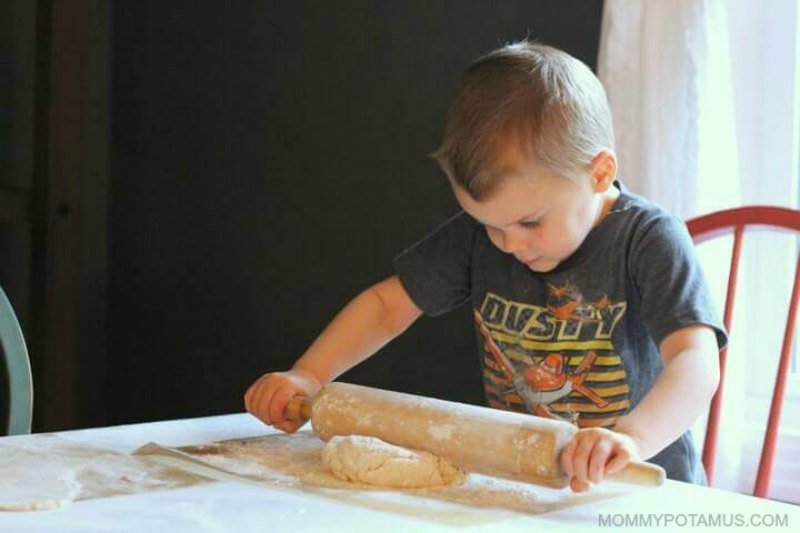
Step 3: Using a lightly floured rolling pin, roll out the dough to 1/4 inch thickness.
Tip: Only roll the dough in one direction. Rolling back and forth can create air pockets that cause the ornaments to puff up while baking.
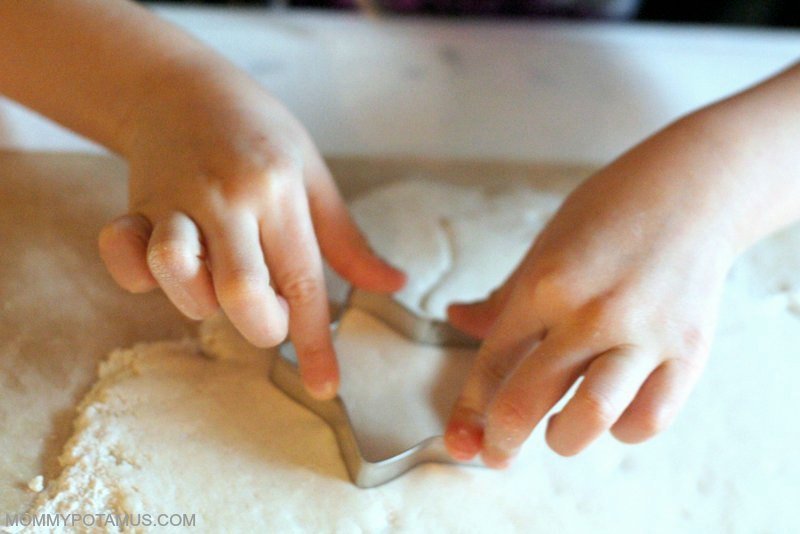
Step 4: Cut out ornaments using cookie cutters.
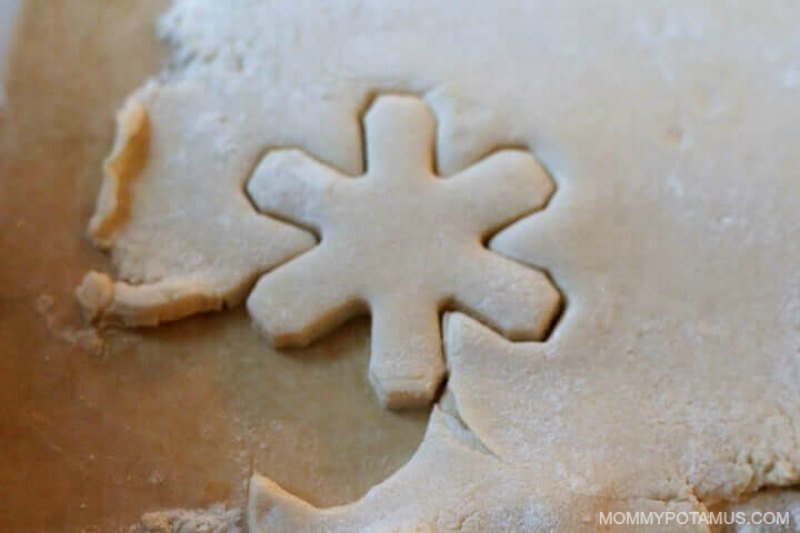
Step 5: Peel away the dough and lift the cutout.
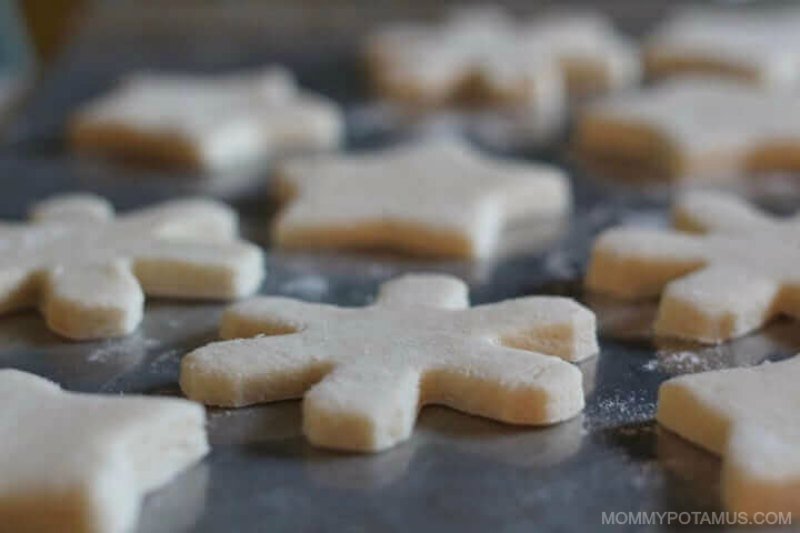
Step 6: Place the cutout on a cookie sheet lined with parchment paper.
As you can see in the photo, I didn’t do that. However, some readers have reported their ornaments stuck to the cookie sheet, so now I recommend lining with parchment paper just in case.
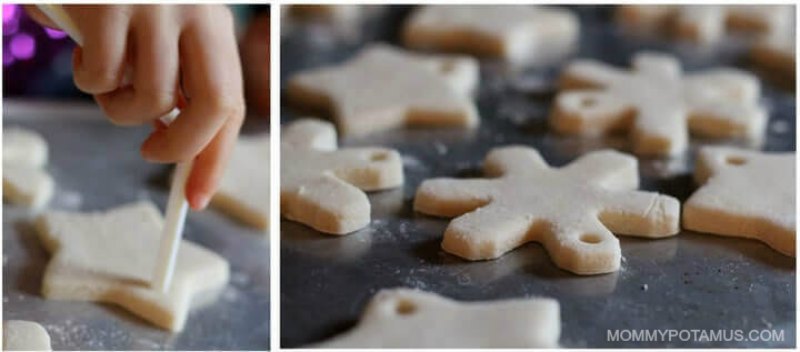
Step 7: Create a hole for the twine that will hang the ornament.
Using a straw, create a hole for the twine that will hang the ornament. Place the ornaments in the oven and bake for two to three hours, or until completely dry. Flip once while baking, then remove the ornaments from the oven and allow to cool completely.
Step 9: Bake
Place the ornaments in the oven and bake for two to three hours, or until completely dry. Flip once while baking, then remove the ornaments from the oven and allow to cool completely.
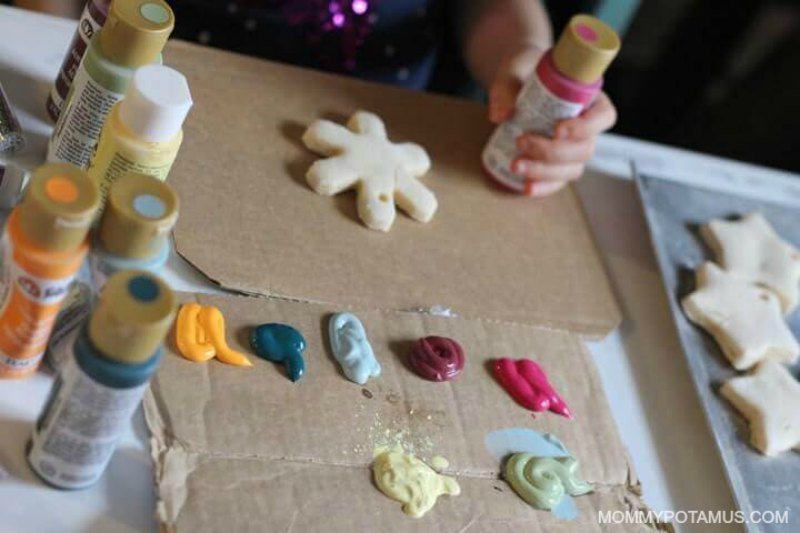
Step 8: When the ornaments have cooled, decorate them with paints and/or glitter if desired.
Optional step: Seal ornaments with three to four thin coats of non-toxic acrylic varnish after the decorative paint has fully dried.
If you want your ornaments to last for years and years, make sure to coat the entire surface with acrylic varnish to prevent moisture from getting in.
Step 9; Snap a selfie, because while you **may** have managed to prevent your preschooler from painting the kitchen table, you did not prevent him from painting you.


Frequently Asked Questions
It depends on the size of the cookie cutters. Personally, I’ve found that one batch makes enough for all three of my kids to decorate to their hearts content.
I’ve never experienced this issue but a few of you have mentioned it over the years. Fortunately, thanks to a comment from Carrie, I think we’ve solved the issue. According to her experience rolling dough for gingerbread houses, it’s important to only roll the dough in one direction because rolling back and forth can create large, flat air pockets that cause the dough to puff up.
I used it to make a handprint with my littlest was a baby and it worked beautifully, but some people have reported that their handprints lost some of their shape while baking. This may be because handprints are thicker and potentially more prone to air pockets. My suggestion would be to bake at a lower temperature (170F – 190F) for a longer period of time to help them cure more slowly and hopefully keep their shape.
Salt Dough Ornament Recipe
Equipment
- Cookie sheet (This stainless steel one is an investment but is my go-to for all baking. Unlike other ones I've had that have become warped or corroded, it's still like new years after I bought it)
- Drinking straw
- Holiday shaped cookie cutters
- Paintbrush
Ingredients
- 1 cup all-purpose flour (self-rising flour should not be used as it will cause the ornaments to bubble up while baking)
- ½ cup salt
- ½ cup water (or more as needed)
- acrylic paints
- glitter (optional)
- twine (for hanging the ornaments)
- non-toxic acrylic varnish for sealing the ornaments (optional)
Instructions
- Preheat your oven to 225F. Add the flour and salt to a medium mixing bowl and stir.
- Add the water to the mixing bowl and stir until everything is well-combined.
- Place a sheet of parchment paper on your work surface and sprinkle it with flour. Knead the dough until it’s soft and pliable. If your dough is super sticky, add more flour.
- Using a lightly floured rolling pin, roll out the dough to 1/4 inch thickness. Only roll the dough in one direction, because rolling back and forth can create air pockets that cause the ornaments to puff up while baking.
- Cut out ornaments using cookie cutters. Peel away the dough and lift the cutout. Place it on a cookie sheet lined with parchment paper.
- Using a straw, create a hole for the twine that will hang the ornament. Place the ornaments in the oven and bake for two to three hours, or until completely dry. Flip once while baking, then remove the ornaments from the oven and allow to cool completely.
- When the ornaments have cooled, decorate them with paints and/or glitter if desired. If you want your ornaments to last for years and years, seal them with three to four thin coats of non-toxic acrylic varnish after the decorative paint has fully dried. Make sure to coat the entire surface to prevent moisture from getting in.
Video
Looking for more fun projects?

We made these yarn ball ornaments a few years ago. They’re one of our favorites to hang on the tree!
This fun, easy play dough recipe uses stuff you probably already have in your fridge/pantry, and there’s a gluten-free option at the bottom for those who need it.
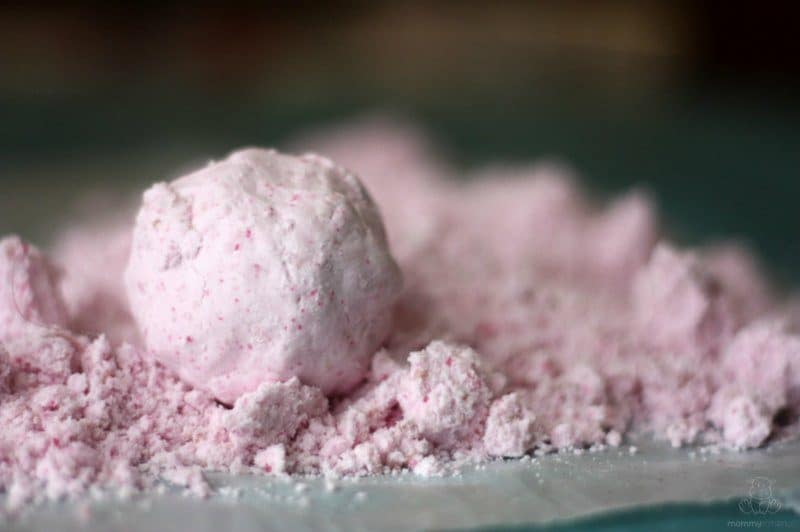
It’s squishy yet crumbly. You can mold with it or smash it to smithereens. What is it? MOON SAND! If you haven’t heard of it, here’s what you need to know: Kids love it, and you can make it in under 10 minutes from stuff you already have in your pantry. Here’s how.


I wish I lived in a less humid place!
I was looking for something on my tree! This is it! Thank you!
I love this! I have been saying I want to do this project with the kids this winter but just haven’t gotten around to it. I think we will do them tomorrow during the snow storm coming our way.
Oh my gosh we had a major disaster when we did this
Does anyone know a grain free dough recipe like this?? My kids are allergic to grains (including rice) so they can’t even touch it to make dough 🙁
I have a gluten-free salt dough recipe here.
You could buy real clay from the craft store. You won’t get to make te dough but kids seem to enjoy the rolling, cutting, baking and decorating parts anyways. I think Sculpty is a completely synthetic baking clay for kids crafts.
How many ornaments can I get from one batch?
It will depend on the size of the cookie cutters.
The cinnamon dough recipe here http://www.mccormick.com/Recipes/Other/Cinnamon-Ornaments
you can actually buy powdered clay that you have to mix yourself from the craft store. then they would get to make the *dough* and everything 🙂
https://www.yummly.com/recipe/Scented-Applesauce_cinnamon-Ornaments-Allrecipes?prm-v1
This works pretty well and smells good too
How many ornaments does one recipe make
It depends on the size of the ornaments 🙂
My kiddos and I just finished ours up this morning! They came out beautiful!
Mine came out darker on one side and they are pretty rough looking.
What am I doing wrong?
I’m wondering if this is waterproof.
I’d like to create outdoor ornaments & would love tips for this.
Thank you for your help in advance.
This is super wonderful!!
WE LOVE YOUR SITE!.
I’m going to make one of these and put my daughters hand print in it for a ‘babies first Christmas’ ornament!
It will be very cute. The hand print will shrink and distort a little in the oven. It may or may not be enough to notice. My friend warned me, so I purchased a special no distort medium from pottery barn kids. I am sure they sell something like that at craft stores. It will be a cute ornament, but it will not stay the exact size of her hand.
I like your idea with your daughter’s hand print. My kids are all adults now, but we have a 4 month old puppy and I am going to use her paw print and make an ornament for her “daddy” to maybe hang in the truck.
Does this have to be wheat flour? I don’t have any in the house anymore but I have plenty of others. Though, it’s cheap enough that I can probably pick up a small sack.
I can be done with cornstarch and salt – I posted a recipe here https://mommypotamus.com/salt-dough-ornaments/
Jillian Bourke – Ohhh, I we did that but I forgot to include it in the post! I need to take a pic and update – thanks for the reminder!
Could this be done gluten free? I know we aren’t going to eat them, but I can’t be anywhere near gluten without getting very sick. Thanks!
Yes, it can! I posted a gluten-free salt dough tutorial here.
Kelly Marlene Geiser – What was the disaster?
Awesome! Good to know they worked out for you. I can’t find a babies first Christmas ornament ANYWHERE! At any stores 🙁
Does the handprint bake up well? We just had our 3rd two days ago, and I would love to do handprints of all 3 kids. 🙂
We may make these today.
Kristin Fisher Lawler – Yes! I will try to post a pic soon, but I used a large coffee mug to create a circle and it turned out pretty good I think.
I don’t have any paints on hand, could I put food coloring in the dough?
I haven’t tried it but I would think so.
I followed a “new&easy” recipe and they burnt up and the house was full of smoke for hours and we need a new oven the stench will not go away my mom told me just use the directions you have don’t try those that won’t work and she was right always listen to your mother…
Can you please add a “pin it” button to your posts? I love to pin your stuff, but it’s so inconvenient to have to copy the link, open pinterest to pin it. Thanks for the great posts, though 🙂
Jenn LoVasco
Thanks Heather! I see a fun craft in our near future. 🙂
Amy Hedderly – If you hover your cursor over a photo it will give you a “Pin it” option 🙂
Jillian Bourke- have you tried a Hallmark store?? They specialize in the sort of thing. Try Hallmark online?
Did that this year, use half as much salt sub for cinnamon and they’re wonderfully scented.
Melanie Nemeth we should do this when we come!
Can the dough be made ahead of time??
Any suggestions if they’re not hardening up well?
See Adna Miranda Mezzaroba!
Yes! Mary Riddell Petersen!
Okay, i’ll try that. Thanks 🙂
Good idea
Courtney O’Connor Morse – I would just bake them a bit longer.
Fun. Easy
These keep for years if you wrap them in waxed paper and store them in a zipper bag. 🙂
These do not work in New Zealand 😉
You are so pretty mommy pot !
Thanks for the idea! I may have to do this with my niece. 🙂 And also, your kids are ridiculously gorgeous!
Does anyone know if GF flour will work well?
Dawn Mary Jean – I posted a gluten-free recipe here: https://mommypotamus.com/salt-dough-ornaments/
Aww, thank you Pam!
Thank you!
We’ve done this twice already this season. Kids love it and makes a great cheap gift for grandparents!
Sorry it’s sideways but here are the ones we made today. We used stamps and stamp ink to color them. Except the 2 solid colored we used water colors
Is that vintage pyrex i spy????
When I was a child my dad used a recipe very similar, we did not add any food coloring and instead of individually creating hanging ornaments individually we created a ornament wreath layering each of the cutouts. The entire reath was done in white I believe he is still at and very high gloss . To top it off we used a red bow at the top . It was so simple clean and so very beautiful . I think it is a great option for older children and families to do together, and a great great option.
Melissa Yancer – YES! It was my grandmother’s. One of my favorite pieces ever.
Sasha Smith Fernandez – So cute!
Just came home from my last day at work and made these with my son to start the holidays – thank you!
Jeff Lynn
Back in 1985 I made dozens of salt dough ornaments to give as gifts as we were broke.
We use to make these a lot when I was a kid…I think u can still find a few of these ornaments lying around my parents house somewhere
We didn’t use food clotting either but can paint and clear coat after
I pinned DIY unpaper towels. Now that my kids are getting older my husband and I are talking about doing this!
Making these!!!
Bake for 2 hours? I’ve been reading a few other salt dough recipes and they have the same ingredients but 20 minute bake time? Big difference:)
Yep, mine needed 2 hours. Maybe they are rolling their dough out thinner or baking at a higher temp?
Ashley Elizabeth Genn Jackelyn Amber DeVeny
Cassandra Seebaum, well timed! Ha
I can’t get this to pin 🙁 can u please email it to me? Thank u!
Brings back memories…used to do this as a kid.
Is there a gluten free version?
Yep, I have a gluten-free version here.
Thank you! I made these with my kiddos today, when we needed something to create together and connect.
Monique Mitchell – I’ve posted a gluten-free version here: https://mommypotamus.com/salt-dough-ornaments/
Awesome! Thank you!
It is SOOOO funny you posted this! I was plaaning on looking into this for my kiddos tomorrow! Perfect timing I would say!!
Just wondering where you got your acrylic paints from in the picture?
Brooke Holland
Me too Tiffany, for the same reason as Anna. Thank you!
Do these last long?? Thinking of handprint or footprints…?
You ave too much time.
Thank you for posting this. I made them this evening and I am looking forward to putting the finishing touches on them with my 7yr old and her friends..
thanks. Happy holidays
Melissa Yancer – If you coat them with a clear varnish (from the hardware store) to prevent moisture from affecting them they will last for years and years. More details in the post.
Crissa
I’ve done these several times and I usually heat the oven to 200° and I bake them for 3 hrs. I use food coloring as paint and old shimmer powder from an old make up kit and I put it on before baking.
Oops missed that part. Thanks!
Will print & file away!! Thx
Its better to make time to do this than to make time on the computer 🙂
Thanks for the idea for a morning activity – here are ours 🙂
love these!! we do them every year with slight variations 🙂
Could you make these smaller and use them as essential oils pendants? Or would the oil dissolve them?
Love them, Caitlin Gibson! So cute!
Christine Peterson Storer – I don’t think the eo would dissolve them but I don’t know for sure.
ok, guess it’s time to start experimenting…I’ll keep you posted! 🙂
Love this, it will be a great project for school break the couple days before Christmas!
we havent painted our yet, but plan on doing that this week. Another activity…2 for 1
This is such a great idea for the Holiday season. If you use a stand mixer to mix the dough, the time spend making the dough will be cut down so you can spend more time decorating and end up making more ornaments. I will definitely have to try doing this with my niece and nephew before Christmas! Thanks for the recipe.
Do you polyurethane before or after painting?
After! Thanks for asking, I didn’t realize the instructions were unclear. Updating now.
Can you use self rising flour or does it need to be a different kind?
Self-rising flour will cause them to bubble so it’s not a good choice. Just plain ole flour works best.
Okay thank you…:-) gonna try this later! Will let you know how it turns out…:-)
We have handprints in the oven right now! Did you flip the handprint ones that you did as well? Wasn’t sure if they’d lose their impression?
I flipped when the top half was dry enough to hold the impression 🙂
I am trying these for the first time to do with my 2 1/2 year old. (Fingers crossed!!!) How can you be sure they are completely dry? I used the same snowflake cutter that was shown in the picture and the middles are raised (puffed out) a bit and a slightly different (darker) color than the arms of the snowflake. They have been in the oven for 3 hours. I cant imagine that they aren’t dry but I’m afraid I will ruin them if they aren’t dry and we decorate them.
Hi. I can’t wait to make these with my kids. What kind of paint do you get after they are cooled? Merry Christmas.
Kelli
Worked on these with my 2 1/2 year old daughter the last couple days. She had so much fun. Did you know that dogs love them?! We found out the hard way. 🙁 But still made good memories. I posted about it on my blog here: http://livesimplyloveextravagantly.blogspot.com/2013/12/made-it-monday-with-twist.html
Yikes, I did not know that! Glad you at least got to make some memories 🙂
Pinned =P love this idea =)
I did hand prints in my dough. My dough bubbled in some of the finger prints. Any suggestions? I also did stars and they all puffed up in the center.
Hi Christina, it sounds like maybe your flour was self-rising. If that’s the case, try making them with plain flour.
Self rising flour doesn’t contain yeast it has either baking powder or baking soda in it (I forget which)
Mine puffed up too in spots and I used regular flour….
My boys had a great time making these and it was so easy. I’m only having one little problem, they’re not drying out very well. I have my oven set to 200 and they’ve been baking for 3 hours. I flipped them after an hour because the top seemed done, but since then the back hasn’t changed much. The dough still has a slight give to it after another 2 hours. Almost a rubbery feeling. The only thing I can think of was that I ran out of regular salt so I mixed in kosher salt to make up the difference. Any thoughts?
Hmmm, I honestly have no idea. So sorry I can’t be more helpful, Erica.
How much dough does this recipe yeild? Need to make a bunch for our large family!! Thanks for posting!!
Hi Sheryl, I didn’t measure it unfortunately. It was more than enough for my two kiddos, though 🙂
Hi,
How would I store the dough if I pre-made it?
Thanks,
Raquel
I’m not sure how well it would do pre-made. If only made a day in advance it might be fine stored in an airtight container.
I made mine and put it in the fridge for when the kids woke up (maybe 2-3 hours) and it bubbled when i baked them. not sure what else to do
How does one get the dough out with the smooth edges? mine seem to still to the cutter and take on a shape of their own? Any suggestions would be greatly appreciated
Trying these right now for my children to decorate as the oldest wants all decorations to be hand made this year. I rolled them thin and it was a great dough to work with. Will it be ok to spray with protection after the holidays? Or does it have to be done the same day?
If your environment is dry I would think so 🙂
We are going to make these and string them together like a banner 🙂
Hello! Getting ready to make this with my counseling kids at school- based on the ingredients that you have listed, how many ornaments can you make out this? Thanks!
Hi Kathryn, it depends on the size of your cookie cutters 🙂
My wife and I baked 120 ornaments today for the kids at church to decorate. For those having long bake times, keep in mind if you are baking a lot at once, it’ll greatly increase the time they need to be in the oven.
Thank you!!
Just did this n they didn’t come out as I expected they bubbled up n turned brown n stuck to the pans 🙁 very disappointing was making them for my husband ( used baby’s feet) its our first child together just wanted to create a memory!!
Hi Valerie, I’m so sorry they didn’t turn out as you expected. Is it possible that your flour was self-rising? From what I understand, that’s usually the cause of bubbling ornaments.
Or the we’re too thin that causes the browning effect. Paint them they are still very usable, especially as a memory maker.
Mine stuck to the pans horribly!! Any suggestion on how to fix that for next time?
You can use parchment paper
Parchment paper worked for me 🙂
I put aluminum foil on my pan and sprayed it with pam. Mine just slid right off
Hello,
Thanks for such a great way:)
I have an urgent inquiry pleaseeeee. English is my second language and I didn’t understand what you meant by self rising flour, as it is really bubble up from me every time?? I need to make flat shapes.
Thanks for your prompt reply
have a nice day
Just use regular white flour the cheapest you can find. That will solve your problem.
Just put ours in the oven and it seems like they may be starting to crack. Is this because I didn’t knead the dough long enough? I also used fine sea salt, so maybe that’s the issue.
Oven temps vary so set it lower next time. That might help. I usually have it set at around 50 and leave for as long as it takes.I’ve made a few ornaments including a Santa and a sheep. A garlic crusher is a great tool for beards, hair, fleece etc.
Made these with my 5 year old. I like how nice and pliable the dough was. I baked them at 200 degrees for about 2 hours (250 was too hot–they started to get too brown). I had two problems with these: One, they stuck to my cookie sheet, and two, some of them got big air pockets underneath, and their undersides are rough and raised. Any suggestions? I would like to try this again with better results. Thanks!
Hmmm, maybe try baking them on parchment paper? I’m not sure about the air pockets, though. So sorry!
Can you use a cookie press instead of cookie cutters?
We used to do these over 40 years ago……if u would rather just put on cookie sheet or cooling rack on waxed paper and wait a week for them to dry on their own. my oven has warm feature I use and keep checking for dryness…..usually a couple hours
i made a handprint had it in for 3 hours took it out let it cool off then i painted it, after painting it the thing seems not hard now will it be ok to bake it again with the paint on it to see if it hardens up
They have to be completly dry before painting or sealing. Any moisture still indide will be trapped, and will have no way to escape.
I have tried to do foot prints and every time input them in the oven they rise so I can’t see the footprint I use plain flour as well please could u help me fix this thank you
Make sure your oven is not too hot. Over 200 and they can bubble. Also, if they do start to bubble, a prick with a pin will release the trapped air inside. Justvprick and gently press it back down. Start the baking with your good side down. The salt rises to the top, so it looks whiter. Flip half way thru. Hope this helps, good luck!
I tried this project and my ornaments look very white in one side and then the other side looks brown. They came out soft in the middle after 3 hours at 200F. I don’t know what to do. Any suggestions?
It is rainy and the temperature is low here. I noticed yesterday that my finished salt dough crafts have become moist and soft so I baked them again and it worked, they hardened again. But when I wake up this morning, and it’s still cold, my crafts become moist and very soft (again)! 🙁 Is it because I didn’t put any finishing paints? Please check out my instagram to see the photos of my work, ”mom.preloved”. Please help me. Thank you!
Just made a bunch for the kids to decorate. Came out of the oven in perfect condition! Thank you 🙂
I made this dough using 2 cups flour 1 cup salt then I added water….that’s where I goof up. I added to much water. How can I fix this without messing up more. Can I add flour to it? Or salt? Will it still bake right?
Hi Heather,
I just found your salt dough ornament recipe on Pinterest and have to tell you your blog with your kiddos included is so cute! I am going to use your recipe to make Michigan shaped ornaments to decorate a tree my work is sponsoring at an event called Circle of Trees. I can’t wait to start making and decorating the ornaments!
Thanks for sharing your recipe.
Karlee Miller
Creative Administrator
Michigan Insurance Group
How many ornaments does your recipe make?
It depends on the size of the ornaments. 🙂
A friend of mine have me this recipe last year and had a blast with both my grandsons. This is a great ideal. But what do I seal it with to put outside in my flour garden ?
Hi Heather, I’m interested in the sealer (clear finish) you linked to for sealing the ornaments, but I see that some reviewers mention a strong odor. Can you tell me if you found the product to have a noticeable odor?
I live in high altitude, would I need to change the temperature for baking?
Ours turned out amazing the year before last and they are still together and awesome
I used wheat flour and it worked perfectly!
trying ours now with wheat fingers crossed
I make gingerbread houses and believe I have a few tips for your readers.
Use plain flour only. Read the label, it should not read self-rising or contain baking powder or soda in the ingredients.
Roll dough out on a piece of parchment that will fit on your cookie sheet. Use pencils or wooden dowels on each side as you roll so that dough is uniform thickness. Only roll the dough in ONE direction. Rolling back and forth can create the large flat air pockets.
Press cookie cutters into the dough. Dip them into salt or flour if dough comes back up with cutter. Don’t move the cookie shapes. Instead, lift away the excess dough.
Slide the parchment paper onto cookie sheet and place in oven.
Hope you don’t mind me sharing.
Merry Christmas!
That’s an amazing tip. Thank you, Carrie!
I made these with my children last night. I followed the directions exactly and they came out perfectly after two hours.
we made these over 40 yrs ago. They are now cracking, crumbling, and flaking. i have glued them together several times. Is there something i can do to preserve them ? what is the best adhesive to bond the broken pieces ?
Loved the selfies at the end.. you are gorgeous..
Hi there, Heather!! The varnish you recommend in this recipe is out of stock…is there another one that you recommend that’s available on Prime?! 🙂
What brand or kind of paint did you use? I love the shades of color and the vibrance.
We made your recipe for salt dough ornaments this morning – thanks!! Unfortunately I totally forgot the ribbon holes, so we’ll have to just tie ribbon around them. But they look like they’re going to come out well anyway! Thanks for posting!
bake at what temperature
I made these last night with my puppy and had her paw print pushed into the salt dough and it turned out soooo dang adorable. I even zapped it in the microwave at the end to make the drying time quicker!
Thanks for this simple recipe! We referenced your blog on ours! Feel free to stop in and check out how ours turned out :). Happy Holidays!
The last week of April I made handprint ornaments with my daycare kids using this recipe for Mother’s Day gifts. Today I attempted to apply the varnish and the varnish itself immediately separated, clumped and became crumbly. So After I brushed all that off the handprint ornament I attempted to apply spray varnish. I thought this was going to work until the varnish began to peel, like glue, over the whole piece. The only thing different that I did was I applied the acrylic paint in the dough instead of painting the item later. Do you have any suggestions or tips I can try to remedy my disaster?
These puffed up insanely, even using ap flour. Now I have disappointed kids and I need to find another recipe to make gifts.
They shouldn’t puff – did you happen to use self-rising flour?
Mine puffed a little as well. I definitely used all purpose flower. Do you have any suggestions? More or less salt? Cook longer at a cooler temp? Thank you in advance!
What kind of salr do you use? Thank you very much – I can’t wait to try these!
We need to make 150. How many does this recipe yield? Thank you!
It depends on the size of the cookie cutters you’re using. I recommend making a test batch with them and seeing how far one batch goes.
This brings back some wonderful memories of my son & I making these for our tree and for Christmas gifts – about FORTY years ago (he’s 49 now). I still have one set and hang them on my tree every year.
I’ve been looking for a good salt dough ornament recipe! Can’t wait to try this out!
I realize the article is a few years old, and it’s wonderful that you’re teaching your children, however, you’re teaching them incorrect measuring techniques. The glass measuring cup is for liquid volume, the metal/plastic measuring cups are for dry ingredients.
Great recipe! Can we save any leftover dough in a container to use in a few days?
It is very good recipe, you can also try for different types and colors of the salt
Awesome! Thanks for the recipe. I will give it a try.
You can paint a coat of glossy decoupage glue over the entire ornament to seal and protect it, and to give it a shiny finish. Thanks for sharing an amazing healthy stuff with us.
Thanks for sharing an amazing healthy stuff will definitely try.
Do you have the link for the acrylic paint you used?
I just bought some gel food coloring, do you think it would work to add to the dough before baking?
Thanks for the great recipe. Years ago, I made some gingerbread s cookies that I used angel shaped cookie cutters on, decorated them and used them for tree ornaments for years.
Hi, what is the app called to make your photos into watercolor works of art?
Waterlogue. You can find my full article here: https://mommypotamus.com/photo-to-watercolor-canvas/