
Things I just pulled out of my purse: One toddler shoe, vanilla beans, Dermabond (because, boys!), and foundation powder that doubles as dry shampoo for days when grabbing a shower just doesn’t happen. And of course, essential oils, because they’re the Swiss army knife of my portable mama-survival-kit.
Take lavender, for example. It’s perfect for an itchy playground bug bite, the occasional crankypants attitude, and helping tired kids drift off to sleep on long car rides. Unfortunately, I often find myself away from home wishing I’d brought xzy oil with me, until recently when I learned to use aromatherapy inhalers.
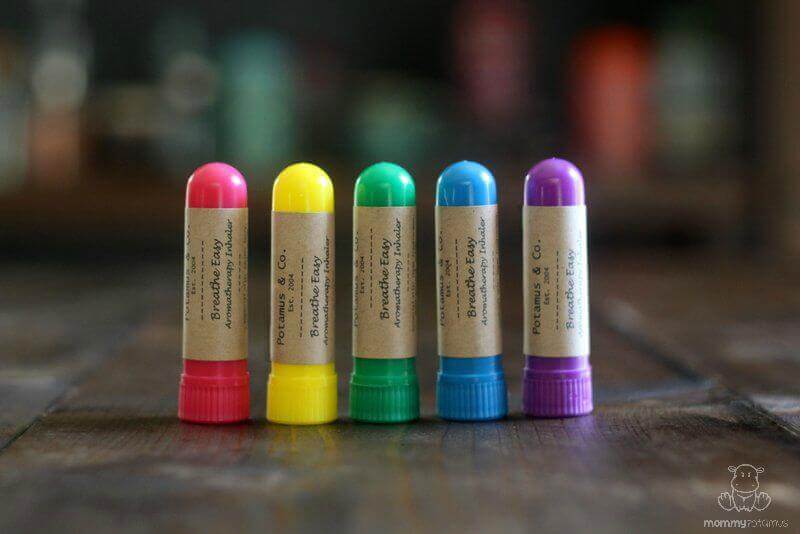
No bigger than a chapstick tube, aromatherapy inhalers allow me to keep a variety of blends on hand without worrying about bottles spilling in my purse. They’re more than just mood-boosting scents, too. According to Robert Tisserand, inhaling essential oils is a very efficient way to absorb them into our bloodstream.
Inhaled substances pass down the trachea into the bronchi, and from there into finer and finer bronchioles, ending at the microscopic sac-like alveoli of the lungs, where gaseous exchange with the lungs mainly takes place.
The alveoli are extremely efficient at transporting small molecules, such as essential oil constituents, into the blood.” (Essential Oil Safety, p. 49)
In this post I’m going to show you how to make an inhaler that supports healthy respiratory function, but you can use the method demonstrated in the video to make inhalers that have other benefits as well. For example, research suggests that rosemary essential oil helps stimulate alertness and long-term memory, so that’s a great one to keep around.
Due to it’s 1,8 cineole content, rosemary is not recommended for small children, which is one more reason to love personal inhalers. Whether you’re in an office, waiting room, car or airplane, you can enjoy the benefits of essential oils without “blasting” anyone around you.
How To Make An Aromatherapy Inhaler (Video Tutorial)
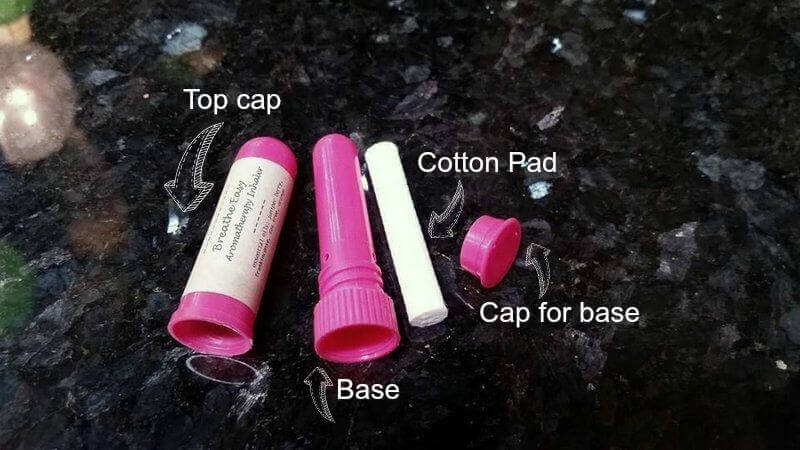
NOTE: The pad used in the video is 100% cotton. Some come wrapped in paper with only the cotton on the ends exposed. If yours is wrapped in paper, add your essential oils to the end where the cotton is visible.
Or if you prefer written instructions:
Add essential oils to the cotton pad that comes with your inhaler or a cotton pad you purchase (organic if possible) that has been trimmed to fit inside the inhaler. Place cotton inside the base and place the bottom cap on, then put the top cap on.
For adults, use about 15 drops of essential oil. For children under six, use 6-10 drops of a child-friendly oil. I’ve listed some suggestions below.

Where To Buy Aromatherapy Inhalers
You can find the ones I used here, and you can find extra wicks here.
These are great, too, because they come with pretty labels that are ready to go!
Essential Oils That Support Healthy Respiratory Function
Kid-Friendly Options
- Thyme ct. linalol (Thymus vulgaris ct linalol)
- Lavender (Lavandula angustifolia)
- Juniper Berry (Juniperus communis)
- Fir Needle (Abies sibirica)
- Frankincense (Boswellia carterii)
- Coriander (Coriandrum sativum)
- Cedarwood (Juniperus virginiana)
- Tea Tree (Melaleuca alternifolia)
- Sweet Marjoram (Origanum marjorana
- Sweet Orange (Citrus sinensis)
- Tangerine (Citrus tangerina)
Additional Options For Adults
- Eucalyptus (Eucalyptus radiata)
- Ravintsara (Cinnamomum camphora)
- Peppermint (Mentha x piperita)
How To Use An Aromatherapy Inhaler
Hold the inhaler just below your nose and inhale slowly for a count of five, then exhale and repeat 2-3 times, or more if needed. This method helps your body absorb the essential oils, and it often helps you relax as well.
Also, if you’re looking for additional ways to support healthy respiratory function, check out this article on the benefits of Himalayan salt inhalers.
Want more research-backed natural remedies?
No problem, I’ve created a free ebook for you –
cary: 25+ Natural Remedies Using Ingredients From Your Pantry – as a gift for signing up for my newsletter. You’ll also get updates when I post about safe essential oils for pregnant/breastfeeding mamas, exclusive gifts and coupons (I was able to give away a jar of free coconut oil to anyone who wanted it recently!), plus other goodies.
Sign up using the form below.


How long do these usually last?
It depends on the particular essential oils and how often the inhaler is used, but I think the general rule is about three months.
Hi! Do you sell these on etsy or something like that?
Where to the essential oils in shop in R.S puram.
I’m interested in finding out more regarding the labels. This would be a great addition to my health boutique and I’m not savvy enough to make the labels.
I have been making EO inhalers for about 10 years. I just use standard mailing labels that come on a sheet that you can put in your home printer. I print the labels from the printer or when I’m in a rush, I just use a pen and write on the label and wrap the label around the inhaler tube. I know there are places to buy fancy labels that are plastic coated but I think you may need a laser printer to print those.
Can you give me the dimensions of the labels you use please!?
Well, if you get a notification and actually read this 2 years later (or for anyone who may read this, it may be helpful). I’m here to say you can absolutely make very professional looking labels with an inkjet printer. Just buy the right size sheet labels for nasal inhalers/lip balms (same size), go online and get a matching template (they’re everywhere for free), and use MS Word, or a free website called PicFont where you can upload any picture or background in the world doing a google image search, and write your text on the the uploaded image in whatever style/design you want. It’s really fun, actually. Once you’ve made a label you really like, save it, and add it to the template. Then put your label sheet in the printer tray just like you would with a regular sheet of paper (usually has 15 labels per sheet, but you can choose how many to print at one time), and that’s it! There’s some beautiful inexpensive label sheets that come in matte or glossy and waterproof, and smear free. And they stick to the inhaler extremely well.
I LOVE these!!! Ordering inhalers today!!! I’ve just sent the link onto 3 friends!!! Thamks for the info!!!
Can u write a small note about each oil like what to use it for? I’m wondering about an inhaler for cough in 6yr old child? Or for stuffiness?
Thanks
This is such a great idea! With winter around the corner a homemade “vick’s” aromatherapy stick would be great for those stuffy noses!
Can inhalers be refilled or do you have to buy a new one after it’s “run out”?
They can be reused. Just replace the cotton inside with a new piece. 🙂
some of the caps are impossible to get off.
I open up a paper clip, and take the end of it through the hole, to pop off the end cap of an inhaler! Sometimes I have to get a big paper clip to do this, if the end cap is on really tight!
Easy peasy!
Love my inhalers. I use a different citrus eo each day of the week for cravings!
Cravings? You hit my weakness on the head. What oils for what cravings? Does it really work? Tell me more. I’m excited.
Where do you find the container?
The inhaler can come in handy. Never know when you need an oil but don’t want to carry all of your oils with you. Love this idea. Thanks for sharing!
Where do you find organic wicks for these? I’ve looked all over and can’t find wicks that are labeled as organic, grown and processed without chemicals.
Heather, I have read that it is advised not to use essential oils in anything plastic (even though my diffuser is plastic). Is this not the case with the inhaler?
Thanks,
Zena Sue (confused in Tennessee)
Thanks for all the natural remedies to help my family
Hi, great tutorial. What dimensions are the labels you need?
Can you reuse the wicks? How do I clean them?
Where do you buy the cotton and the tubes for filing
Hi Debby, you can find them here.
Heather, I have read that it’s not advised to use essential oils in anything plastic… Is this not the case with the inhaler?
Hi Thank you for all the information on making aromatherapy inhalers I’m going to buy the glass ones to make one for my grandkids and my allergies. Would you suggest sterilizing them before hand?
Thank you, Dora